
· Sunday Crochet
In this pattern
01 · A little ghost for your Halloween crochet02 · Yarn & tools03 · Crochet the ghost motif04 · The pattern05 · Add the face and finish06 · Common questionsA little ghost for your Halloween crochet
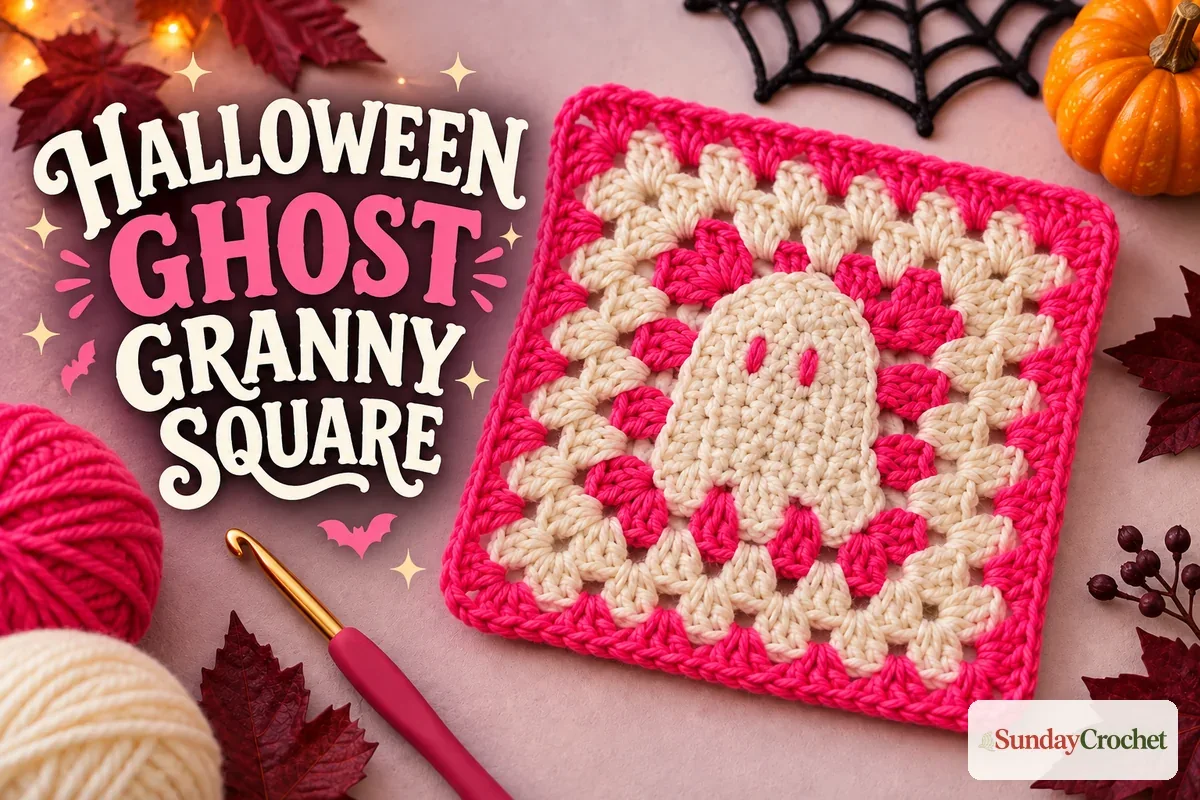
This Halloween ghost granny square brings a simple cream ghost right into the middle of a classic granny motif. Three soft bumps form its lower edge, while the square grows outward in familiar clusters. Use a traditional black-and-cream palette for a spooky look, or choose a bright contrast such as pink to make every stitch easy to see. One square can become part of a blanket, cushion, bag, or another granny-square project.
I’ll show you how I make the ghost first, then build the square around it. The ghost is shaped over a foundation chain, and the surrounding motif is worked in four joined rounds. The sample uses worsted-weight yarn and a 4.5 mm hook. You’ll want to be comfortable with chains, half double crochet, double crochet, slip stitches, and a taller treble crochet for the pointed top corners. If those stitches are new, my beginner crochet guide explains the basic movements before you begin.
Yarn & tools
The sample combines cream and pink. The written steps below use cream for the ghost and inner square, and contrast color for the first square round, the embroidered eyes, and the final border. Change colors at the same points if you prefer black, purple, or another Halloween shade. No yardage is specified, and this is described as a small-yarn project, so gather enough of each color for your chosen number of motifs rather than relying on an exact quantity.
Abbreviations
- ch — chain
- sl st — slip stitch
- sc — single crochet
- hdc — half double crochet
- dc — double crochet
- tr — treble crochet
- st(s) — stitch(es)
- BLO — back loop only
The pattern uses US crochet terms. A chain 1 at the end of the ghost-shaping rows is a turning chain, so work the next row into the first stitch rather than into that chain. In the granny-square rounds, chain 3 counts as the first dc of its cluster. Corner spaces are the chain-2 spaces between the two groups of 3 dc.
Crochet the ghost motif
The ghost begins as a narrow oval worked around both sides of a short chain. Its wider middle makes the rounded head; three groups of four dc along the opposite edge create the little scallops. The counts below follow the stitches that are specified. The curved edges are shaped by working into the center stitch, so place a marker in that middle stitch if it helps you find it again.
Ghost Row 1
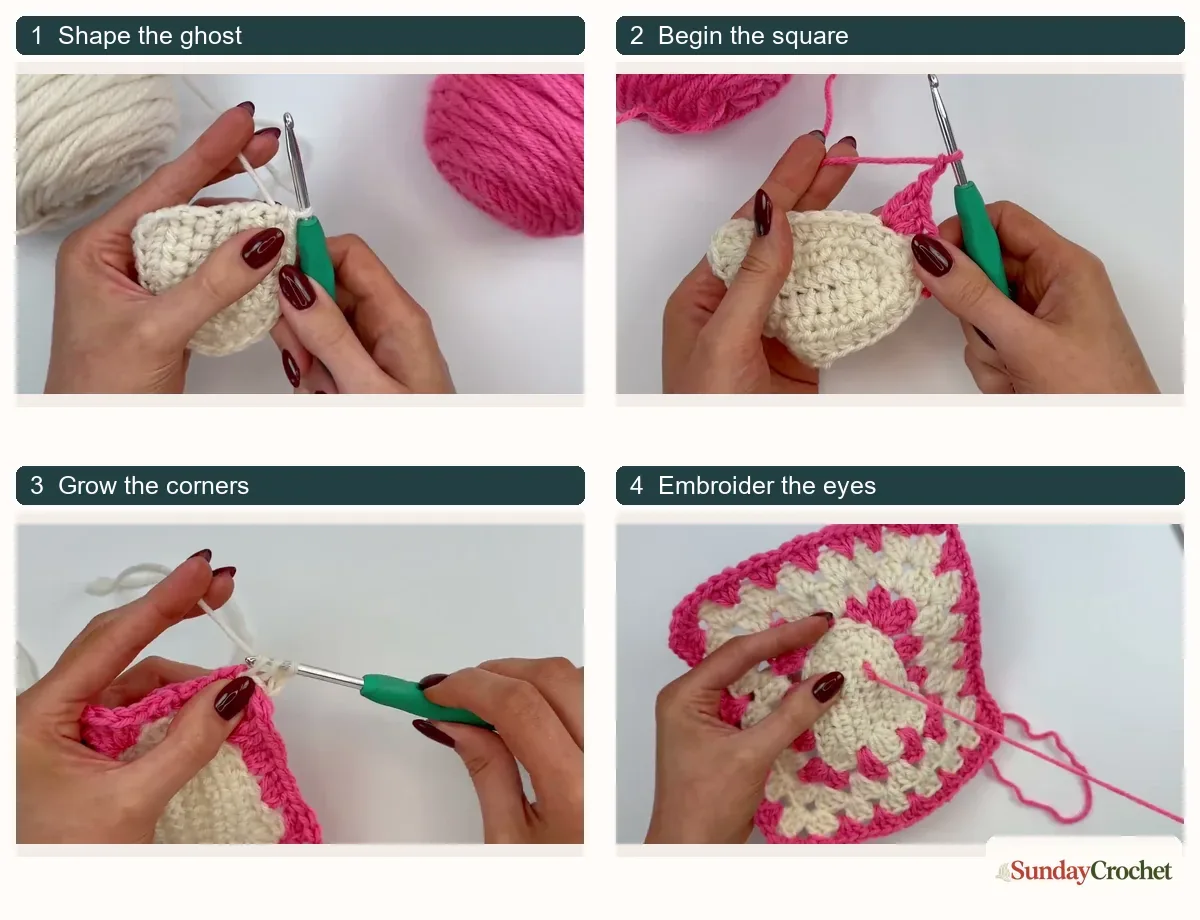
With cream yarn, make a slipknot and ch 8. Starting in the second chain from the hook, work 1 hdc in each chain across. You will have 7 hdc along the first side. At the final chain, add 2 more hdc into the same chain, for 3 hdc there altogether. Turn the work so you can continue along the unused loops on the other side of the foundation chain, and work 1 hdc in each loop back toward the beginning. The piece may curl at first; gently flatten it with your fingers and continue.
Ghost Row 2
Ch 1 and turn. Skip the turning chain, then work 1 hdc into each stitch until you reach the middle stitch at the rounded end. Work 3 hdc into that center stitch to widen the head without pulling it inward. Continue with 1 hdc in each remaining stitch along the other side. Ch 1 and turn again.
Ghost Row 3
Work 1 hdc in each stitch to the center of the rounded end, then place 3 hdc in that center stitch, directly above the increase from the previous row. Continue with 1 hdc in each stitch back down the other side. The top should now look like a small rounded ghost head with a flatter edge waiting for its three bumps.
Turn the work so the flat edge faces you. Along that edge, make three separate groups of 4 dc, placing a sl st between groups. The stitch spaces along this edge are not very distinct, so aim to space the three groups evenly and skip roughly one stitch before beginning the next group. Finish with a sl st at the edge, ch 1, cut the yarn, and pull the tail through to fasten off. The lower edge is intentionally scalloped rather than straight.
The pattern
The first square round outlines the ghost and establishes four corners. The following rounds are standard granny-square construction: work a 3-dc group into every space between clusters and make each corner with two 3-dc groups separated by ch 2. The number of clusters on each side increases by one with each round.
Round 1
With the ghost facing you, attach the contrast color in the back loop of the stitch immediately to the right of the top-center stitch. Ch 1; count this as the first sc, then work 1 more sc into the same back loop. Skip the top-center stitch and work 2 sc into the back loop of the next stitch on the left.
Skip the next stitch. In the following back loop, work 2 dc, 1 tr, ch 2, 1 tr, and 2 dc; this forms the taller corner above the ghost. Skip the next 2 stitches and work 3 dc into the back loop of the third stitch. Skip 2 stitches and work another 3 dc group into the third stitch. At the next corner, work 3 dc, ch 2, 3 dc into the corner stitch.
Along the flatter lower edge, place 3 dc groups into the slip-stitch spaces between the ghost’s scallops; these clusters sit in the small valleys between its three bumps. Continue around the other side, mirroring the spacing and clusters. At the final upper corner, make the matching tall corner: 2 dc, 1 tr, ch 2, 1 tr, 2 dc in the corresponding back loop. Join with a sl st into the first chain you made when attaching the contrast yarn, then ch 1, cut the yarn, and fasten off. The square may look a little uneven at this stage; the next rounds even out its shape.
Round 2
Join cream yarn in any corner ch-2 space. Ch 3; this counts as the first dc. Work 2 more dc into the same corner space, ch 2, then work 3 dc into that same space. You have made one corner.
Along the side, work 3 dc in each space between the previous clusters. On this round, make 3 clusters between each pair of corners. Work each remaining corner as 3 dc, ch 2, 3 dc in its ch-2 space, and keep placing 3 dc in each intervening space along every side. When you reach the beginning, join with a sl st to the top of the starting ch 3. This completes the first full granny-square round around the ghost.
Round 3
Keep the cream yarn. If needed, sl st across to the next corner ch-2 space. Ch 3 (counts as the first dc), work 2 dc into that space, ch 2, and work 3 dc into the same space to make the corner. Work 3 dc into each space between clusters, making 4 clusters along each side between corners. Repeat the same corner sequence in all four ch-2 spaces, then join with a sl st to the top of the beginning ch 3.
Round 4
For the final round, change back to the contrast color. Attach it in a corner space, then ch 3 (counts as the first dc), work 2 dc into that space, ch 2, and work 3 dc into the same space. Work 3 dc into every space between clusters, making 5 clusters along each side between corners. Repeat the 3-dc, ch-2, 3-dc corner in each corner space. Join to the starting ch 3 with a sl st, ch 1, cut the yarn, and pull the tail through to fasten off.
Add the face and finish
Thread the tapestry needle with contrast yarn. On the rounded end of the ghost, embroider one small eye on either side of the original top-center chain, keeping them level with each other. The exact spacing is flexible, so keep the pair balanced rather than measuring a fixed distance. Pass the yarn through from the back, make each eye with a short stitch, and go over each one a second time if you want it more defined. Tie off the eye yarn securely at the back, then weave in the remaining tails with the tapestry needle.
Take a moment to check the corners and the three lower bumps. If the square looks slightly soft or wavy before its surrounding rounds are added, that is expected: each granny round adds structure and brings the shape closer to a square. Keep your stitches relaxed enough for the clusters to sit neatly in their spaces, and use the corner ch-2 spaces—not the tops of the corner stitches—when working the next round.
This cream-and-pink version gives the ghost a playful look, while cream with black or deep purple leans more traditionally spooky. The stitch structure stays the same whichever contrast shade you pick. For another small Halloween make, the mini crochet ghost lollipop cover uses a different, three-dimensional shape; the witch ghost amigurumi pattern is a separate stuffed project. For a second Halloween granny square, the bubbling cauldron granny square puts a purple pot on an orange block — a natural partner for this ghost.
Common questions
Is this Halloween ghost granny square beginner friendly?
It is a good project if you already know the basic crochet motions and are ready to practice hdc, dc, sl st, and tr. The ghost’s curved edge and the first square round need a little attention, so it may feel challenging as a first-ever crochet project. The beginner guide is a useful companion if you want to review chains and stitch placement first.
Can I use black yarn instead of pink?
Yes. Pink is used in the sample to make the stitches easier to see, but black is an easy Halloween color choice. Keep the cream ghost and inner square, and use black anywhere the pattern says “contrast color.” Purple or another dark shade works with the same color-change points.
How large will the finished square be?
A finished measurement and gauge are not specified. The sample uses worsted-weight yarn and a 4.5 mm hook, but your yarn, tension, and hook can change the final size. Keep the same yarn and hook throughout a set of motifs if you want them to be more consistent when used together.
Does the pattern include a whole blanket?
These instructions cover one ghost granny-square motif. The square can be used in a larger granny-square project, but blanket size, joining method, and edging are not specified here, so plan those parts separately for the project you have in mind.


