
· Sunday Crochet
In this pattern
01 · A tiny ghost in a pointed hat02 · Before you begin03 · The pattern04 · Common questionsA tiny ghost in a pointed hat
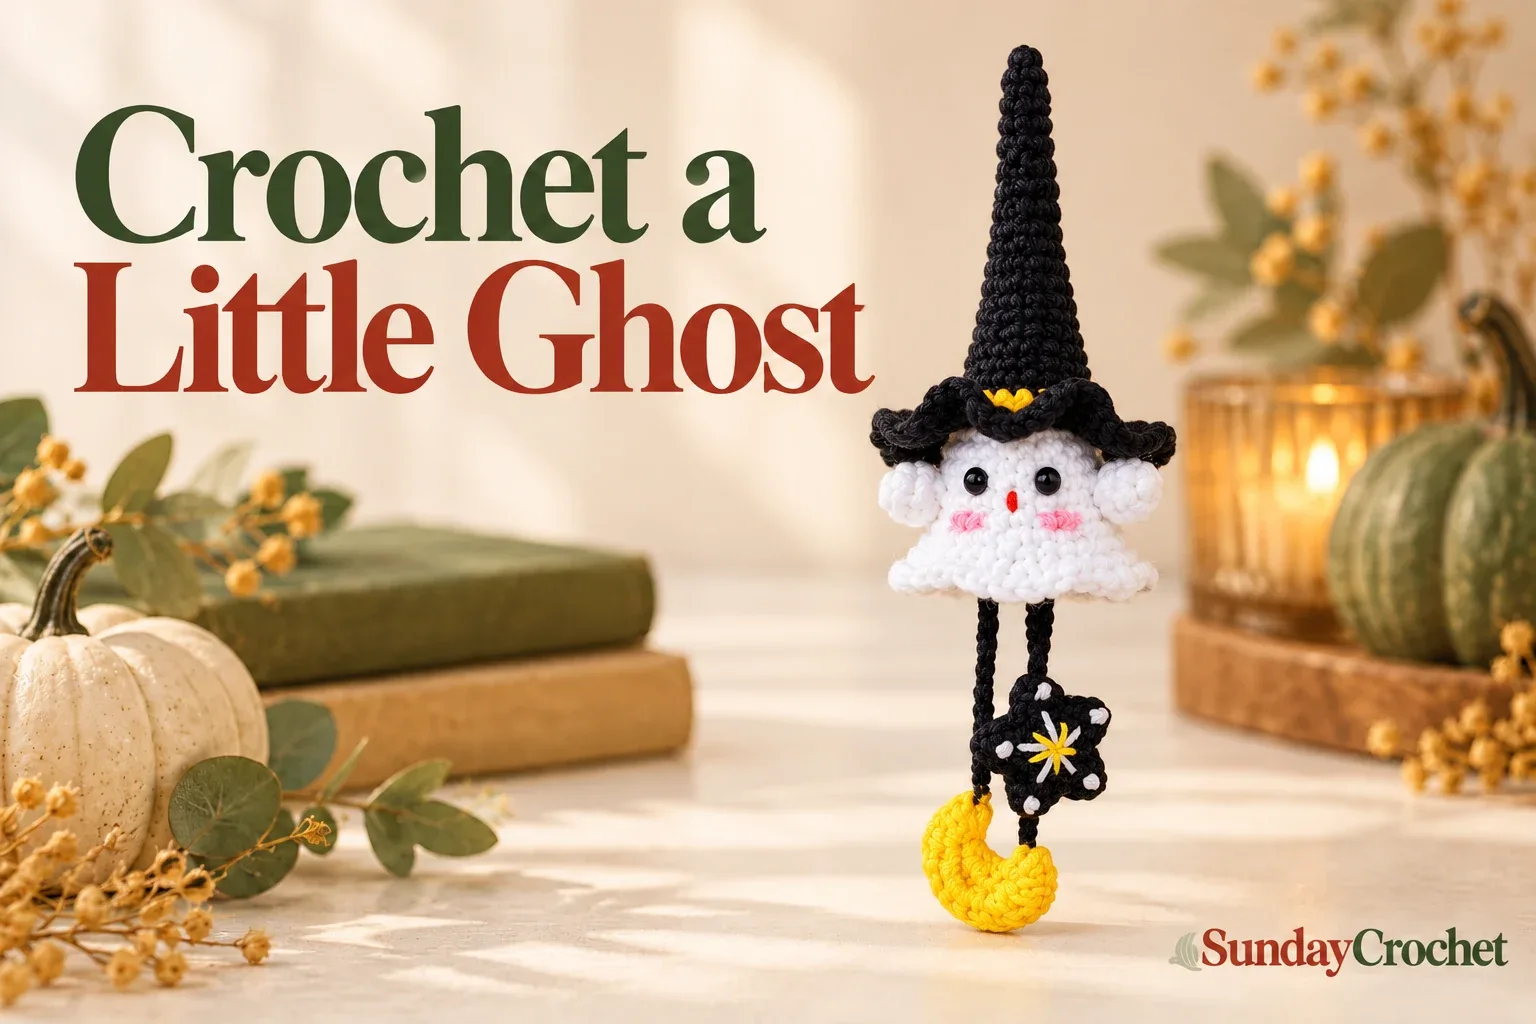
A white ghost with a tall black witch hat is already a sweet Halloween make; add the little star and moon details and it becomes a miniature character with plenty of personality. The stitch charts below cover the hat, flared body, two arms, star charm, and moon charm. The photographed finish also shows long black legs, decorated boots, and facial details, but their stitch instructions are not charted here, so I’ll keep those parts clearly separate from the counted pattern.
I’ll show you how I work through the charted pieces and how to read the stitch counts as you go. This is a small amigurumi project worked in joined rounds, with color changes on the hat and a shaped edge on the body. The directions use US crochet terms. The exact yarn weight, hook size, gauge, finished dimensions, stuffing amount, and some assembly details are not specified; your finished toy will depend on the materials and joining choices you make.
Before you begin
The colors visible in the design are black, white, and yellow, with small contrasting details on the face and charms. Choose a yarn and hook that work comfortably together, and keep your stitches even. Because hook size and gauge are not provided, I can’t give a reliable finished measurement. A quick swatch can help you decide whether your fabric looks suitably compact for a small stuffed figure. If you’re comparing hook measurements, the guide to crochet yarn weight explains millimeter and letter sizing; your own yarn label is the best place to start for a specific yarn.
The pattern uses these US abbreviations:
- ch — chain
- sl st — slip stitch
- sc — single crochet
- hdc — half double crochet
- dc — double crochet
- inc — work 2 sc into the same stitch
- st(s) — stitch(es)
- ( … ) × 6 — repeat the bracketed sequence six times
- [ … ] — work the grouped stitches into the same stitch where noted
At the beginning of each round, make 1 ch as a lifting chain; join the end of the round with a slip stitch. This join is part of the method shown for the charted rounds. Keep the joining chain and slip stitch consistent so they don’t accidentally become extra counted stitches. If pattern shorthand is new, the examples in my guide to reading written crochet patterns explain how repeats and stitch totals fit together.
The pattern
Crochet the witch hat
Use black yarn for Rounds 1–18. The hat begins narrow, widens gradually, then flares into its brim. The stitch count at the end of each round is in parentheses.
| Round | Instructions | Count |
|---|---|---|
| 1–8 | 6 sc in the starting ring | 6 each round |
| 9 | (1 sc, inc) × 3 | 9 |
| 10 | 9 sc | 9 |
| 11 | (1 sc, inc, 1 sc) × 3 | 12 |
| 12 | 12 sc | 12 |
| 13 | (3 sc, inc) × 3 | 15 |
| 14 | 15 sc | 15 |
| 15 | (2 sc, inc, 2 sc) × 3 | 18 |
| 16 | 18 sc | 18 |
| 17 | (5 sc, inc) × 3 | 21 |
| 18 | 21 sc | 21 |
| 19 | Change to yellow; (3 sc, inc, 3 sc) × 3 | 24 |
| 20 | 24 sc | 24 |
| 21 | Change back to black; (7 sc, inc) × 3 | 27 |
| 22 | Work 2 dc in each stitch around | 54 |
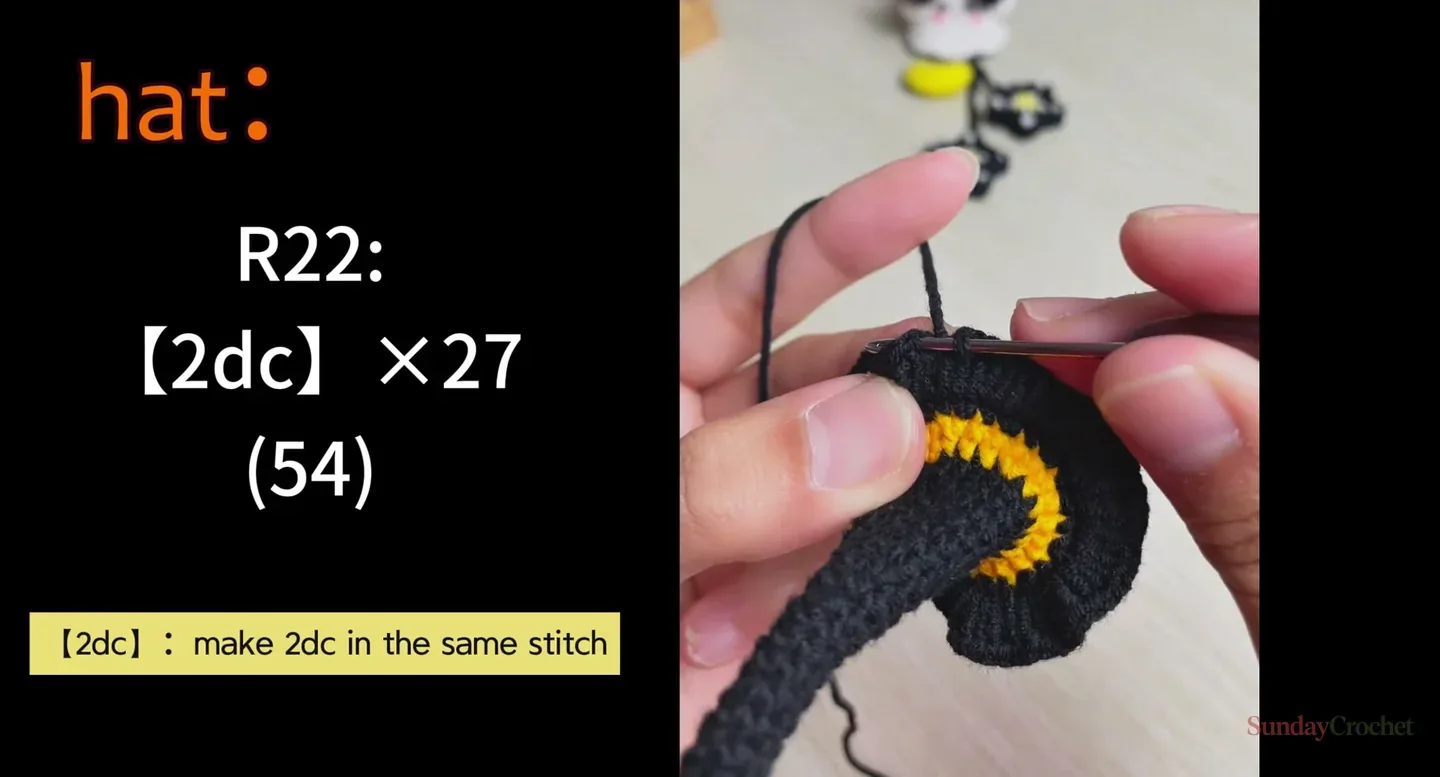
Round 22 is the dramatic brim: each of the 27 stitches gets two double crochets, bringing the round total to 54. The stitches create the broad, rippling edge shown in the close-up. Keep the increases evenly distributed by following one repeat for each stitch rather than adding more increases between repeats.
The yellow band sits between the narrow black crown and the black brim. Cut or carry yarn only in the way you prefer for your color changes; the chart gives the change points but doesn’t specify a finishing method for the tails. This contrast is the key visual detail, so check that the yellow rounds sit level before you continue in black.
Shape the ghost body
Work the body in white. The first twelve rounds build a small tube that grows steadily from 6 to 42 stitches. Round 13 turns that circle into a soft scalloped hem by varying stitch height; each group of six stitches is repeated seven times around.
| Round | Instructions | Count |
|---|---|---|
| 1 | 6 sc in the starting ring | 6 |
| 2 | inc × 6 | 12 |
| 3 | (1 sc, inc) × 6 | 18 |
| 4 | (1 sc, inc, 1 sc) × 6 | 24 |
| 5–9 | 24 sc | 24 each round |
| 10 | (3 sc, inc) × 6 | 30 |
| 11 | (2 sc, inc, 2 sc) × 6 | 36 |
| 12 | (5 sc, inc) × 6 | 42 |
| 13 | (1 sc, 1 hdc, 1 dc, 1 hdc, 1 sc, 1 sl st) × 7 | 42 |
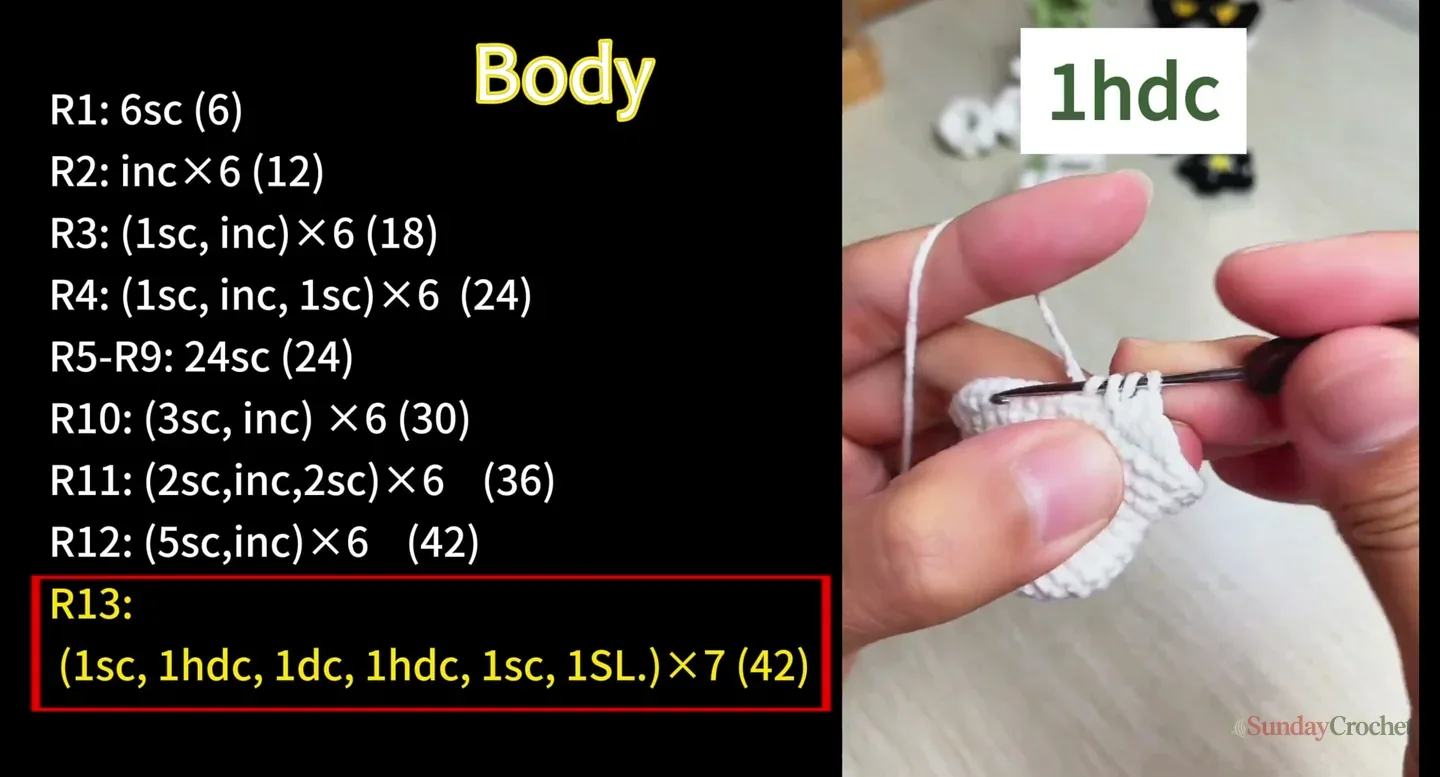
In Round 13, the taller stitches make each wave rise and fall. The slip stitch at the end of the group returns to a low point before the next repeat. Keep the sequence in order; replacing every stitch with a single crochet would remove the scalloped outline. The chart ends after this decorative round and doesn’t give a separate closing or stuffing instruction, so plan any filling and finishing method to suit the figure you’re making rather than treating an unstated method as part of the pattern.
The finished example has black eyes, a small nose, and pink cheek details. Their spacing and embroidery method aren’t charted. Lay out any features before attaching the hat so you can center them under its brim, and use your own judgment for placement. This is visual finishing guidance, not a measured face template.
Make two small arms
The arms are worked in white, two alike. Their chart is short: begin with five stitches, increase twice in Round 2, then work one plain round.
| Round | Instructions | Count |
|---|---|---|
| 1 | 5 sc in the starting ring | 5 |
| 2 | (1 sc, inc) × 2, 1 sc | 7 |
| 3 | 7 sc | 7 |
Fasten off with a tail if you want to use it when attaching each arm at the upper sides of the body. The exact sewing positions and stitch method aren’t specified, so pin or hold the arms in place first and check that they look balanced from the front. The example shows small arms close to the head, but it doesn’t provide a measurement for spacing.
Add the star and moon charms
The star is crocheted in black and shaped with five points. Make a small base, increase to ten stitches, then build each point into one stitch. After the five point groups, slip stitch into the next stitch to separate them.
| Round | Instructions | Count |
|---|---|---|
| 1 | 5 sc in the starting ring | 5 |
| 2 | inc × 5 | 10 |
| 3 | Repeat 5 times: [1 sc, 1 hdc, 1 dc, 1 hdc, 1 sc] in one stitch; sl st in the next stitch | 5 points |
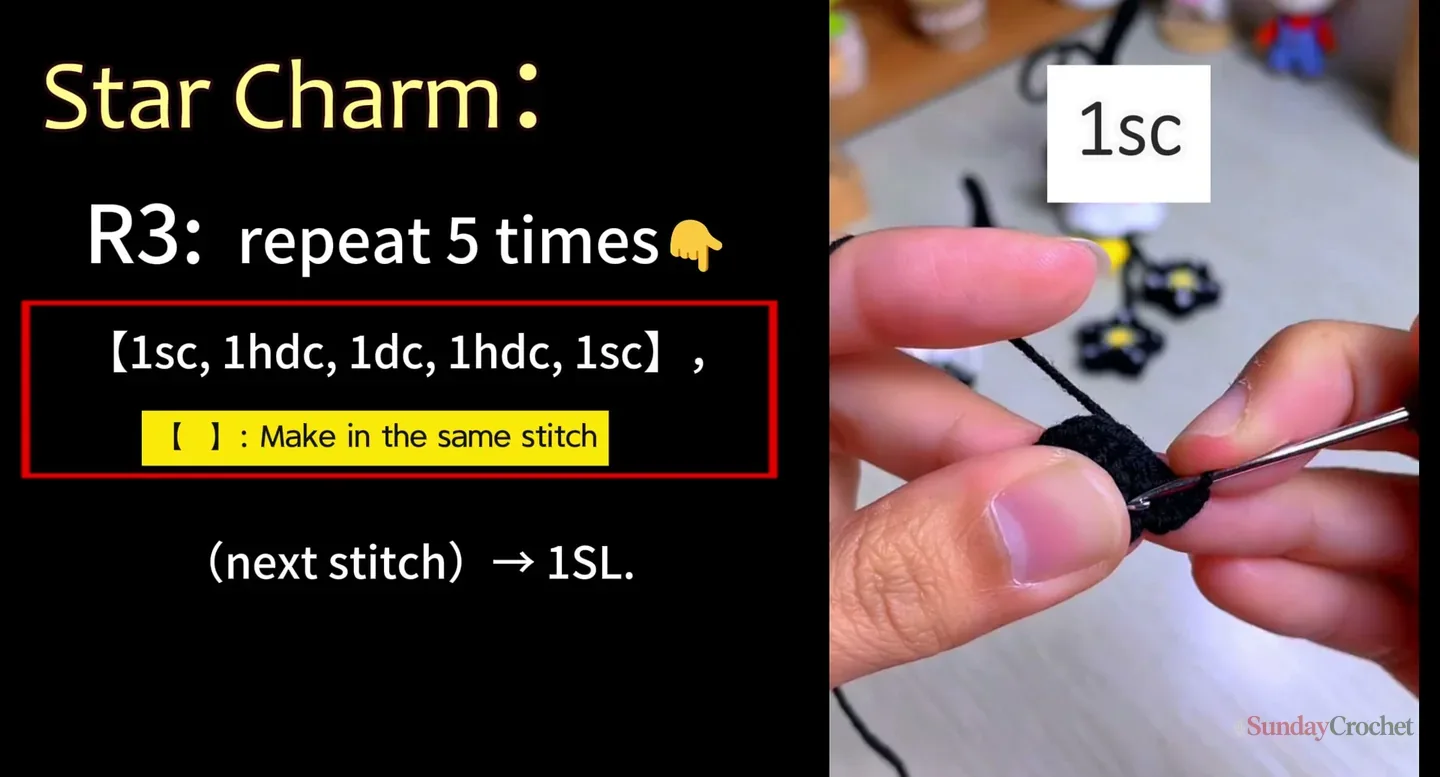
The mixed stitch heights make the points without needing a separate point-by-point piece. The close-up demonstrates the group worked into a single base stitch. Keep the stitches of each group together, then move to the next stitch for the slip stitch. The finished star is decorated with small contrasting stitches; their exact colors and embroidery count are not specified.
The yellow moon charm is also worked in joined rounds. The increasing stitches create a small flat motif; the exact method for shaping or attaching it as a crescent is not stated, so use the finished photo as a visual reference rather than adding unshown shaping rounds.
| Round | Instructions | Count |
|---|---|---|
| 1 | 6 sc in the starting ring | 6 |
| 2 | Work 3 sc in each stitch around | 18 |
| 3 | Work 2 dc in each stitch around | 36 |
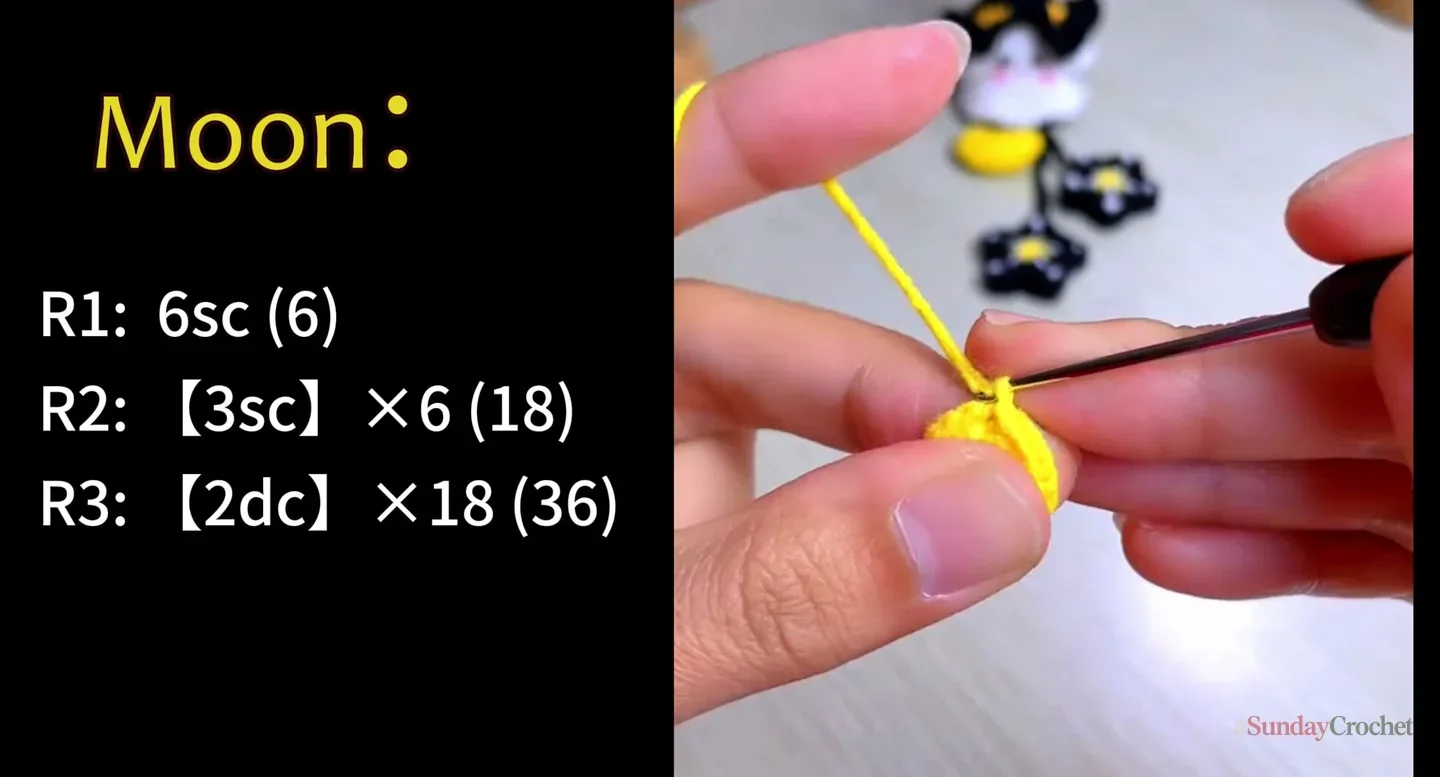
A separate hanging chain of 100 ch is shown with the charms. Its exact attachment points aren’t given. Lay the pieces beside the finished example before you sew or join anything, and decide how you want the chain to hang. The finishing sequence also shows a 30-chain length, but doesn’t label which component it belongs to; I’ve left it out of the counted parts rather than assign it to a leg or another piece without a clear direction.
Finish and assemble thoughtfully
The finished design places the tall hat above the face, the two white arms at the sides, and the small charms below the body. Before fastening every tail, arrange the pieces together and look at the front view. Check that the hat is centered, the arms are balanced, and the hanging detail falls where you want it. Use the remaining yarn tails or a yarn needle for attachment if that suits your construction; exact joining stitches are not specified.
The photo also shows long black legs and decorated boots. Those features are part of the appearance, but the visible charts don’t provide their round counts or joining instructions. The 30-chain step near the end is not assigned to a named component, so it can’t safely stand in for a leg pattern. If you want to reproduce those details exactly, you’ll need a separate, clear leg-and-boot instruction before treating this as a complete pattern.
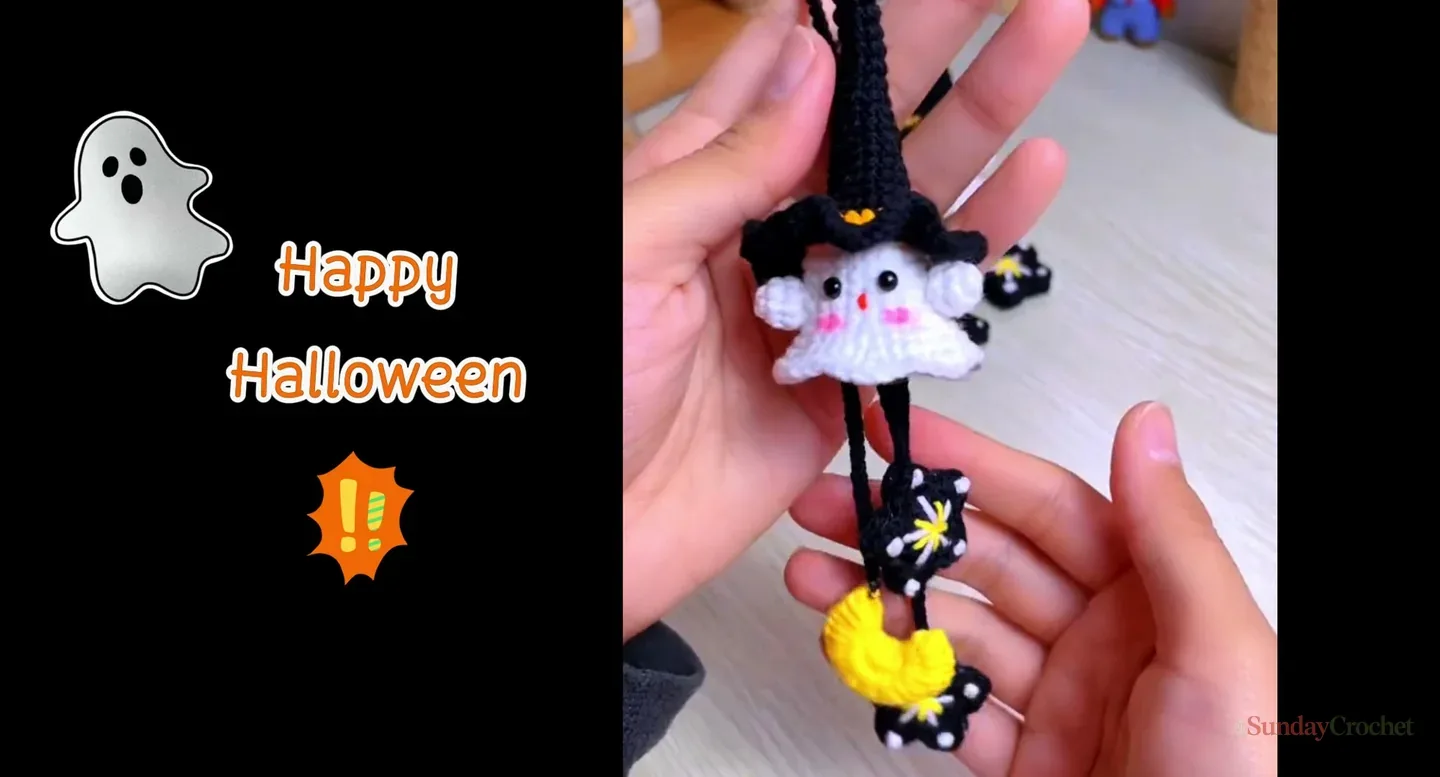
This pattern preserves every stitch sequence that is legible in the charts and keeps the undocumented details visible. The charted hat, body, arms, star, and moon give you a strong start for a Halloween character; the finished size and final assembly will vary because the yarn, hook, gauge, stuffing, face placement, legs, and boots are not fully specified.
Common questions
What yarn weight and hook size should I use?
No yarn weight, hook size, gauge, or finished measurement is specified. The design uses black, white, and yellow yarn, with small facial and charm accents. Choose a hook that works with your yarn and gives you an even fabric; changing yarn or hook size will change the finished scale.
Are these US or UK crochet terms?
The stitch abbreviations are US terms: sc is single crochet, hdc is half double crochet, and dc is double crochet. UK names differ for some stitches, so keep that terminology consistent throughout.
How do I read an increase in these rounds?
For the single-crochet rounds, an increase means working two single crochets into one stitch. A repeated instruction such as “(1 sc, inc) × 6” means you work one single crochet, then an increase, and repeat that pair six times. The number in parentheses at the end is the expected stitch count for that round.


