
· Sunday Crochet
In this pattern
01 · A bubbling pot for Halloween02 · Yarn & tools03 · The pattern04 · Shape the cauldron05 · Make the bubbling foam06 · Finish and use your square07 · Common questionsA bubbling pot for Halloween
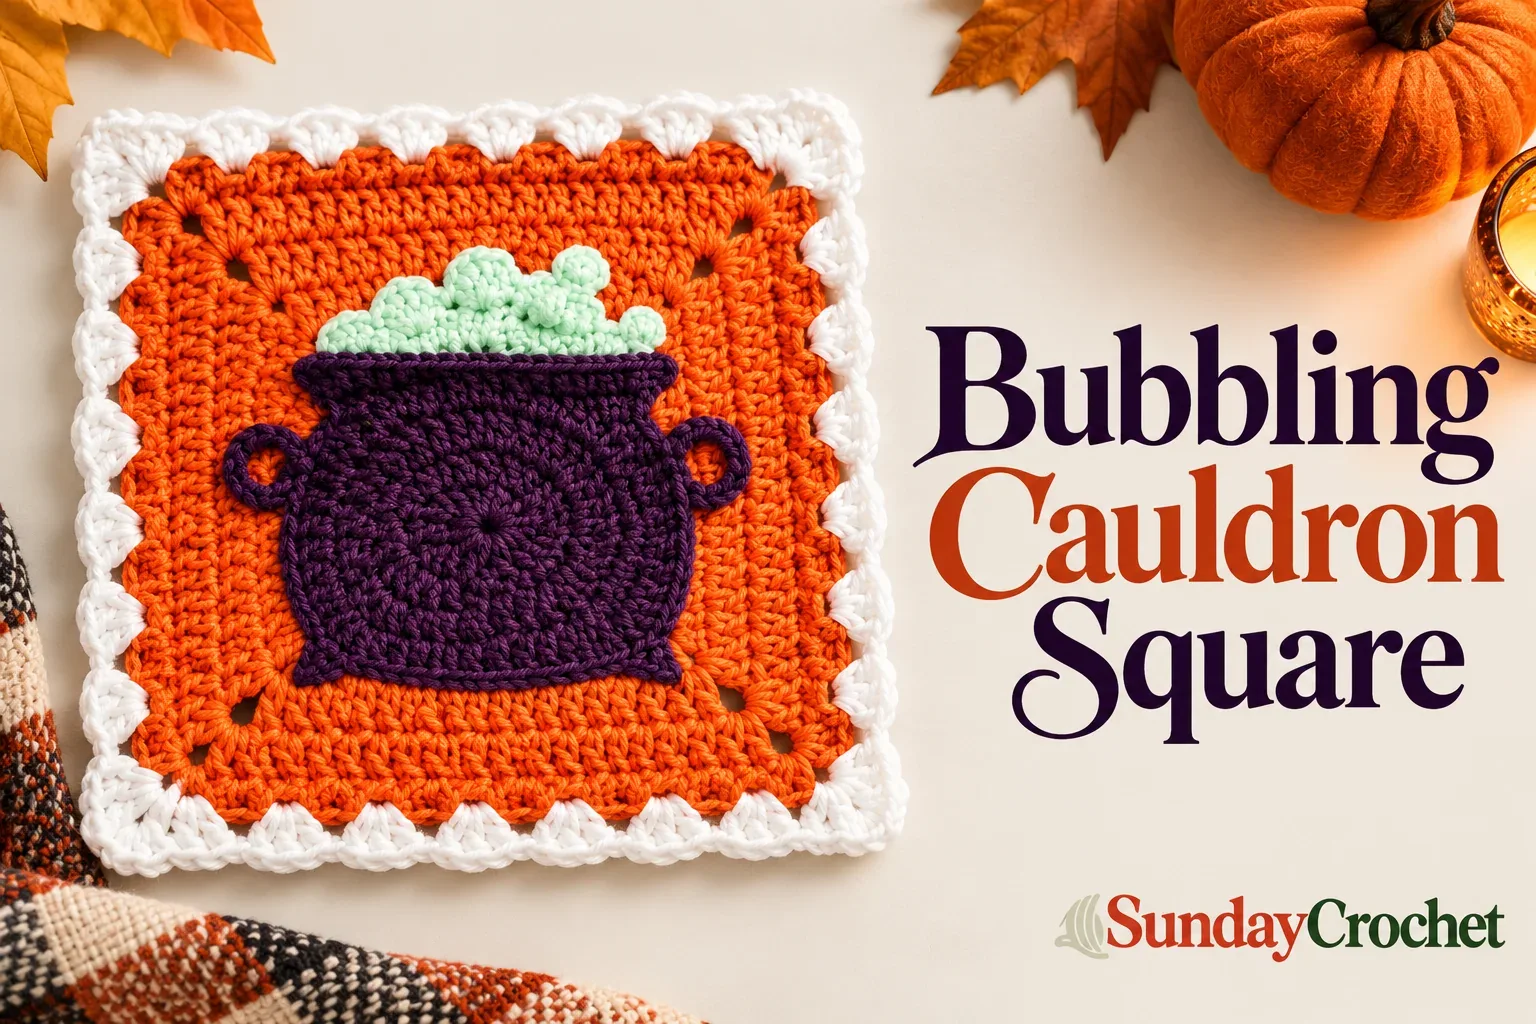
This bubbling cauldron granny square turns a round purple pot into the centerpiece of an orange Halloween block. The handles, feet, and rim are worked directly into the unused loops of the pot, so much of the detail is anchored as you crochet instead of being made separately and sewn on later. A little mint-green applique tucked under the rim becomes the bubbling foam, and a white shell border finishes the square.
I’ll show you how I do this from the center outward, then return to the purple loops to shape the cauldron. The pattern uses US crochet terms and assumes you know chains, slip stitches, single crochet, half double crochet, double crochet, and treble crochet. A quick refresher on basic stitches can help before you begin, and a guide to reading written instructions is handy if abbreviations are new.
Yarn & tools
The original square is about 11.5 to 12 inches as part of a coordinated blanket series, but your finished measurement will depend on your yarn and tension. No gauge is specified. Keep the colors in the same roles if you would like the cauldron to read clearly against the background, or choose your own Halloween palette.
Abbreviations
- ch: chain
- sl st: slip stitch
- sc: single crochet
- hdc: half double crochet
- dc: double crochet
- tr: treble crochet
- BLO: back loop only
- st(s): stitch(es)
The opening ch 3 counts as a dc in Round 1. In Rounds 2 through 6, the ch 3 is for height and does not count. The pattern uses a false-stitch adjustment at the join to keep the circular rounds even: work into the joining slip stitch where instructed, skip the beginning chain, and join to the first real dc. From Round 8 onward, the ch 3 counts as a dc. Each ch-2 space is a corner.
The pattern
Round 1
With purple, make a magic ring. Ch 1 to secure it, then ch 3; this ch 3 counts as the first dc. Work 11 dc into the ring, working over the short tail if convenient. Pull the tail to close the center. Join with a sl st to the top of the beginning ch 3. You have 12 dc.
Round 2
Ch 3, then dc in the same joining stitch. Work 2 dc in each of the next 11 stitches. At the end, dc once into the joining slip stitch, skip the beginning ch 3, and join with a sl st to the first real dc. There are 24 dc. This false-stitch finish fills the gap at the join; the chain is not counted.
Round 3
Ch 3 and dc in the same stitch. Work 1 dc in the next stitch. Repeat 2 dc in the next stitch, 1 dc in the following stitch 11 times. At the end, work 1 dc into the joining slip stitch, skip the beginning ch 3, and join to the first real dc. There are 36 dc.
Round 4
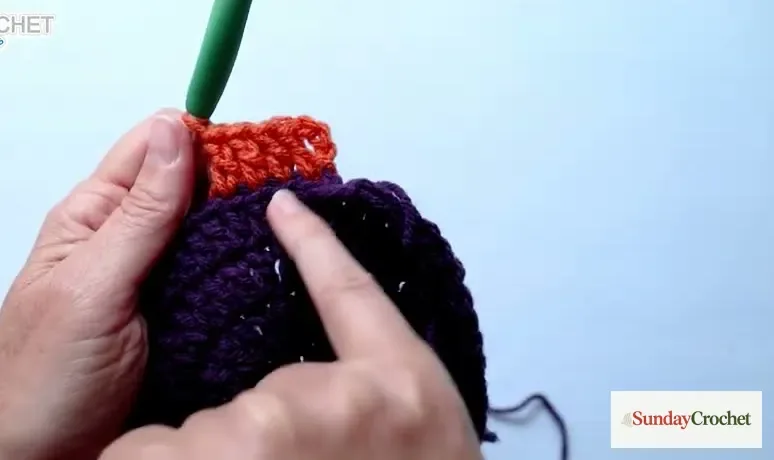
Ch 3 and dc in the same stitch. Work 1 dc in each of the next 2 stitches. Repeat 2 dc in the next stitch, 1 dc in each of the following 2 stitches 11 times. Work 1 dc into the joining slip stitch, skip the beginning chain, and join to the first real dc. There are 48 dc. Do not fasten off. Pull the purple working loop and yarn to the front of the square so they stay accessible while you build the background.
Round 5
Join orange with a slip stitch in the same joining stitch, working into its back loop only. Ch 3 and dc in the same stitch, then work 1 dc BLO in each of the next 3 stitches. Repeat 2 dc BLO in the next stitch, 1 dc BLO in each of the next 3 stitches around. At the end, work 1 dc BLO into the joining slip stitch, skip the beginning ch 3, and join to the first real dc. There are 60 dc. The front loops from the purple round remain visible; leave the purple working loop at the front and keep it from tangling.
Round 6
Ch 3 and dc in the same stitch. Work 1 dc in each of the next 4 stitches. Repeat 2 dc in the next stitch, 1 dc in each of the next 4 stitches around. Use the whole stitch this time. Finish with 1 dc in the joining slip stitch, skip the beginning chain, and join to the first real dc. There are 72 dc. Keep the purple loop and yarn to the front.
Round 7
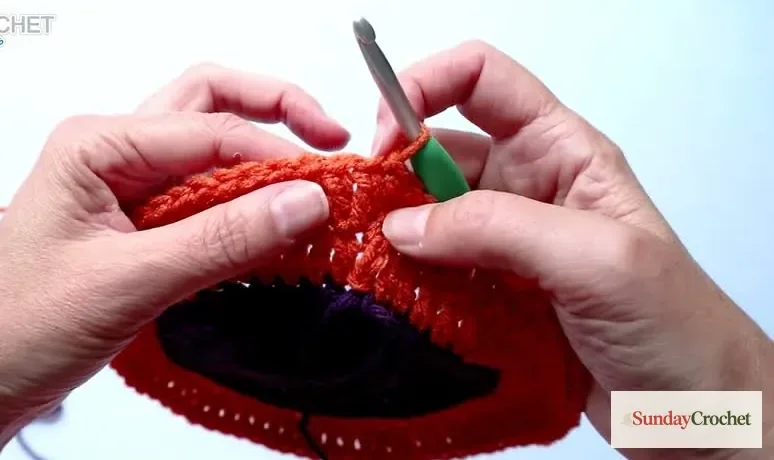
The slip-stitch join from Round 6 is the first stitch of this round. Mark it if useful. From the small stitches, work 1 sc in each of the next 2 stitches, 1 hdc in each of the next 2, 1 dc in each of the next 2, and 1 tr in each of the next 2. Ch 2 for the first corner.
Now work down the other side of the curve: 1 tr in each of the next 2 stitches, 1 dc in each of the next 2, 1 hdc in each of the next 2, 1 sc in each of the next 2, and 1 sl st in each of the next 2. Keep slip stitches relaxed so they remain easy to use in the next round. Repeat this transition from small to tall, ch 2, and tall to small around the circle to make four corners. The round still has 72 stitches, including the slip stitches, and four ch-2 corner spaces. The contrast between short and tall stitches is what squares the circle.
Round 8
Ch 3; it counts as a dc. Dc in every stitch up to the next ch-2 corner space. In that space, work 2 dc, ch 2, 2 dc. Continue dc in every stitch along the side and repeat the same corner sequence in each ch-2 space. Remember to work into the small slip stitches as stitches. Join with a sl st to the top of the beginning ch 3, skipping the joining slip stitch from the previous round. There are 88 dc, or 22 across each side, plus four ch-2 corners.
Round 9
Repeat Round 8, working dc in each stitch and 2 dc, ch 2, 2 dc into every corner space. Join to the top of the beginning ch 3. There are 104 dc, or 26 across each side, plus the four ch-2 corners.
Round 10: shell border
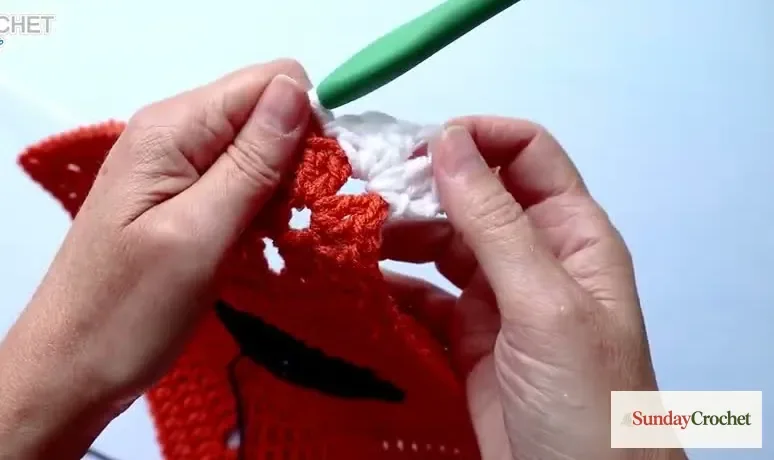
Join white in any corner ch-2 space. Ch 3, then work 2 dc in that same space, ch 2, and work 3 dc in the same space. Ch 1. This makes a shell on each side of the corner. Along the side, skip the next 3 stitches, then work 3 dc in the next stitch, ch 1. Repeat this shell sequence six times along each side. At the end of a side, skip the last 2 stitches to reach the next corner and work 3 dc, ch 2, 3 dc, ch 1 in that corner. Repeat around.
At the end, join to the top of the starting ch 3, or join to the first real dc if you prefer the neater finish shown. Fasten off the orange background if you have not already, and weave in those tails. Keep the purple cauldron loop available.
Shape the cauldron
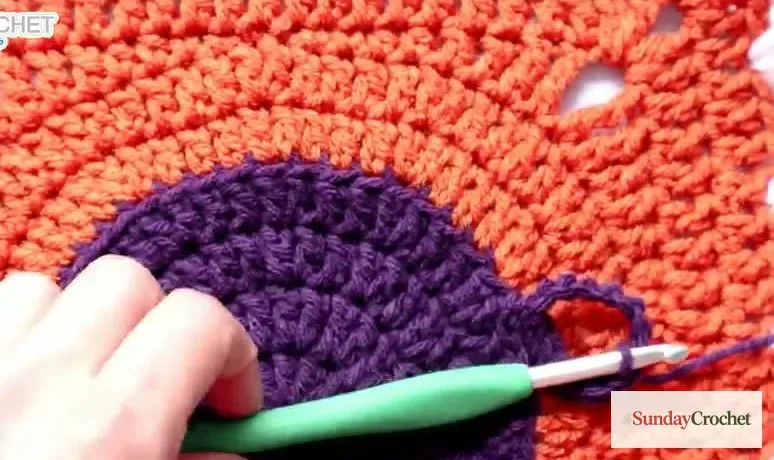
Put the hook back into the purple working loop and snug the join. You will work into the unused front loops left from Round 4 of the purple circle. These are the only loops available along that edge now. The order below travels around the pot: first handle, rim, second handle, then the two feet. Try the shape on the square as you go; the anchor points matter more than forcing every detail into a rigid position.
Slip stitch into the next 4 front loops. Ch 14 for the first handle, then join with a sl st to the first chain to make a ring. Sl st into the next 5 chains. Hold the loop where you want it to sit, then make the next sl st through both the next chain and a top-facing loop on the square. This anchors the handle to the block. Sl st into the remaining chains and join back into the first chain. This builds the loop and attaches it without sewing the whole handle down afterward.
Slip stitch into the next 3 front loops to reach the rim. Ch 3, counting as a dc, and work 2 dc into the same front loop. Across the next 11 loops, work: dc in the next, hdc in each of the next 2, sc in each of the next 4, hdc in each of the next 2, dc in the next, then 2 dc in the next. Ch 3 and sl st into that same last loop to make the rim tip. The top edge has 16 stitches including the chain threes. Leave this rim unanchored for now so the foam applique can tuck underneath it.
Slip stitch into the next 3 front loops. Make the second handle with ch 14, join to the first chain, and work sl sts along the chain as for the first handle. Anchor it through both the next chain and a top-facing loop of the square when it lies in a matching position, then finish slip stitching the remaining chains.
Continue down the side with sl sts into about 10 front loops, stopping opposite a corner area for the first foot. Ch 3. Work back along the chains with sc in the next chain, hdc in the next, and dc in the first chain at the base. Skip 2 front loops on the pot and sl st into the third to anchor the foot at a slight angle. Adjust that anchor before continuing if you want the foot to angle differently. Sl st along the next 6 front loops toward the second foot and repeat the 3-chain foot in reverse, mirroring the first. Finish with sl sts in the remaining front loops, about 5, and fasten off. Shape the loops and feet with your fingers, then weave in the tail.
Make the bubbling foam
With mint or green yarn, ch 15. Skip the first chain from the hook and hdc in each remaining chain. You will have 14 hdc. Ch 1 and turn.
For the bubbly edge, work across the 14 stitches in this order: sl st in the first stitch; 3 dc in the next; sl st in each of the next 2; 2 hdc in the next; sl st in each of the next 2; then work dc, extended dc, and dc in the same next stitch. Sl st in each of the next 2; work 2 hdc in the next; sl st in the next; hdc in the second-to-last stitch; and sl st in the last stitch. This mix of bumps and low valleys makes an uneven foam edge. Fasten off with a long tail, around 18 to 20 inches, for sewing. Weave in the short tail along the straight foundation edge.
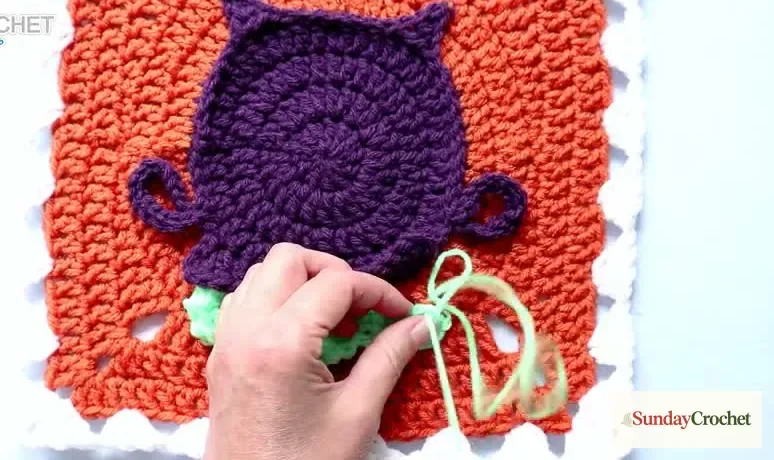
Place the foam against the square so its straight edge sits just inside the cauldron opening and its bumpy edge bubbles above the rim. Pin it if that helps you hold the placement. Sew around it using the top-facing loops of the square, gently easing the strip inward so it sits within the pot. The bottom edge can be less tidy because the rim will cover it. Pull the rim corners out so they extend past both ends of the foam. Then sew the purple rim down through its back loops and the front loops of the square, shaping a clear point at each end. Across the top, you can also catch the front loops of the foam. This secures the applique while leaving its wavy edge visible above the pot.
Finish and use your square
Weave in any remaining tails on the back and flatten the square on a table. Check that the four corners are clear and that the pot, handles, feet, and foam sit where you want them. The handles and feet are intentionally formed with chain loops anchored into the motif, so small differences in angle are part of the handmade character. Blocking may help the square lie flatter, but no blocking method or gauge is specified here.
This motif is one seasonal square in a larger blanket, and it also works as a Halloween pillow front or a panel in a tote if you plan your joining and backing around the shell edge. If you are combining it with another seasonal block, the ghost-centered square motif uses a different construction but shares the same granny-square spirit. For multiple cauldron squares, keep your yarn amounts and tension consistent so their edges are easier to join.
Common questions
Is this cauldron square suitable for a beginner?
It is best for a confident beginner. The first rounds use familiar dc increases, but the square-shaping round changes stitch heights, and the cauldron details are worked into exposed loops with placement adjustments. Review sc, hdc, dc, tr, and slip stitch before beginning.
Do I cut the purple yarn after Round 4?
No. Pull the purple working loop to the front while you work the orange rounds and white border. Return to that live loop afterward to shape the handles, rim, and feet. This keeps the pot details attached to the original circle.
Can I change the colors?
Yes. Keep a strong contrast between the pot and background so its silhouette is easy to see. The sample uses purple for the cauldron, orange for the square, white for the shell border, and mint green for the foam.
Why is the foam a separate piece?
The green strip is crocheted separately so its uneven bubbly edge can sit underneath the cauldron rim. Sew the applique to the background first, then place the rim over its straight edge and stitch the rim down.


