
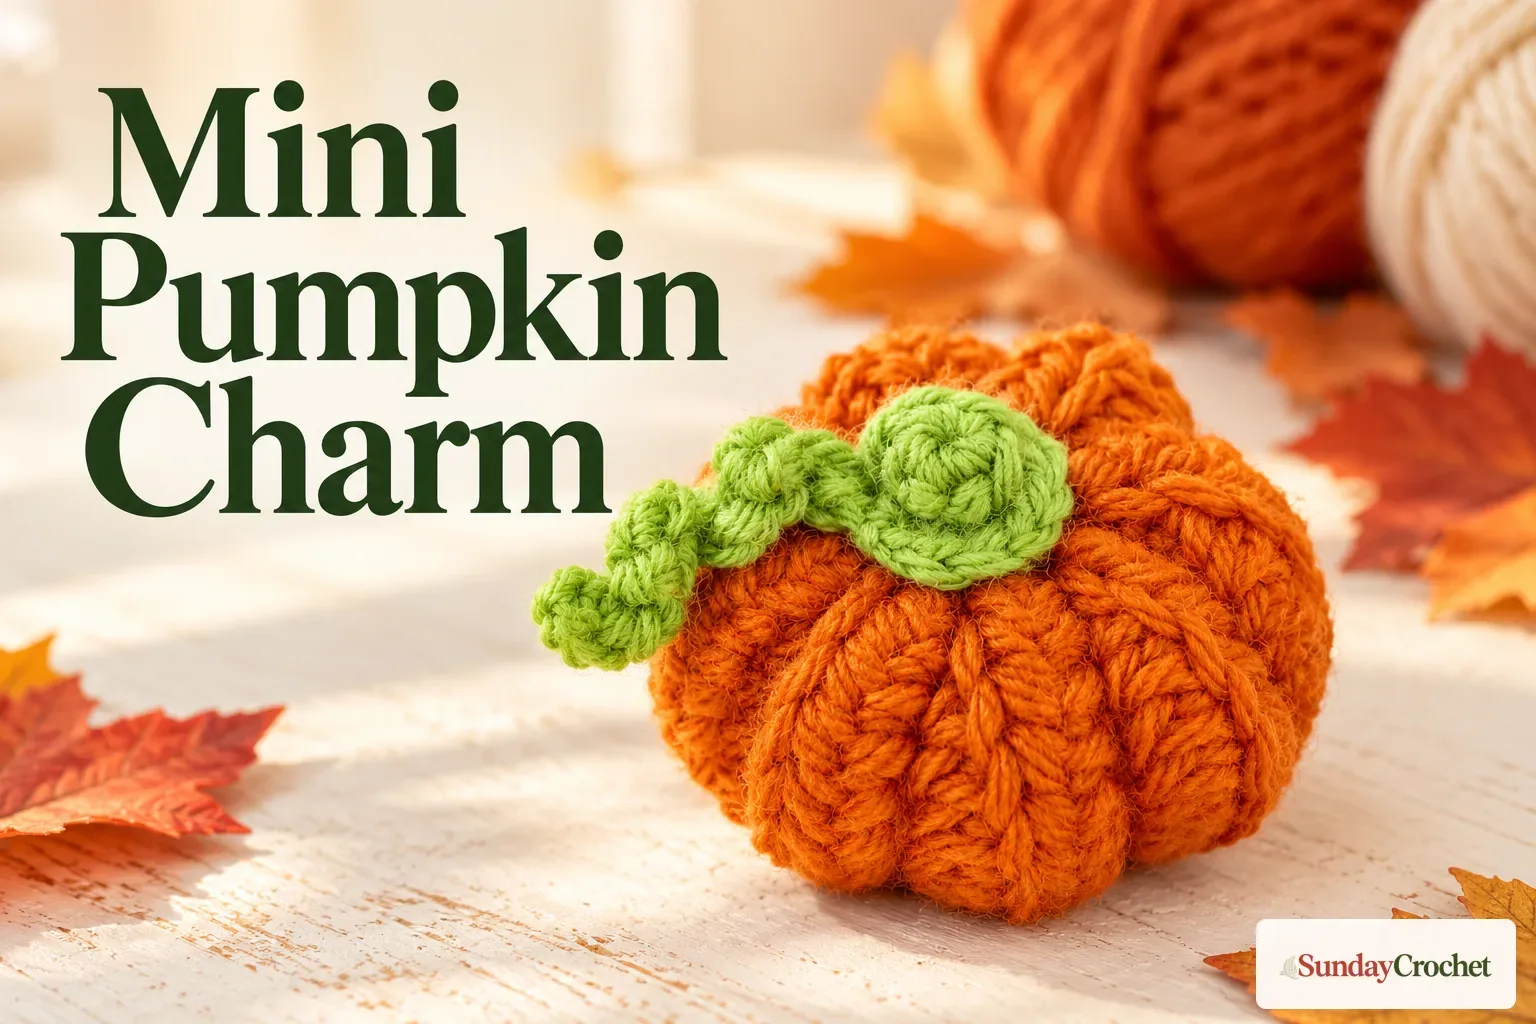
A ribbed pumpkin with a curly vine, styled for fall. · Sunday Crochet
In this pattern
01 · A tiny pumpkin for fall02 · Yarn & tools03 · Stitches and abbreviations04 · Before you begin05 · The pattern06 · Helpful checks as you crochet07 · Common questions08 · A small make with a lot of fall characterA tiny pumpkin for fall
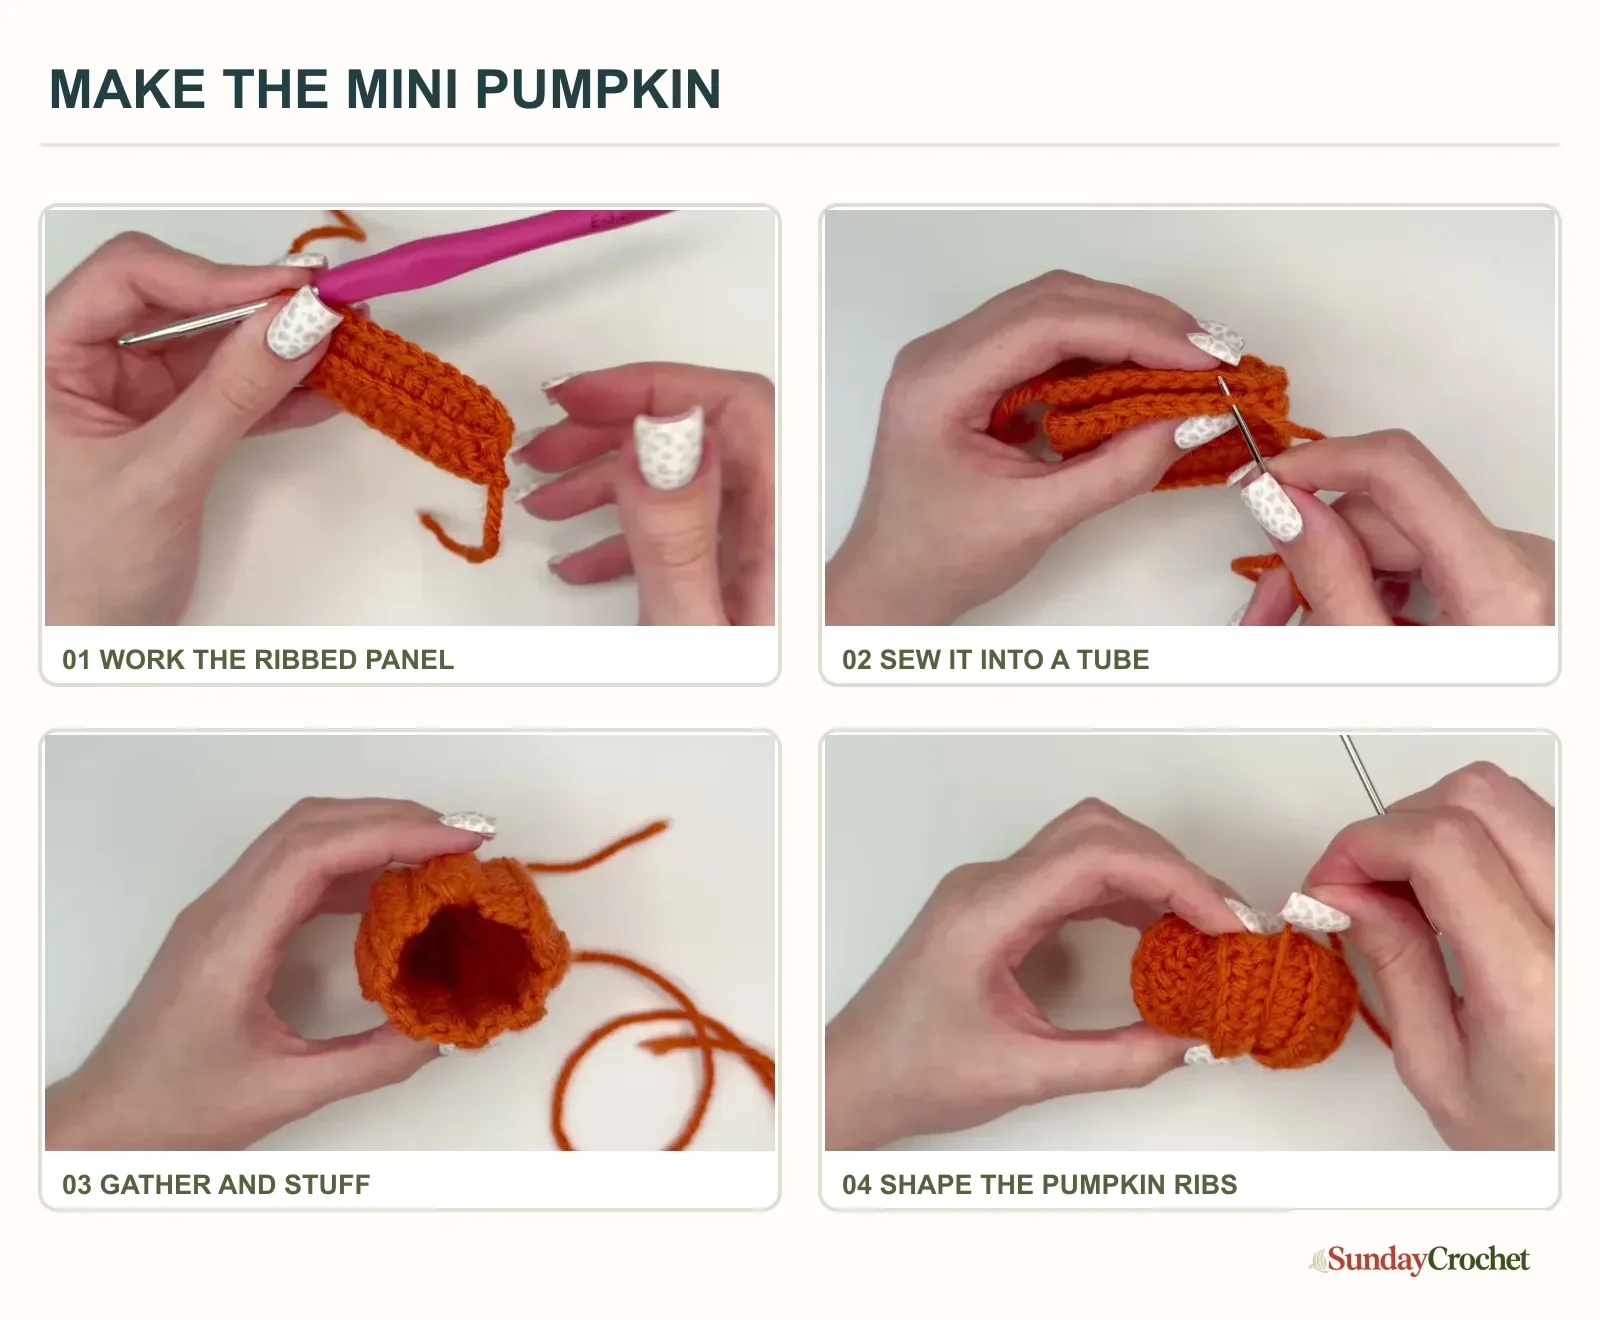
A little pumpkin is a satisfying seasonal project when you want to finish something in one sitting. This version starts as a narrow orange strip, not a circle of joined rounds. Back-loop stitches make the strip ribbed, and a tapestry-needle seam turns it into a tube. Gather both ends around a small amount of stuffing, draw in the ribs, then finish with a separate green stem and curly vine.
I’ll show you how I follow the stitch counts and shape the body without losing track of the edges. The pattern stays small on purpose, which makes it a cheerful desk decoration or the crocheted part of a pumpkin keychain. The instructions make the pumpkin and stem; they do not include a metal key ring or explain how to attach hardware. You can leave it as a tiny fall ornament or add a suitable keychain fitting separately.
Yarn & tools
The sample uses orange for the pumpkin and green for the stem. The amount of yarn and the finished measurements are not specified, but this is a small project, so only a modest amount is needed. A different yarn weight will change the size and look of the stitches. If you are choosing a substitute, check the yarn label for its weight and suggested hook, then keep in mind that the pattern's stated 3.5 mm hook is the one used here. A quick look at the information printed on yarn labels can help you compare your skein with the sample materials.
Stitches and abbreviations
These instructions use US crochet terms:
- ch: chain
- sl st: slip stitch
- sc: single crochet
- hdc: half double crochet
- BLO: back loop only, the loop farthest from you at the top of a stitch
The pumpkin body is worked flat in rows. The stem is worked in joined rounds. In Row 1, work through the chain normally. From Row 2 onward, the body stitches go through the back loop only. The chain 1 at the beginning of each row or stem round gives the next row height and does not count as a stitch.
Before you begin
The body has 12 stitches across and 16 rows in total. The first and last stitch of every row are single crochet; the ten stitches between them are half double crochet. Keeping those two edge stitches easy to identify makes the narrow strip simpler to seam later. If the first chain curls while you are working Row 1, gently flatten it and continue. The sample straightens as more rows are added.
BLO means inserting the hook under only one of the two loops at the top of a stitch. When you look down at the top edge, the loops form a small V. The loop nearest you is the front loop; the loop farther away is the back loop. Working into that far loop leaves the other strand visible and builds the raised ridges that become the pumpkin's vertical sections.
The pattern
Crochet the orange body
Make a slip knot and place it on the 3.5 mm hook. Chain 13. The chain on the hook does not count as one of the 13 chains. Keep the starting tail long enough to weave in neatly later.
Row 1: Single crochet in the second chain from the hook. Make one half double crochet in each of the next 10 chains. There should be one chain left. Make one single crochet in that final chain. You now have 12 stitches: one single crochet, ten half double crochets, and one single crochet.
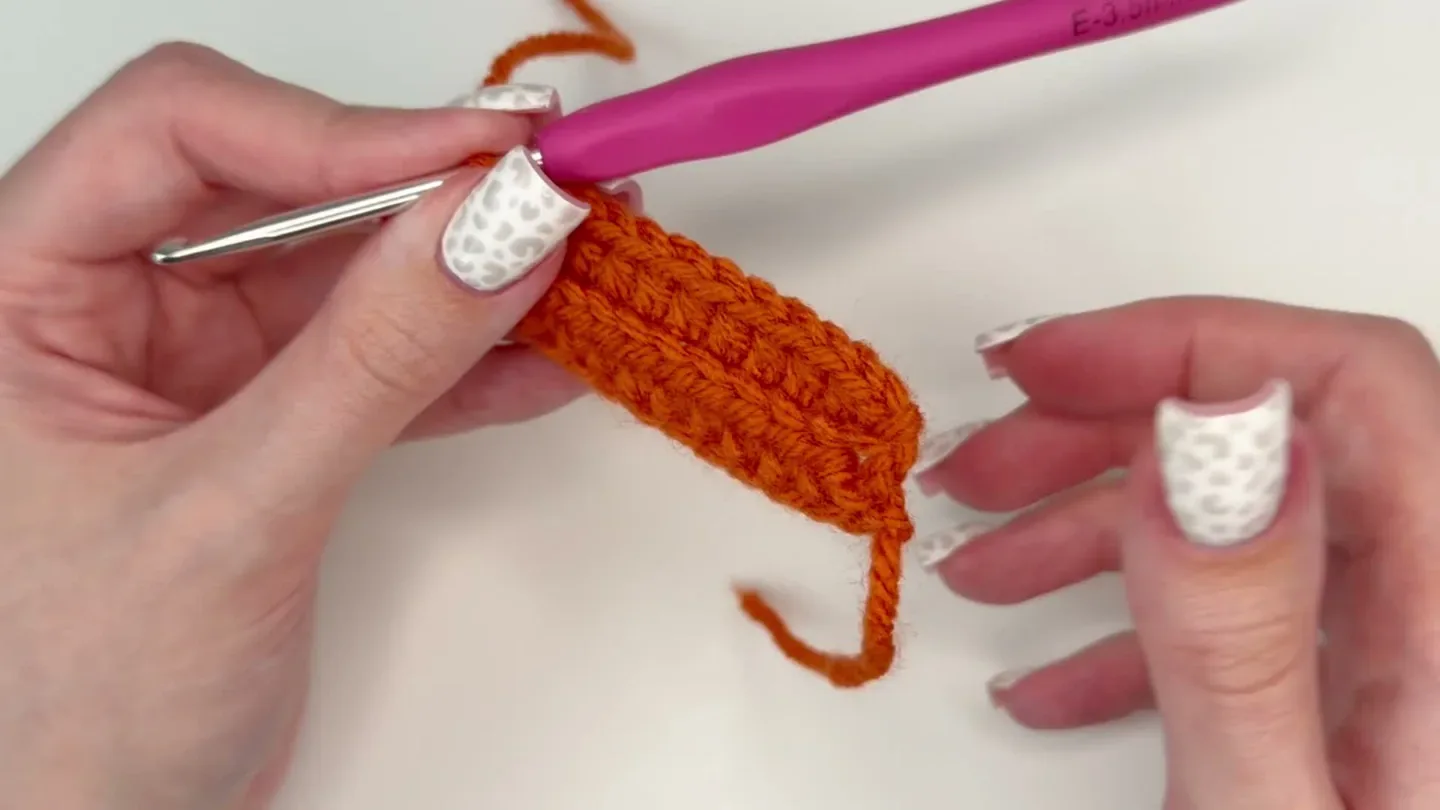
Rows 2–16: Chain 1 and turn. The chain does not count. Work one single crochet into the back loop of the first stitch, one half double crochet into the back loop of each of the next 10 stitches, then one single crochet into the back loop of the last stitch. Keep the count at 12 stitches in every row. Repeat this same row until you have 16 rows total, including Row 1.
After Row 16, chain 1, cut the orange yarn, and pull the cut end through the chain to fasten off. Leave a long tail for sewing the side seam and gathering the pumpkin. A longer tail is easier to thread and gives you room to close the opening without joining a new piece of yarn halfway through.
Sew the panel into a tube
Fold the strip so its first and last row edges meet. Thread the long orange tail onto the tapestry needle. Sew the two row edges together, matching one stitch on one edge with the corresponding stitch across from it. Continue along the full edge so the seam closes from one end of the strip to the other. Pull the stitches snug enough to hold, while keeping the join aligned.
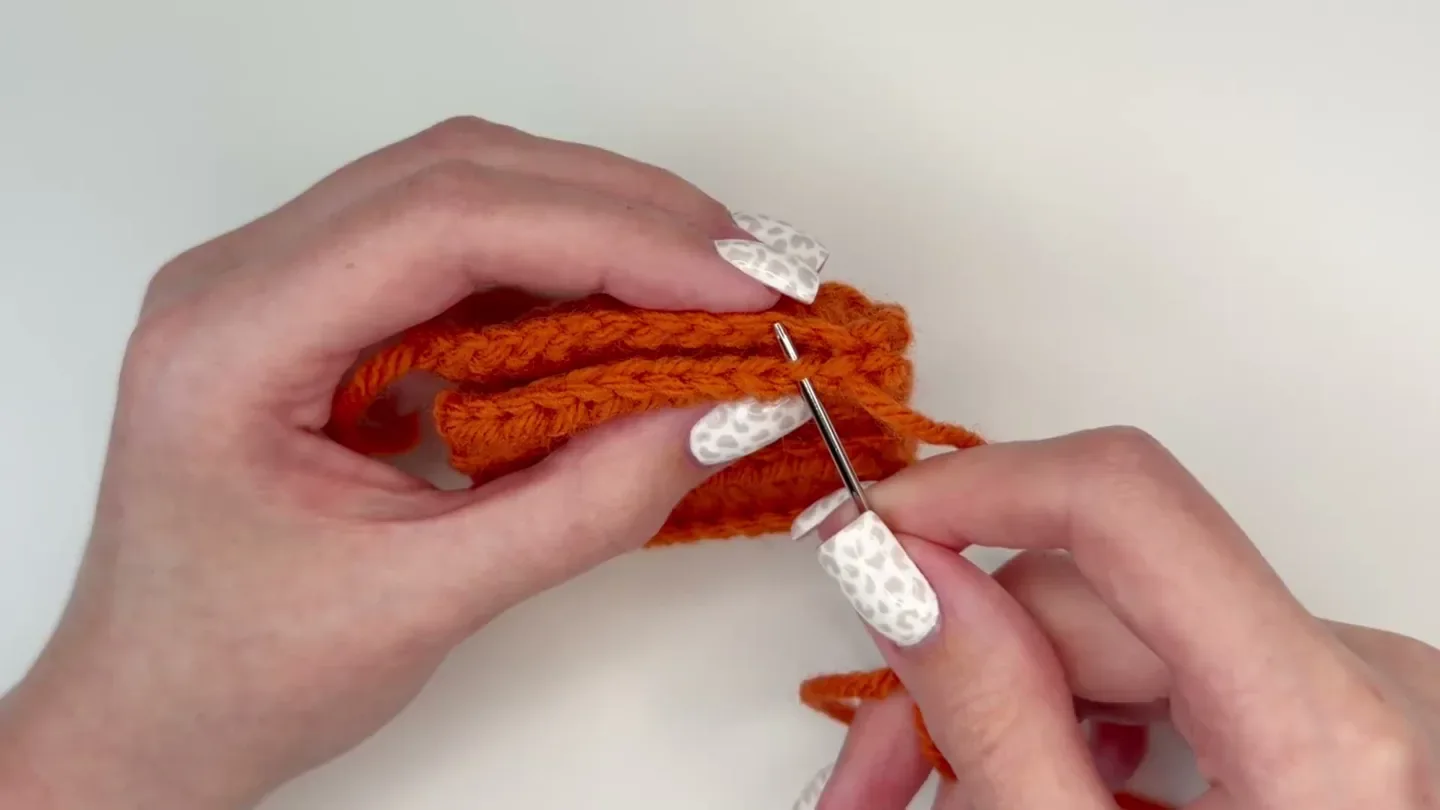
Turn the tube inside out so the seam sits inside the pumpkin. You now have two open ends. One end will be gathered to form the base; the other will stay open long enough for stuffing.
Gather, stuff, and close the pumpkin
With the same long orange tail, weave the needle in and out around one open edge, catching the fabric every couple of stitches. Once you have gone all the way around, pull the tail to draw the opening closed. If a small hole remains in the middle, sew across it a couple of times to close it. Keep this tail attached for shaping rather than tying it off now.
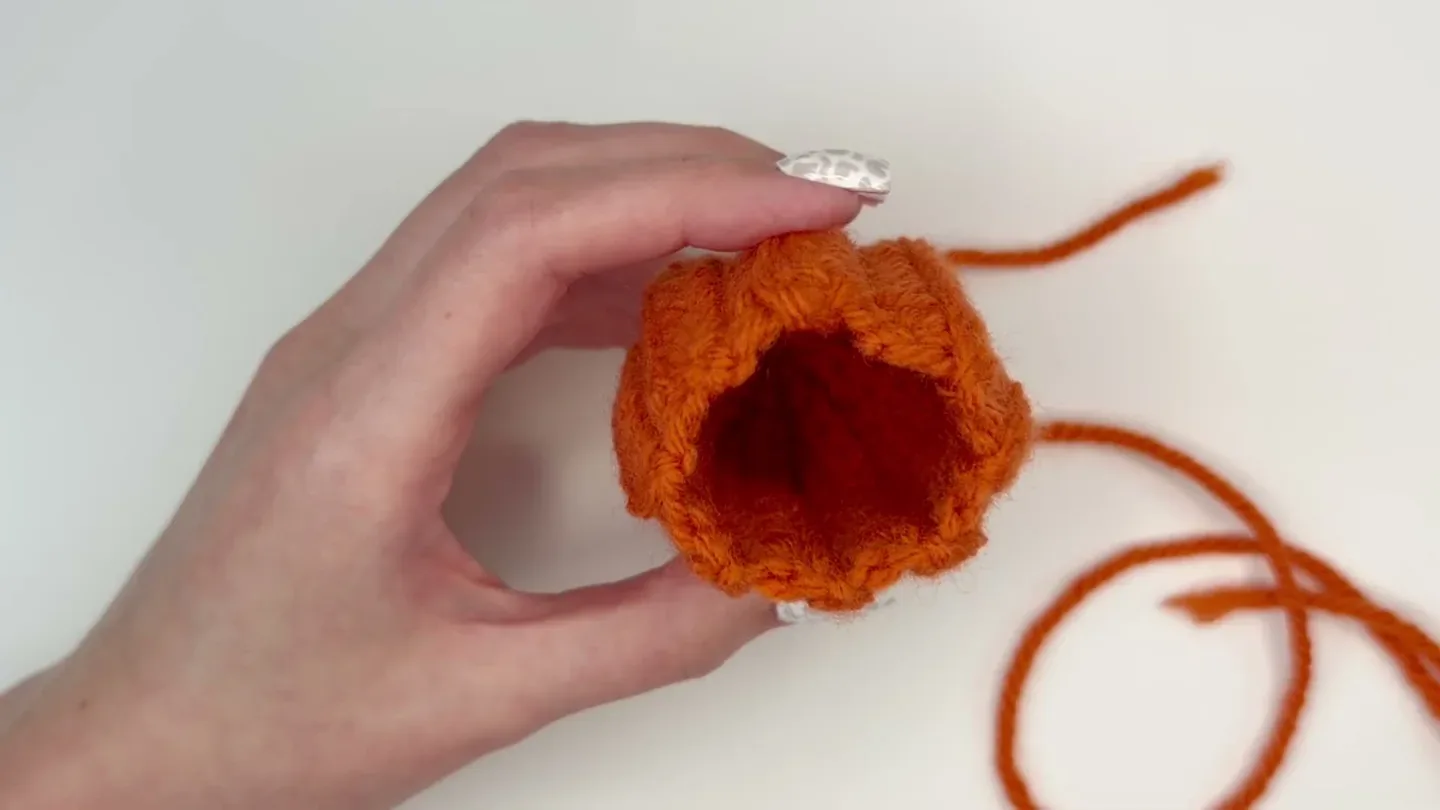
Add fiberfill or yarn scraps inside the tube. Use enough to give the pumpkin a rounded body, while keeping the second opening accessible for gathering. Bring the needle and yarn tail through the inside from the closed base toward the open top, then bring it out through a stitch at the top edge. Gather this edge the same way, passing in and out every couple of stitches. Pull the tail to close the opening and sew across any remaining gap. The pumpkin should now feel softly filled and enclosed.
Shape the pumpkin ribs
The body already has ridges from the back-loop rows. The shaping yarn draws the top and bottom toward one another and makes those ridges stand out as pumpkin sections. Bring the orange tail through the center from the bottom to the top, then take it back down through the opposite side. Pull gently until the surface indents. Repeat around the pumpkin, placing each pass between two rows and spacing the pulls evenly. Keep the tension similar as you go so one section is not much deeper than the next.
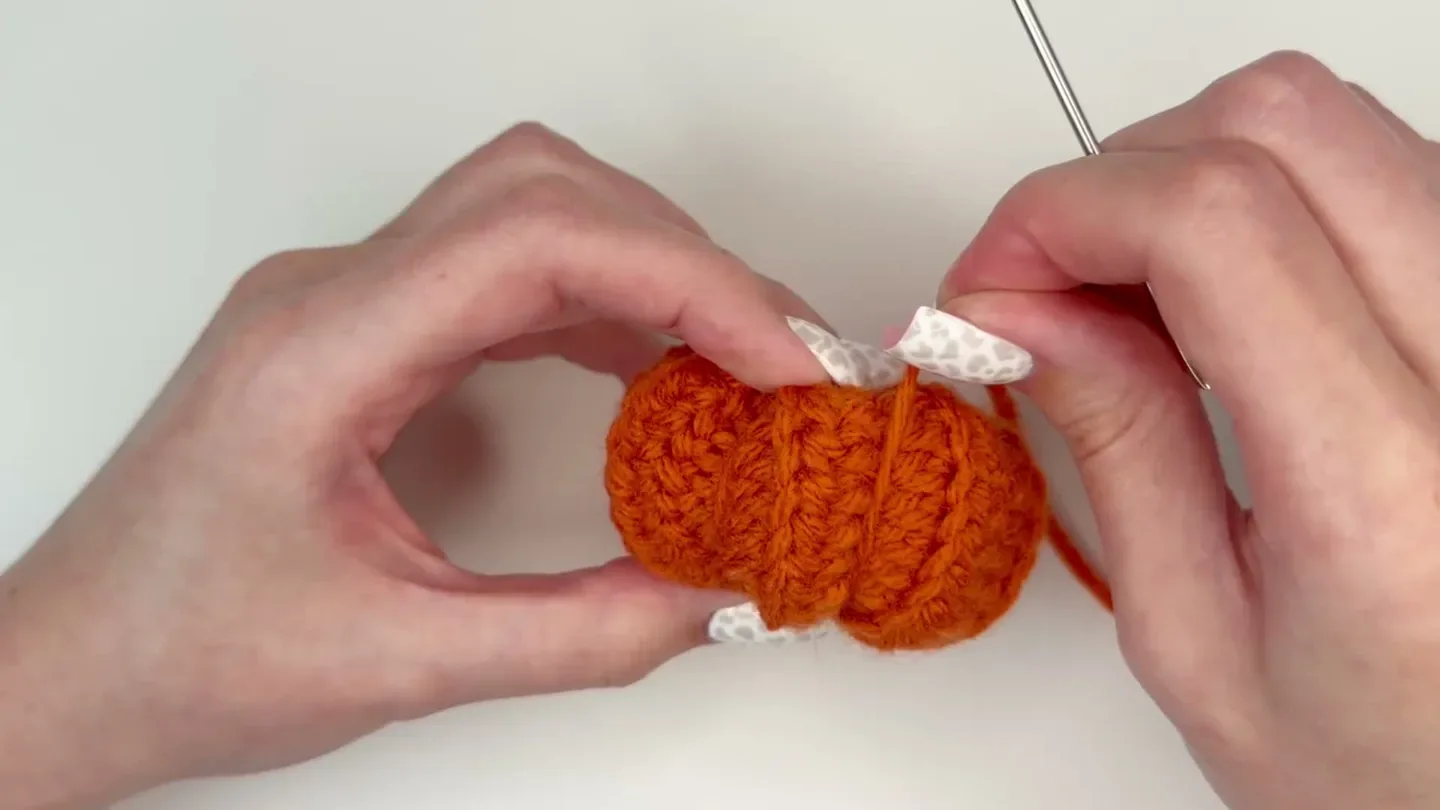
When the ribs look even, secure the tail and draw it into the center of the pumpkin to hide it. The sample does not specify a fixed number of sections; use the visible rows as guides and keep the spacing consistent around the body.
Crochet the green stem
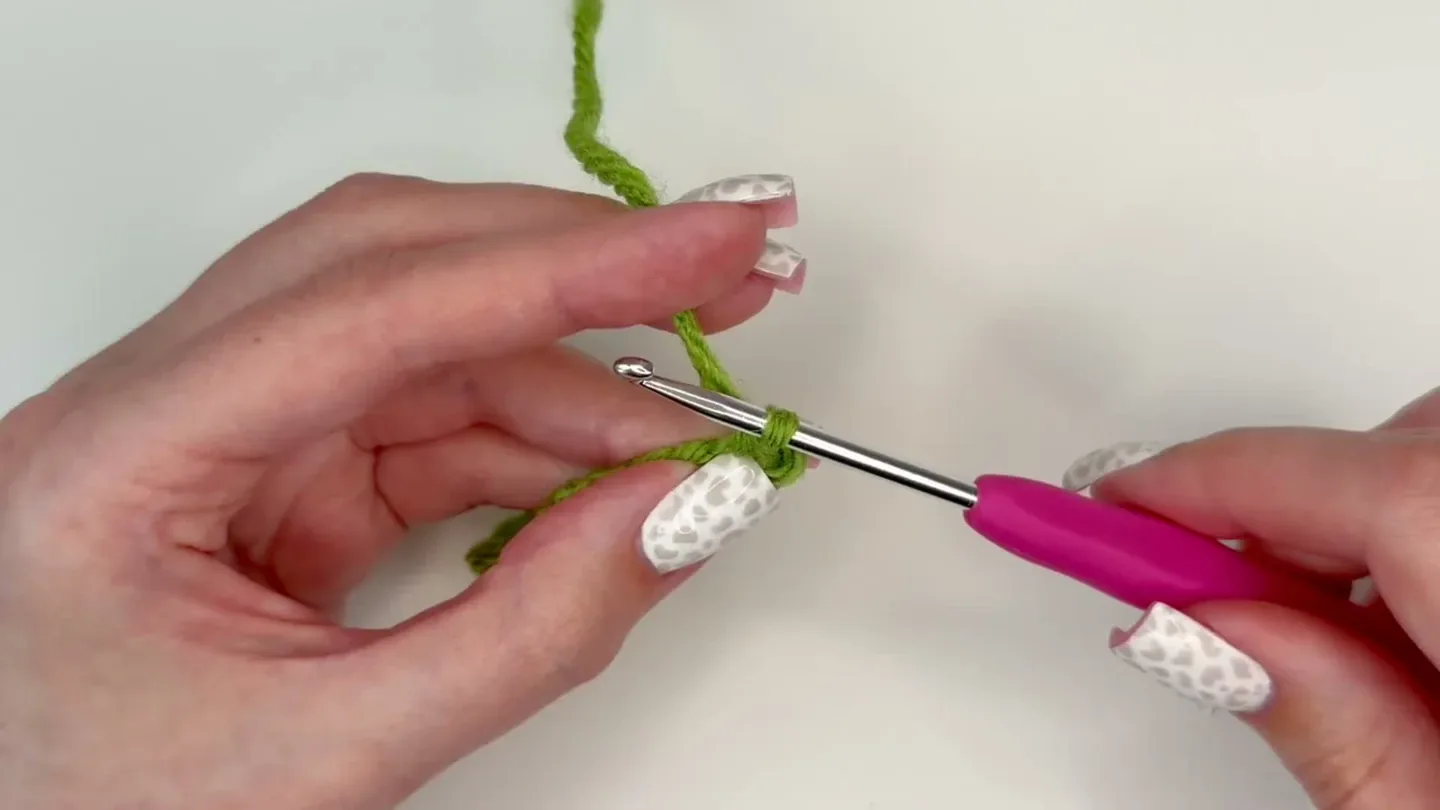
With green yarn, make a slip knot and chain 2.
Round 1: Work 5 single crochets into the first chain. Pull the starting tail to close the center hole, then slip stitch into the first single crochet to join.
Round 2: Chain 1. It does not count as a stitch. Work one single crochet into the back loop only of each of the 5 stitches around. Slip stitch into the first single crochet to join the round.
Round 3: Chain 1. Work 2 single crochets into each stitch around, this time using both loops of each stitch. You will have 10 single crochets. Slip stitch into the first single crochet to join.
Add the curly vine and attach the stem
From the joined stem, chain 9. Starting in the second chain from the hook, work 2 single crochets into every chain back toward the stem. The extra stitches make the narrow chain curl. A longer starting chain can make a longer vine, but it will shorten as it curls. Slip stitch into the next stitch on the stem to secure the vine, then chain 1, cut the green yarn, and pull the tail through the chain. Weave in the loose ends.
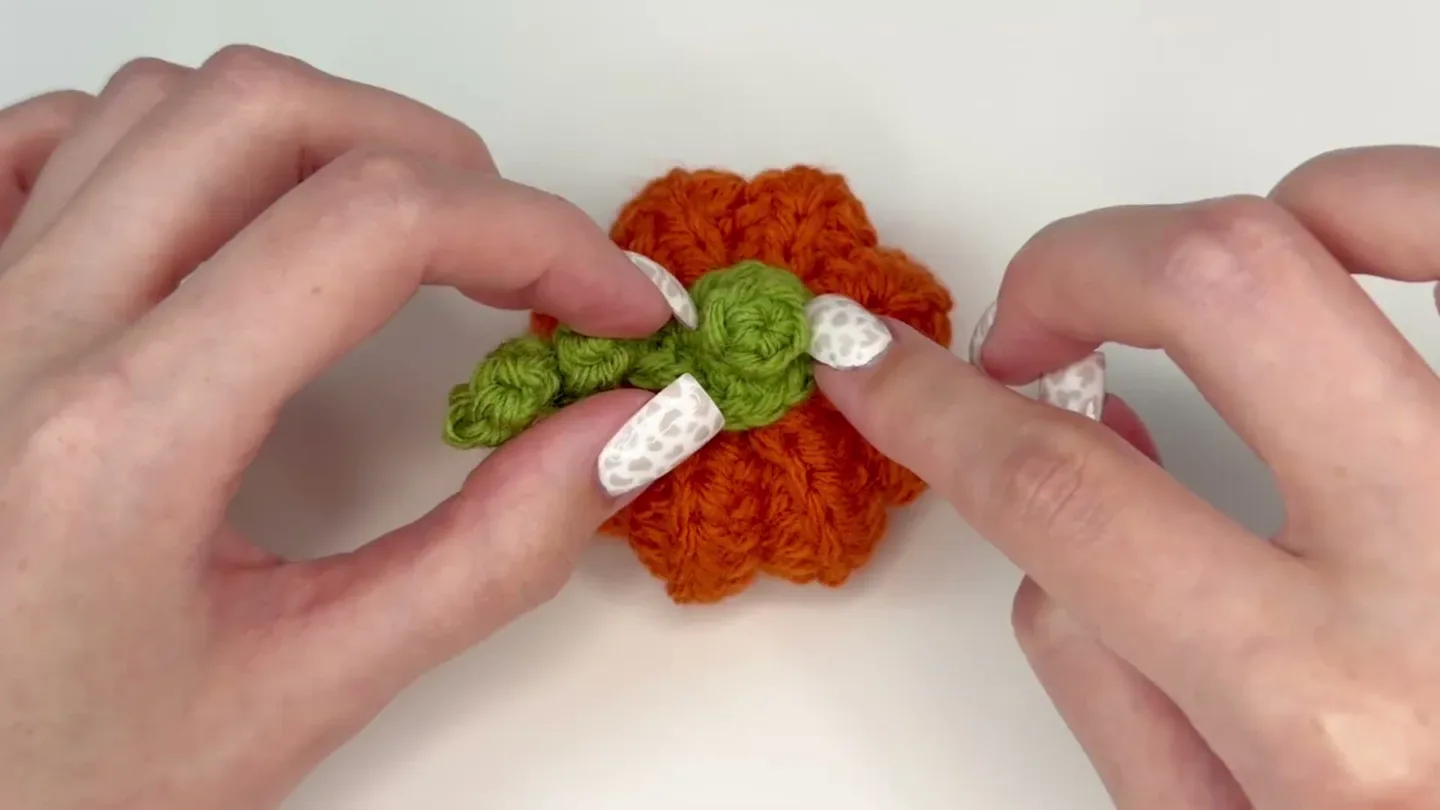
Position the stem over the gathered top of the pumpkin. Attach it with a few stitches of green yarn, or use hot glue, as preferred. If you want to use the finished crochet as a keychain, add a key ring or clasp separately; that hardware and its attachment are outside this pattern. The pumpkin also works on its own as a small seasonal ornament.
Helpful checks as you crochet
- The panel is curling: This can happen early. Smooth the strip gently and keep working; the added rows help it settle.
- The sides look uneven: Check that each row begins and ends with a single crochet and that the ten half double crochets stay between those edges.
- The ribs disappear: Confirm that Rows 2–16 are worked in the back loop only. The visible ridges and the shaping passes work together to define the pumpkin.
- The stuffing shows through: The amount of stuffing is flexible. Add only enough to round the form, and close any opening with a few extra sewing passes.
- The stem feels loose: Reposition it at the center of the gathered top and secure it with green yarn or the chosen adhesive.
Because this small pattern has no gauge or finished measurements, use the stitch and row counts as the size guide. Keep the orange strip's 16 rows and the green stem's stated rounds if you want to match the sample proportions. The yarn fiber and your individual tension can still change the final dimensions. A beginner stitch refresher is available in the basic crochet guide, and a small handmade keychain project offers another compact gift idea.
Common questions
Can I use yarn scraps instead of fiberfill?
Yes. The instructions allow either fiberfill or leftover yarn scraps for the center. Use small pieces and distribute them inside the tube as you fill it so the pumpkin stays rounded.
Can I make this pumpkin larger?
This is a fixed mini version with 13 starting chains and 16 total rows. Changing those counts changes the proportions and has not been specified as part of this pattern. For a larger pumpkin, use a pattern written for adjustable sizing rather than assuming the mini instructions scale evenly.
Does the pattern include a key ring?
No. It makes the crocheted pumpkin and green stem. The instructions do not include keychain hardware or show how to attach a ring or clasp. You can add suitable hardware separately or keep the piece as a small fall decoration.
What does back loop only mean?
At the top of a stitch, find the two strands that form a V. Insert the hook under the strand farther from you and leave the near strand unworked. This is the back loop and it creates the narrow raised ridge on the pumpkin body.
A small make with a lot of fall character
This mini pumpkin gets its shape from a simple sequence: crochet one narrow strip, seam it into a tube, gather and stuff the ends, then draw in the sections. The green stem and curled vine add a bright finishing touch without making the body complicated. Keep the row count steady, watch the two single-crochet edges, and let the back-loop ridges guide the shaping. The result is a tiny handmade pumpkin that can decorate a shelf or become the crocheted charm on a keychain you finish with your own hardware.


