
· Sunday Crochet
In this pattern
01 · A big daisy with beautifully raised petals02 · Yarn & tools03 · Before you start04 · The pattern05 · Checks that save unpicking06 · Common questionsA big daisy with beautifully raised petals
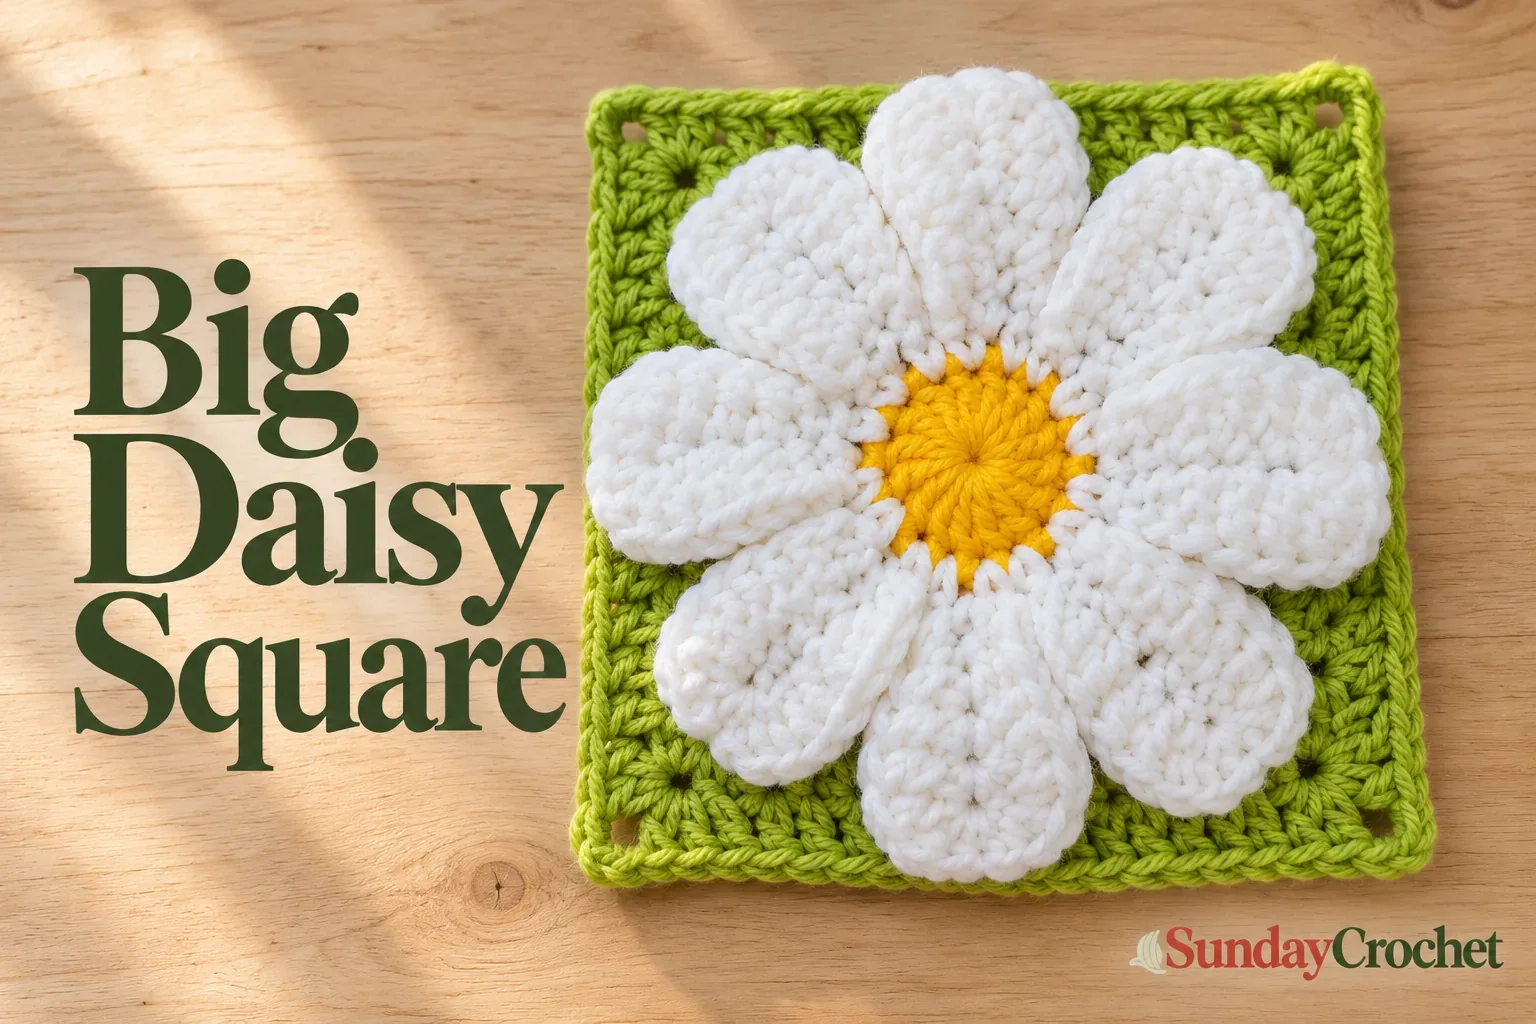
This large flower granny square puts the flower front and center: eight generous white petals surround a bright yellow circle, with a green square peeking out behind them. The petals have a raised, layered feel, but they become part of the square as you work. You don’t need to sew a separate flower onto a finished background.
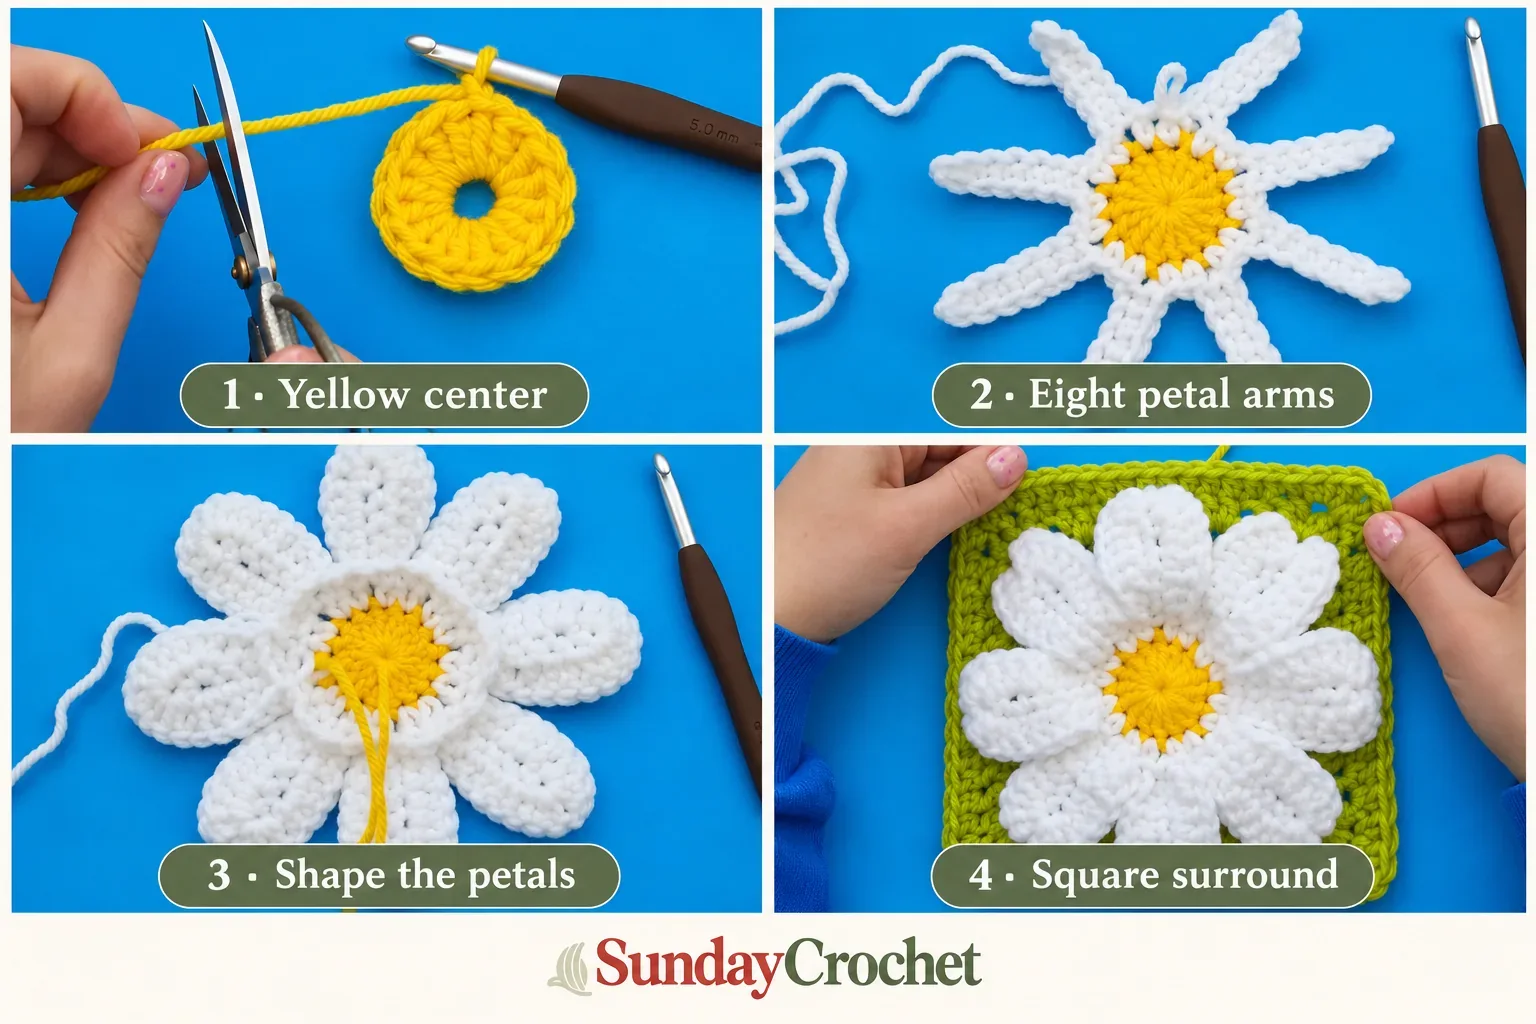
The construction is worth taking slowly. You’ll make a small center, add eight narrow arms, widen them into petals, and crochet chain loops behind the flower. Those hidden loops give the square its foundation. A later round catches the petal tips into the border, holding the flower in place while keeping its texture.
I’ll show you how I build each section and where I place the joining stitches. The individual stitches are familiar, but working behind the petals and through two layers needs a little extra attention. If you’re comfortable following repeats and checking where each stitch belongs, you can take this one round at a time.
Yarn & tools
You can use any yarn weight and a suitable hook. There is no fixed finished measurement, gauge, or yardage given for this motif, so make one square before planning a larger project. Its size depends on your yarn, hook, and tension; “large” describes the bold flower rather than a guaranteed number of inches.
Yellow, white, and green give the square a daisy-like appearance. You can change the colors while keeping the same stitch sequence. When choosing supplies, check the recommended hook information and yarn thickness together. The three colors need to work comfortably as one motif.
Before you start
These instructions use US crochet terminology. Work in joined rounds, keeping the front of the flower facing you except when you need to fold petals forward to reach the back. Don’t turn the work at the end of each round.
| Abbreviation | Meaning |
|---|---|
| ch | Chain |
| sl st | Slip stitch |
| sc | Single crochet |
| hdc | Half double crochet |
| dc | Double crochet |
| sp | Space |
For a standing sc, begin with a slip knot on your hook, insert the hook in the indicated stitch, draw up a loop, then yarn over and pull through both loops. For a standing dc, start with a slip knot, yarn over, hold the loops so they stay on the hook, insert into the indicated space, draw up a loop, then yarn over and pull through two loops twice.
A granny cluster here means three ordinary double crochets in one space. It isn’t a three-stitch decrease. The square rounds have no chain between neighboring clusters; the spaces you work into are the gaps between them. Corner spaces are made with ch 2.
The pattern
Round 1 — Make the yellow center
With yellow, make a magic ring and ch 2. Work 15 dc into the ring. Push the stitches around the ring as needed to make room.
Ignore the starting ch 2 when joining: sl st into the first actual dc. Ch 1, cut the yarn leaving a tail for weaving in, and pull it through. Tighten the magic ring to close the center.
There are 15 double crochets plus the starting chain. That starting area matters in the next round, so don’t try to add a sixteenth double crochet here.
Round 2 — Build eight petal arms
With white, put a slip knot on your hook. Find the yellow stitch where you joined, then move to the next stitch and make a standing sc. Sc in the following stitch.
Ch 7. Skip the chain immediately below your hook and sc in each of the remaining six chains, working back toward the yellow center. This makes the first narrow arm.
Continue around the center with this repeat:
- Sc in each of the next two yellow stitches.
- Ch 7.
- Skip the first chain beneath the hook; sc back along the other six chains.
After seven arms, the final pair of base stitches needs particular care. Sc in the remaining clear yellow stitch, then work the second sc into the joining area at the top where Round 1 was slip stitched. Make the eighth arm with ch 7 and six sc back down.
Sl st into the first white sc, then sl st into the second white sc. Count eight arms, each with six single crochets, before continuing. This extra slip stitch positions you beside the first arm for shaping.
Round 3 — Widen the arms into petals
Each petal travels up the unused side of an arm’s foundation chain, around its tip, and down the tops of its single crochets. Look for the small chain openings along the first side; those are separate from the stitch tops on the return side.
For each petal, work as follows:
- Into the first five chain positions, working upward: sc, hdc, dc, dc, 2 dc. The two dc share one chain position.
- Skip the chain at the very tip. Find the top of the first sc made when you came back down the arm in Round 2.
- In that sc, work 3 dc, ch 1, 3 dc, all in the same stitch.
- Down the remaining five sc stitches, work 2 dc, dc, dc, hdc, sc. Again, the first two dc share one stitch.
- At the yellow center, skip the first of the two base sc and sl st into the second.
Repeat around the arms, but finish the eighth petal differently. After its last sc, locate the slip stitch between petals at the beginning of this round. Instead of another ordinary joining slip stitch, work one sc around that slip stitch’s post from behind.
To do this, bring the hook from the back through one side of the slip stitch, then return it to the back through the other side. Yarn over at the back, draw the loop through that path, then yarn over and pull through two loops. Your working yarn is now behind the flower, ready to make the support loops.
Round 4 — Add the hidden chain loops
Ch 5. Fold the next petal forward and find the slip stitch between it and the following petal. Work a sc around the post of that slip stitch from behind, using the same hook path as at the end of Round 3.
Repeat ch 5, sc around the next separating slip stitch until you have gone around the flower. After the final ch 5, join to the sc that began this arrangement. Sl st into its top; joining into the adjacent starting chain loop is also an option if that is easier to reach.
Ch 1, fasten off, and leave a tail. Open the petals out again. Check for eight petals on the front and eight ch-5 loops on the back.
This is a good point to weave in the two yellow ends and two white ends. Pass the needle underneath stitches at the back without bringing it out through the front of the flower.
Round 5 — Begin the green square
With green, choose any ch-5 loop behind a petal. Make a standing dc in that loop, then 2 more dc in the same space. Ch 2 and work 3 dc back into that loop. You’ve made the first corner: 3 dc, ch 2, 3 dc.
In the next loop, work 3 dc for a side. In the following loop, work another corner. Continue alternating a corner and a side in the remaining loops, finishing with a side in the eighth loop.
Sl st into the standing dc to join. You should have four corners and four single side clusters. Fold petals forward whenever you need to see a loop clearly. The square is still mostly hidden from the front at this stage; turn it over to check the outline.
Round 6 — Grow the square
Ch 3; this counts as a dc. Move straight to the next corner ch-2 space and work 3 dc, ch 2, 3 dc in it.
Along the side, work 3 dc into each gap between clusters. There are two such side gaps before the next corner. Continue with a corner in every ch-2 corner space and a three-dc cluster in each side gap.
After the fourth corner, work 3 dc in the first gap on the final side. In the last gap, where the starting ch 3 comes from, work only 2 dc. Together with that chain, they complete the cluster. Sl st into the top of the starting ch 3.
Keep that last gap in mind: the round begins partway through a cluster, and you finish it only when you return.
Round 7 — Attach the petal tips
Ch 3, counting it as a dc, and move to the corner. This round keeps the granny-square structure while catching the ch-1 space at each petal tip.
At each corner, line up the petal resting over it. Work:
- One dc into the green corner space only.
- One dc through both the petal’s ch-1 tip space and the green corner space.
- One dc into the green corner space only.
- Ch 2.
- Repeat steps 1–3 in that same corner space, catching the same petal tip again.
The corner still contains two three-dc groups separated by ch 2. Only the middle dc of each group passes through the petal, so a corner petal is attached with two stitches.
Between corners, there are three side gaps. Work the first cluster normally: 3 dc in the green gap. At the middle gap, line up the next petal and work one dc into green only, one dc through both its ch-1 tip and the green gap, then one dc into green only. Work the third side cluster normally.
Repeat that corner-and-side arrangement around. On the final side, complete the last cluster with 2 dc beside the starting ch 3, then sl st into the top of that chain. Check all eight petals: four are attached at corners with two stitches each; four are attached at side middles with one stitch each.
Round 8 — Finish with a half-double-crochet edge
Ch 1; this does not count as a stitch. Hdc in the top of the starting ch 3 where you just joined, then hdc in each of the next three dc to reach the first corner.
In each corner ch-2 space, work 2 hdc, ch 2, 2 hdc. Between corners, work one hdc in the top of each of the 15 dc from Round 7. Work into stitch tops this time, rather than the gaps between granny clusters. Fold a side petal out of the way when it hides those tops.
After the fourth corner, continue along the unworked stitches to your starting point. The final two stitches go into the two dc made at the end of Round 7. Don’t mistake the joining slip stitch for another stitch, and don’t work into the starting ch 1.
Sl st into the first hdc. Before cutting the yarn, check for 19 hdc between each pair of corner ch-2 spaces: two from the previous corner, 15 across the old stitches, and two from the next corner.
Ch 1 and fasten off, leaving a tail. Weave in both green ends. Open out the petals, ease the corners outward, and arrange the flower with your fingers. The side petals naturally have a little curve; they don’t need to look completely flat.
Checks that save unpicking
The most useful checkpoints are the ones that keep later rounds predictable: eight arms after Round 2, eight petals and eight back loops after Round 4, then four corners in the square. Check the back whenever the flower hides the border.
If a petal looks uneven, compare its two sides before moving on. Both have the same progression of stitch heights in reverse order. The wide tip uses six dc separated by ch 1 in a single stitch; missing that shared placement changes its shape.
When joining petals, check the tip space before inserting your hook through the green background. Corner petals use that space twice; side petals use it once. The join replaces a normal dc in the cluster rather than adding an extra stitch. Keeping those totals unchanged is what makes the final 19-stitch edge work.
Common questions
Is this suitable for a first granny square?
I’d choose it once you can identify stitch tops, work a magic ring, and make basic crochet stitches comfortably. The challenge is seeing the attachment points behind the flower. A little time practicing the basic hook movements helps you focus on those placements when you tackle this larger motif.
Can I use a different yarn or color combination?
Yes. The rounds can be worked with any yarn weight and an appropriate hook, and the center, petals, and square can each be a different color. Make a sample to establish its finished size. This pattern gives no fixed yarn quantity or measurement to substitute directly.
Do I sew the petals onto the square?
No. Round 7 catches their ch-1 tip spaces as you crochet the green clusters. Four petals join at the corners and four at the middle of the sides. Weaving in the yarn ends is the finishing work; a separate sewing step for the petal tips isn’t needed.
Why is my flower hiding the square?
That is expected while the first green rounds sit behind the broad petals. Check the shape from the back, continue through the joining round, and finish the hdc edge. Arrange the petals afterward so the raised flower and its green frame both show.


