
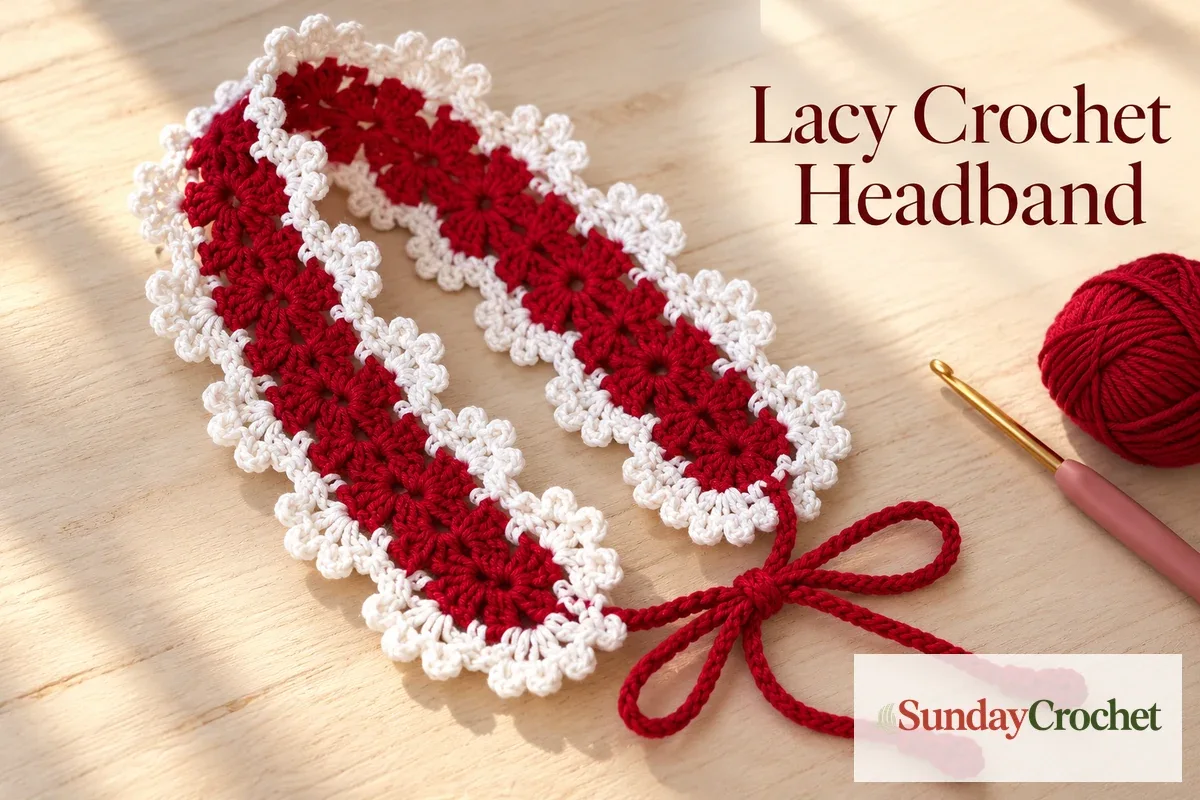
A red lace band with long ties creates an adjustable headband. · Sunday Crochet
In this article
01 · An adjustable headband built from lace motifs02 · Yarn & tools03 · Before you begin04 · The pattern05 · Fit, finishing, and color06 · Common questions07 · A light, adjustable finishAn adjustable headband built from lace motifs
This crochet headband combines two visual details that work well together: an openwork strip made from small paired clusters and long chain ties that fasten in a bow. The sample uses a red center, white decorative edging, and a red bow. The ties let you fine-tune the fit, while the repeated five-chain spaces keep the lace airy instead of dense.
I’ll show you how I do this. We’ll start with the small ring motif, work the sample’s 75-chain tie and 117-chain center, then build two passes of cluster groups around the foundation. I’ll keep the instructions in US crochet terms and call out which counts belong to the sample, so you can follow the stitch path without mistaking it for a graded size chart.
Yarn & tools
The exact fiber, weight, yardage, and hook size are not specified. Choose a smooth yarn that lets you see the loops clearly, and keep the hook consistent throughout the red section. If you are new to yarn labels, this quick guide to choosing a hook and yarn can help you match a yarn weight to a sensible starting hook. A white accent is visible in the styled sample, but the stitch count for that separate edge is not available here; the pattern below covers the red openwork body and ties.
Before you begin
The sample is constructed in one connected length: a small starting ring motif, 75 chains for the first tie, 117 chains for the center foundation, and a second 75-chain tie at the far end. Two markers help you find the important turning points. Put the first marker in the last chain of the 75-chain section, then the second in the last chain of the 117-chain section. These are placement markers, not extra stitches.
The counts are useful reference points, not a universal measurement. There is no gauge, finished circumference, or set of child and adult sizes, and yarn thickness and tension change how long each chain becomes. Before starting, measure the chain sections against the intended wearer. The tie bow gives some adjustment, but it cannot compensate for a center section that is far too short or too long. If you need to resize the center substantially, test a small repeat first and keep the marker and group placement symmetrical.
The written instructions use US terms. Ch means chain, sl st means slip stitch, dc means double crochet, and cluster here means two unfinished double crochets closed together. To make one dc, yarn over, insert the hook, pull up a loop, yarn over and pull through two loops, then yarn over and pull through the remaining two. For the cluster, pause before that final pull-through, begin a second dc in the same place, and close both unfinished stitches together.
If you want a quick refresher on the basic motions before beginning, these crochet foundation stitches cover chaining and double crochet. Keeping a simple written count beside you also helps; a pattern-reading reference explains common abbreviations and repeat marks.
The pattern
Round 1
Begin with a magic ring. Chain 2, then work 4 dc into the ring. Chain 3 and slip stitch to finish the first small loop; chain 3 and slip stitch again to complete the little starting motif. Pull the ring snug. This motif anchors the beginning of the continuous headband length.
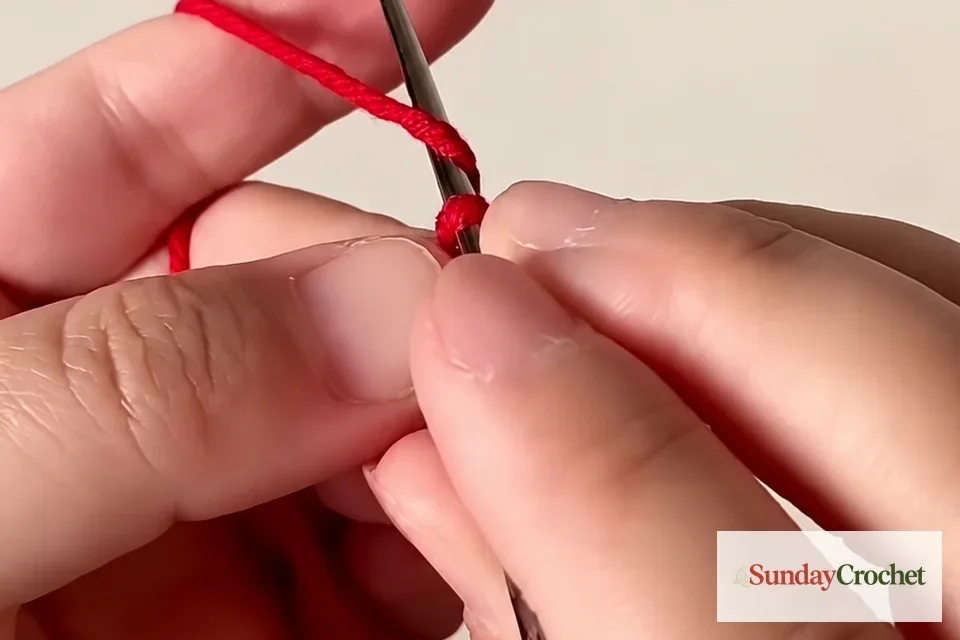
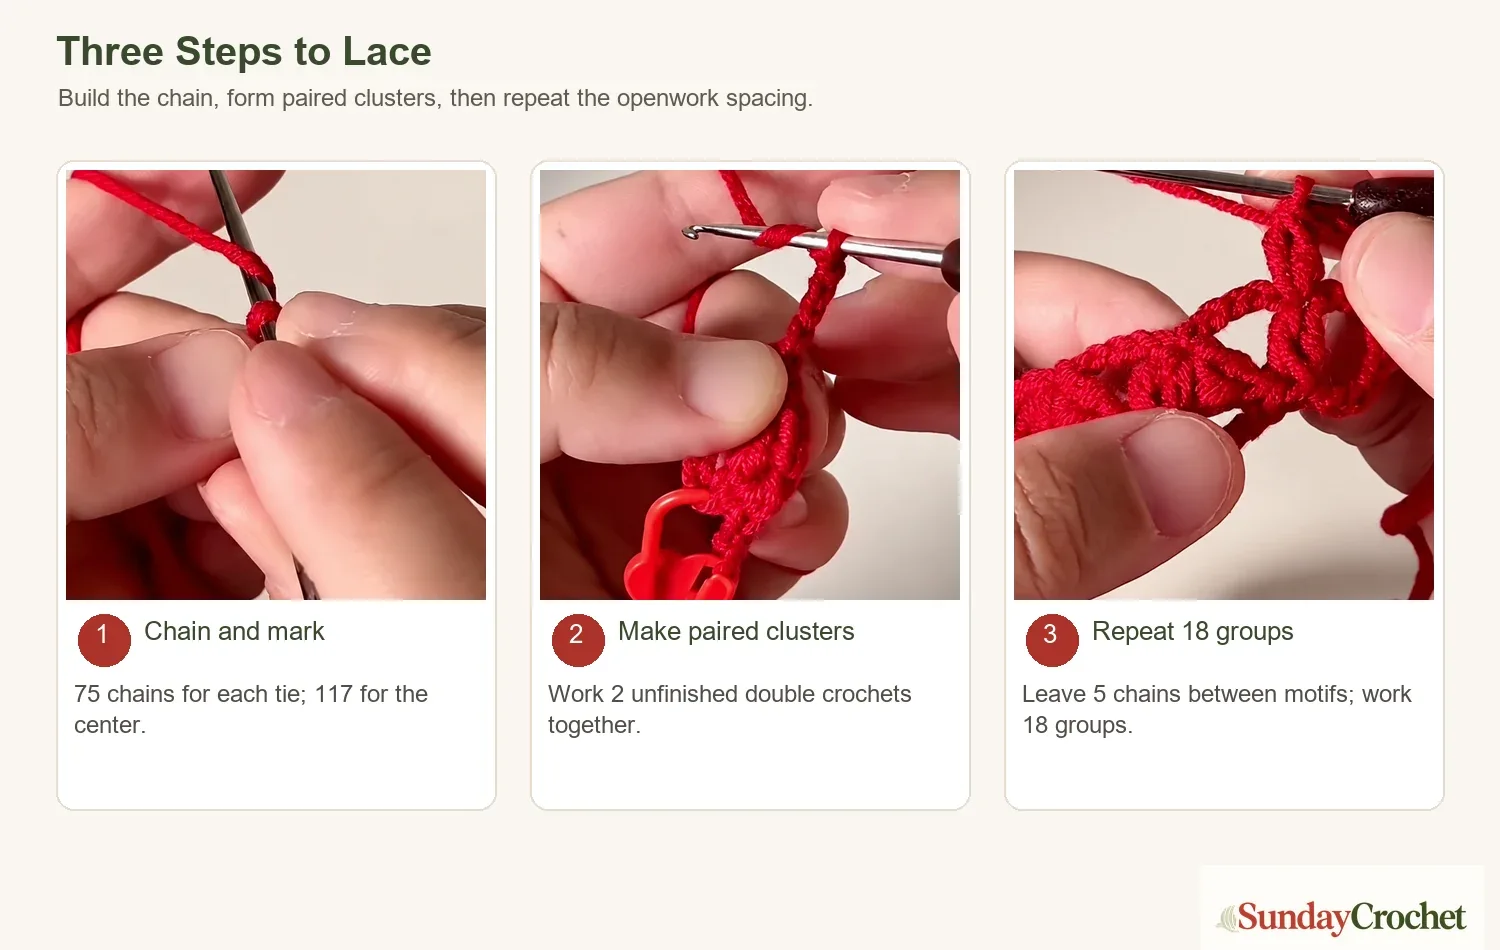
From the starting motif, chain 75 for the first tie and place a marker in the final chain. Chain 117 for the center and mark its final chain with the second marker. Then chain 8 to set up the first cluster. These are sample counts. Keep your chains loose enough for the hook to enter them later, but even enough that the foundation does not ripple.
Yarn over and work back into the eighth chain from the hook. Make one unfinished dc: yarn over, insert the hook, pull up a loop, yarn over and pull through two loops, leaving the last two loops on the hook. In the same chain, begin a second unfinished dc. You will have three loops on the hook after pulling through the first two loops of that second stitch. Yarn over and pull through all loops. That closes the pair into one two-dc cluster.
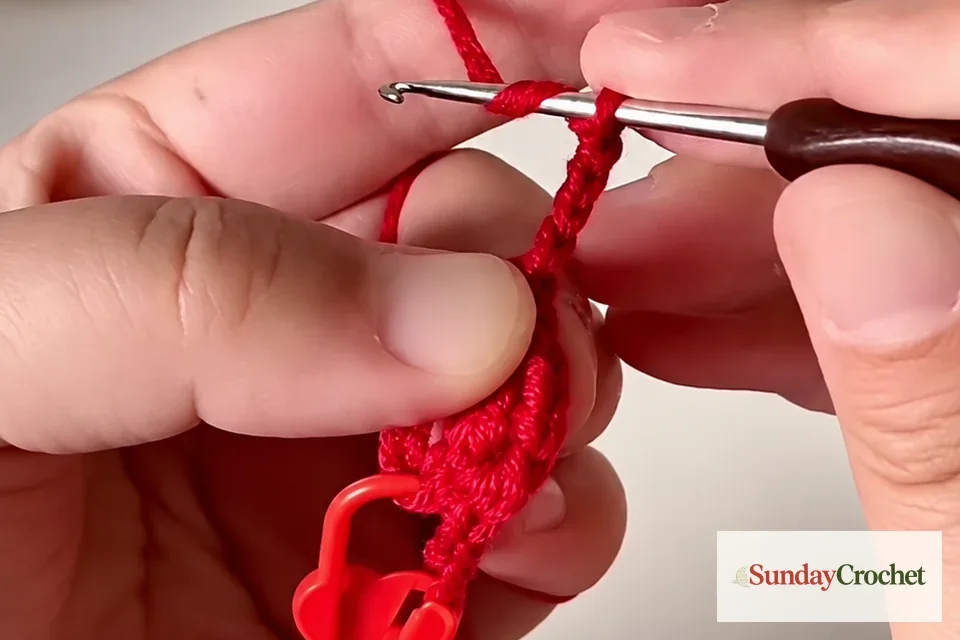
For the next cluster, skip 5 chains and work into the sixth. Make the same two-dc cluster, then chain 5. Work another cluster to make a paired motif group. Continue along the foundation, leaving 5 chains between motifs, until you have 18 groups. Keep the paired structure consistent so the open spaces line up along the long center section.
The repeated counts give you a useful checkpoint. After the first few groups, pause and make sure the clusters sit on the intended chain positions and the five-chain gaps remain open. Count by groups rather than trying to count every loop in the row: 18 paired groups should span the marked center section. If you reach the marker early, check for a missed group or a skipped chain count before continuing.
After the 18 groups, make one more cluster, skip 5 chains, and work a cluster into the next point. Then make the corner that turns the work toward the opposite side of the foundation: chain 7, slip stitch into the marked point, chain 7 again, then make a cluster in the point directly opposite. This forms the first corner and gives the next pass room to sit beside the first rather than bunching into it. Keep the chains relaxed; pulling them tightly makes the turn curl.
Round 2
Work the same cluster motif into the spaces from the previous pass. Leave 5 chains between clusters and repeat the paired group until you have 18 groups again. The second pass mirrors the first along the marked center. Check the spacing as you go: each new cluster should land in an open space, not split a cluster or close the lace gap.
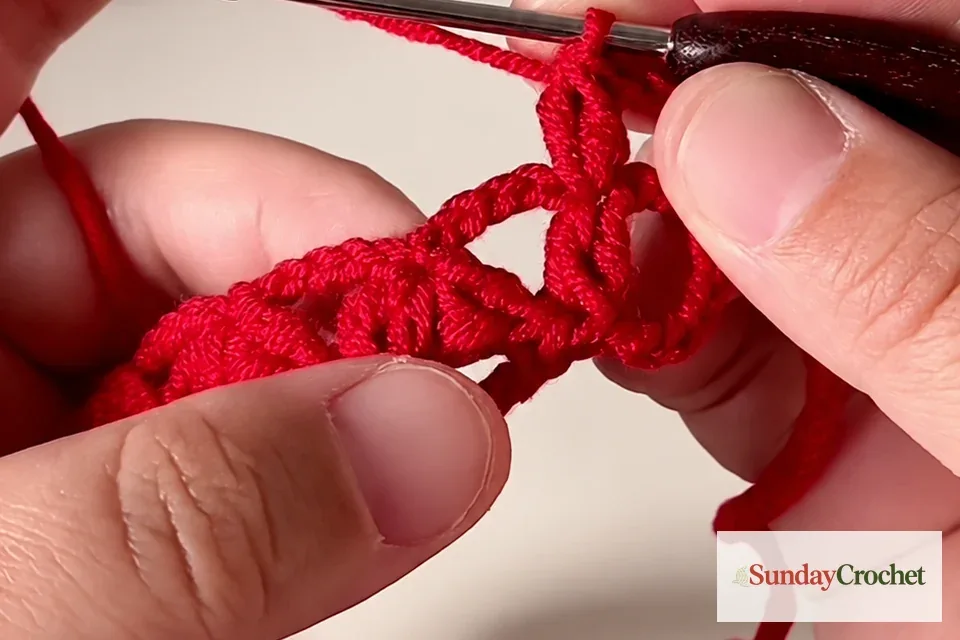
When you reach the marker, work a cluster at that marked point. Chain 7, slip stitch at the corner, then chain 7 again. Chain 75 for the second tie and use the first tie as your length reference. Keep both tie sections as even as possible; the pattern does not call for an additional turning count after this final chain section.
Fit, finishing, and color
Before fastening off, lay the band flat and compare both ties. They should be close in length so the bow sits near the center when tied. Try the headband around the intended wearer without pulling the lace; snug the ties into a bow and check that the openwork center covers the area you want. If the ties feel too short, the written sample’s 75-chain length may not suit your yarn or tension. For a new attempt, adjust the tie length evenly at both ends and note the count you use.
The main body is easiest to inspect while it is flat. Look for 18 groups on each pass, consistent five-chain gaps, and two clear corners at the marked end. If one side waves, compare your chain tension and the number of groups rather than tugging the fabric into shape. If the center narrows, you may have missed a cluster space; if it puckers at a corner, loosen the seven-chain turn on your next pass.
The finished styling uses a red body with white scalloped edging. Since no dependable stitch-by-stitch edging count is available, I have not added guessed border directions to this pattern. You can work the red band in one color for a clean look, or plan a contrast edge separately once you have a repeat that fits these clusters and corners. For a two-color version, leave a tail long enough to weave in securely wherever you change colors, and check that the edging does not pull the openwork out of shape.
When the fit and motif count look right, fasten off and weave in the loose ends with a yarn needle. Secure the starting ring and any color changes so they do not loosen with wear. Do not trim the tails close until you have checked the reverse side and tugged the join gently. The ties are meant to be tied and untied, so keep their finishing smooth and comfortable against the skin.
Common questions
How many chains does the sample use?
It uses 75 chains for the first tie, 117 chains for the center foundation, and 75 chains for the second tie. The setup also includes an 8-chain section before the first cluster and seven-chain corner turns. These counts reproduce the demonstrated sample sequence; they are not measurements that guarantee the same fit in every yarn.
How many groups should I make?
Work 18 paired motif groups on the first pass and 18 on the second. Each group pairs two clusters with a five-chain space between them. Use a stitch marker and count groups as you work so the two sides remain balanced.
What is the two-double-crochet cluster?
It is a pair of unfinished double crochets closed with one final yarn over and pull-through. Start the first dc and stop before its last pull-through. Begin a second dc in the same stitch or space, stop at the same point, then pull through all remaining loops. This groups the stitches into one raised motif.
Can I use another yarn or hook?
The instructions do not specify a yarn weight or hook size, so you can choose a yarn you like and use the hook suggested on its label as a starting point. Make a small sample of the cluster and five-chain spacing first. If the fabric feels stiff or the hook is difficult to insert, try a larger hook; if the gaps look oversized and floppy, try a smaller one. Keep the same pairing and spacing when you make the full band.
Does this include the white scalloped border?
The finished styling shows a white edge, but there is not enough stitch-count information to give a reliable border repeat here. The directions above cover the red openwork band and chain ties. Add a separate edging only after checking that its repeat fits the band evenly.
A light, adjustable finish
This headband gets its character from a modest set of repeats: a small starting ring, a long chain foundation, paired two-dc clusters, and five-chain spaces. The sample’s 75-chain ties make a bow closure, while its 117-chain center and 18 groups per pass give you clear counting checkpoints as you work. Take time to mark each section and keep the two passes aligned; those small checks make the lace neater and the fit easier to judge. Once the ends are secured, the openwork band is ready to tie on and wear.


