
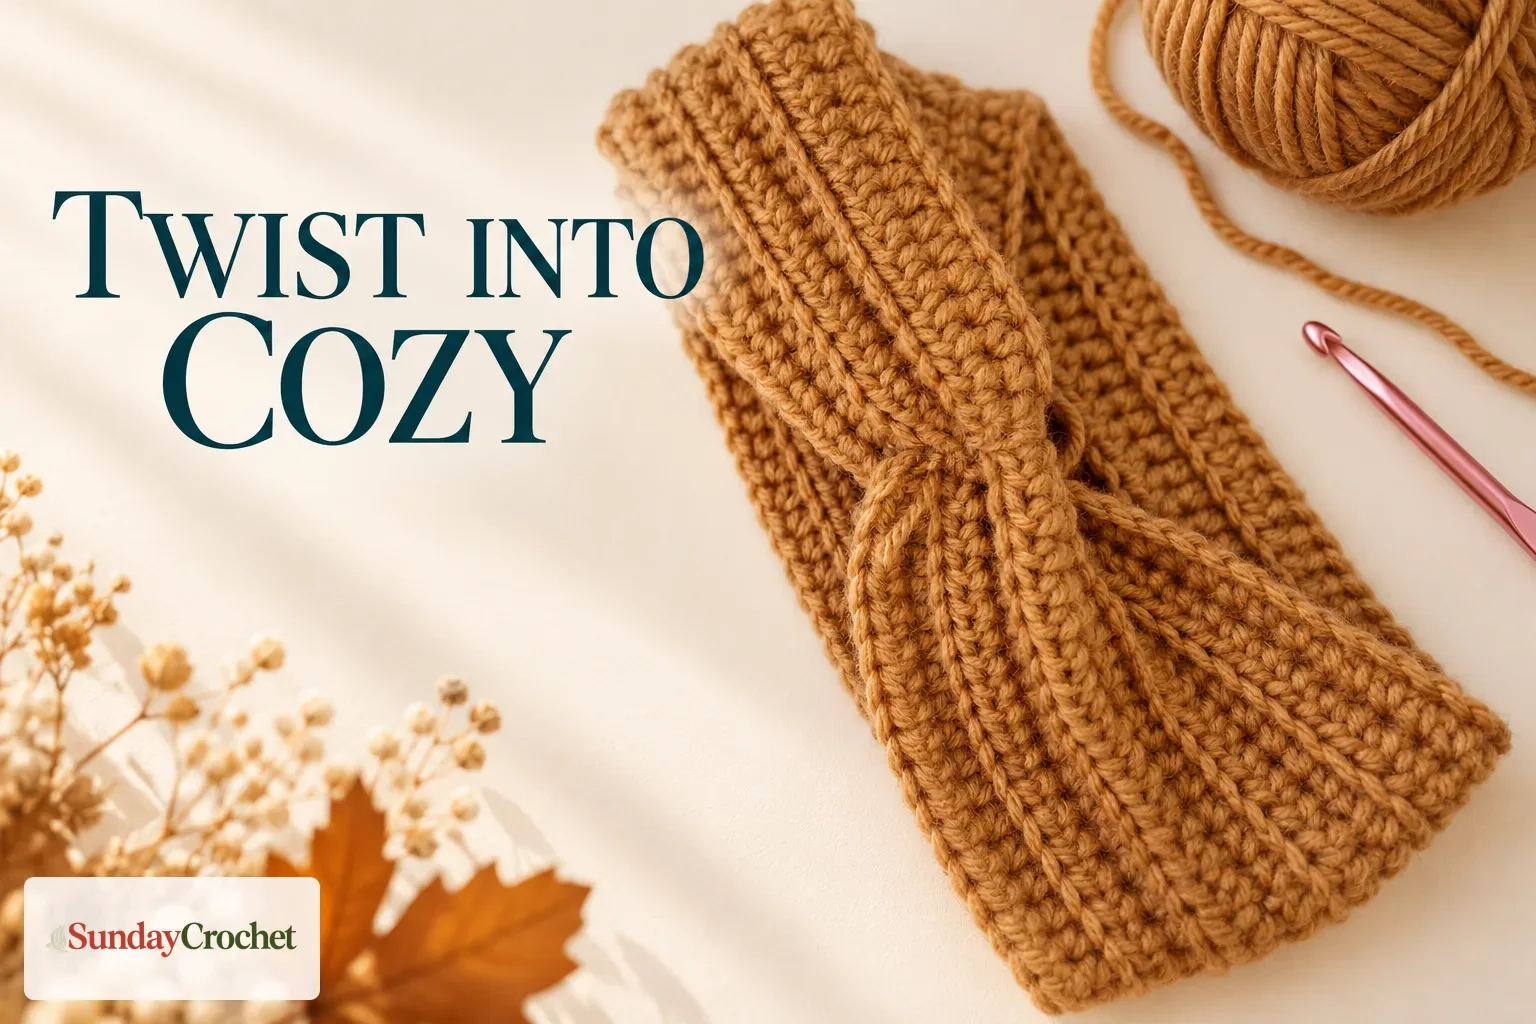
A simple ribbed rectangle becomes a cozy twisted ear warmer. · Sunday Crochet
In this article
01 · A simple ribbed rectangle, finished with a twist02 · Yarn & tools03 · Before you begin04 · How to crochet the twisted headband05 · Fit and finishing checks06 · Common questions07 · A cozy finish from a simple stripA simple ribbed rectangle, finished with a twist
A twisted crochet headband looks polished, but the fabric begins as a straightforward rectangle. Half double crochet stitches worked through the back loop create the stretchy, knit-like ribs, and a folded seam at the center turns the strip into a cozy ear warmer. Because the length is measured around the wearer’s head and the width comes from the number of rows, you can adapt the fit instead of relying on one fixed size.
I’ll show you how I do this. We’ll make a comfortable foundation chain, build the ribbing without changing the stitch count, and shape the twist by folding and sewing the ends together. The stitch itself is beginner-friendly, and you can check the fit as you go.
Yarn & tools
The amount of yarn is not specified, so have enough on hand to make a band in your chosen size. The yarn-weight guide can help you identify worsted yarn if you are still learning the label terms. If you are brand new to making a slipknot and foundation chain, the first-stitches guide covers those basics.
Before you begin
This is an adjustable tutorial rather than a fixed-count pattern. You choose the length of the starting chain by trying it around the intended wearer’s head, then choose the band’s width by repeating rows until you like the coverage. The sample chain measures about 18½ inches and the sample band uses 11 rows, but those are examples, not required counts. Different yarn, tension, hook, and fit preferences can change what feels comfortable.
The stitches below use US terminology. HDC means half double crochet. To make one, yarn over, insert the hook into the indicated stitch, yarn over and pull up a loop so three loops sit on the hook, then yarn over and pull through all three loops. BLO means back loop only: of the two loops forming the little V at the top of a stitch, work into the loop farthest from you.
How to crochet the twisted headband
Step 1: Make a foundation chain that fits
Begin with a slipknot on your 5 mm hook. Chain until the strand can wrap comfortably around the wearer’s head. Check it against the head as you work rather than aiming for a universal number. It should feel secure without pulling tightly or hanging loose. The strip will become the circumference of the headband, so this first fit check matters more than matching the sample measurement.
Take care not to pull the chain so tightly that it becomes difficult to work into. If you tend to chain firmly, pause and compare the foundation with the wearer a few times. You can add chains while the working loop is still on the hook. Once it fits comfortably, note that this starting length is your guide for the rest of the band.
Step 2: Work the first row
For Row 1, make one HDC in each chain, beginning in the second chain from the hook. Yarn over, insert the hook, pull up a loop, then yarn over and draw through all three loops. Repeat in every chain to the end. This gives you the first row of the rectangle.
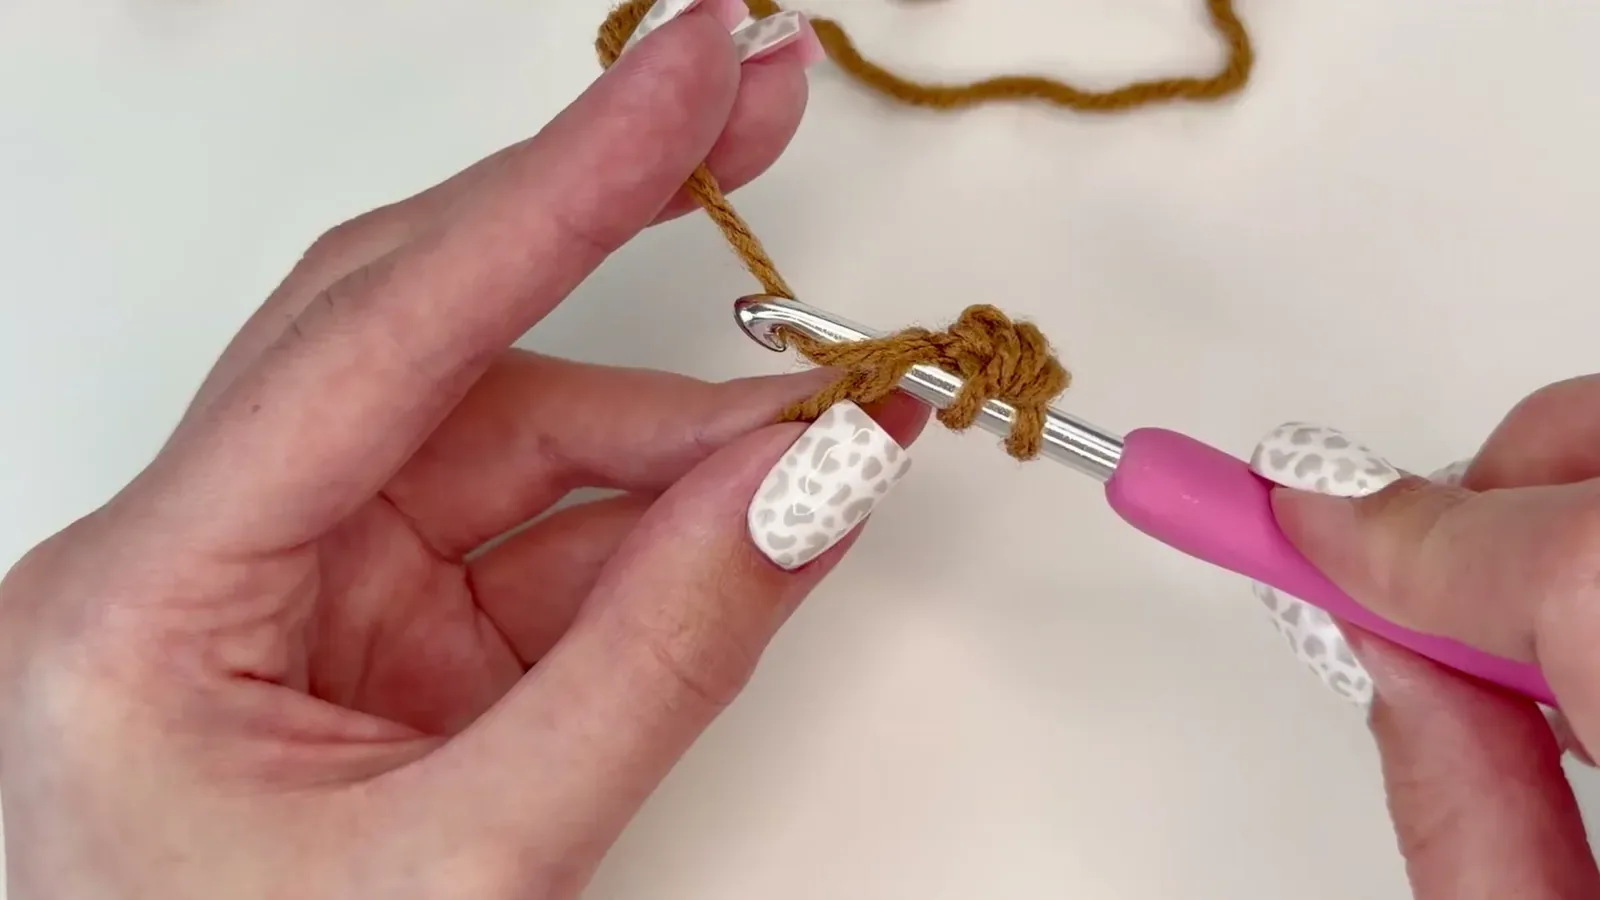
The starting strip may curl a little while it is short. That is okay; flatten it gently as you work or let the following rows settle it. What matters now is that you have worked into every chain and can identify the top V-shaped loops along the row.
Step 3: Build the ribbed fabric
At the end of each row, chain one and turn. This turning chain gives you height to begin the next row; it does not count as a stitch. For Row 2, make one HDC in the back loop only of every stitch across. Find the two loops at the top of each stitch and insert your hook beneath the loop farthest from you, then complete the HDC as usual.
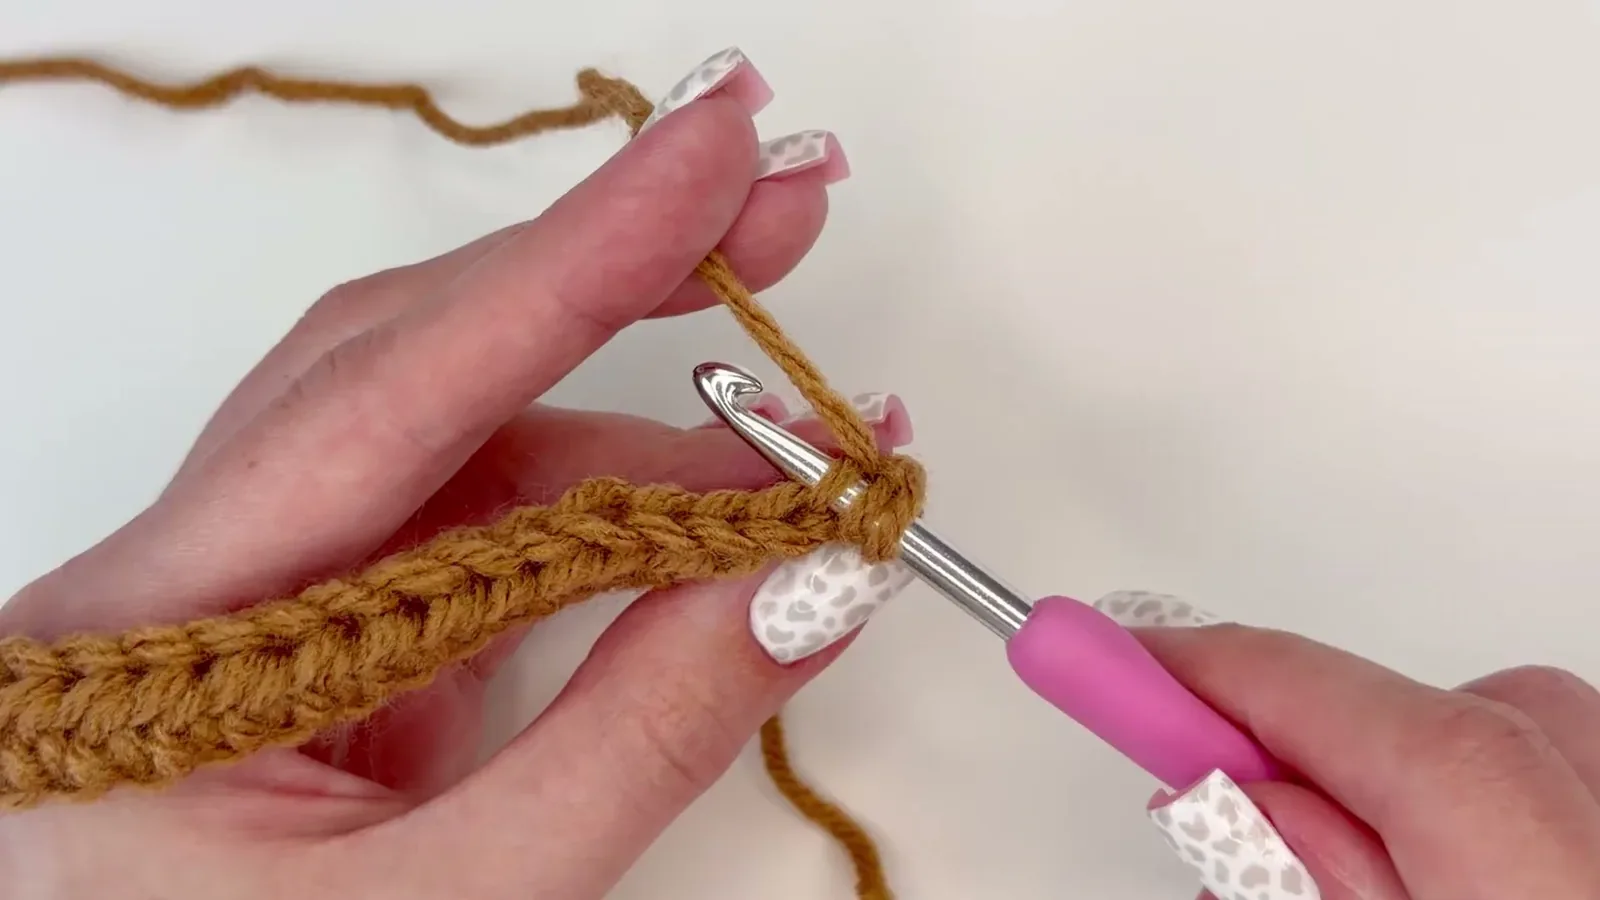
Keep the same stitch count in every row. Work the final stitch at the end of the row, which can be easy to miss. If the rectangle begins narrowing, check whether that last stitch was skipped. After Row 2, repeat the same sequence: chain one, turn, and work one HDC through the back loop of every stitch. This repeated back-loop texture makes the fabric look ribbed and gives the band flexibility.
Step 4: Choose the width
Continue repeating the ribbed row until the strip looks as wide as you want the headband to be. The number of rows controls the width, not the fit around the head. The sample uses 11 rows, but you may prefer fewer or more. Fold the strip in half to preview the coverage before you fasten off. This quick check helps you decide whether you want a narrower band or more warmth over the ears.
Because the tutorial does not give a gauge or a fixed row count for every size, use the actual fabric as your guide. Keep your rows even and check that the edges stay straight. A steady stitch count prevents the strip from tapering as it grows.
Step 5: Fold the ends into a twist
When you are happy with the width, chain one, cut the yarn with a long tail, and pull that tail through the final loop to fasten off. Thread the tail onto your tapestry needle. Bring the two short ends together and fold each end in half. Layer the folded ends over and through one another so the folds interlock and create openings on either side of the center.
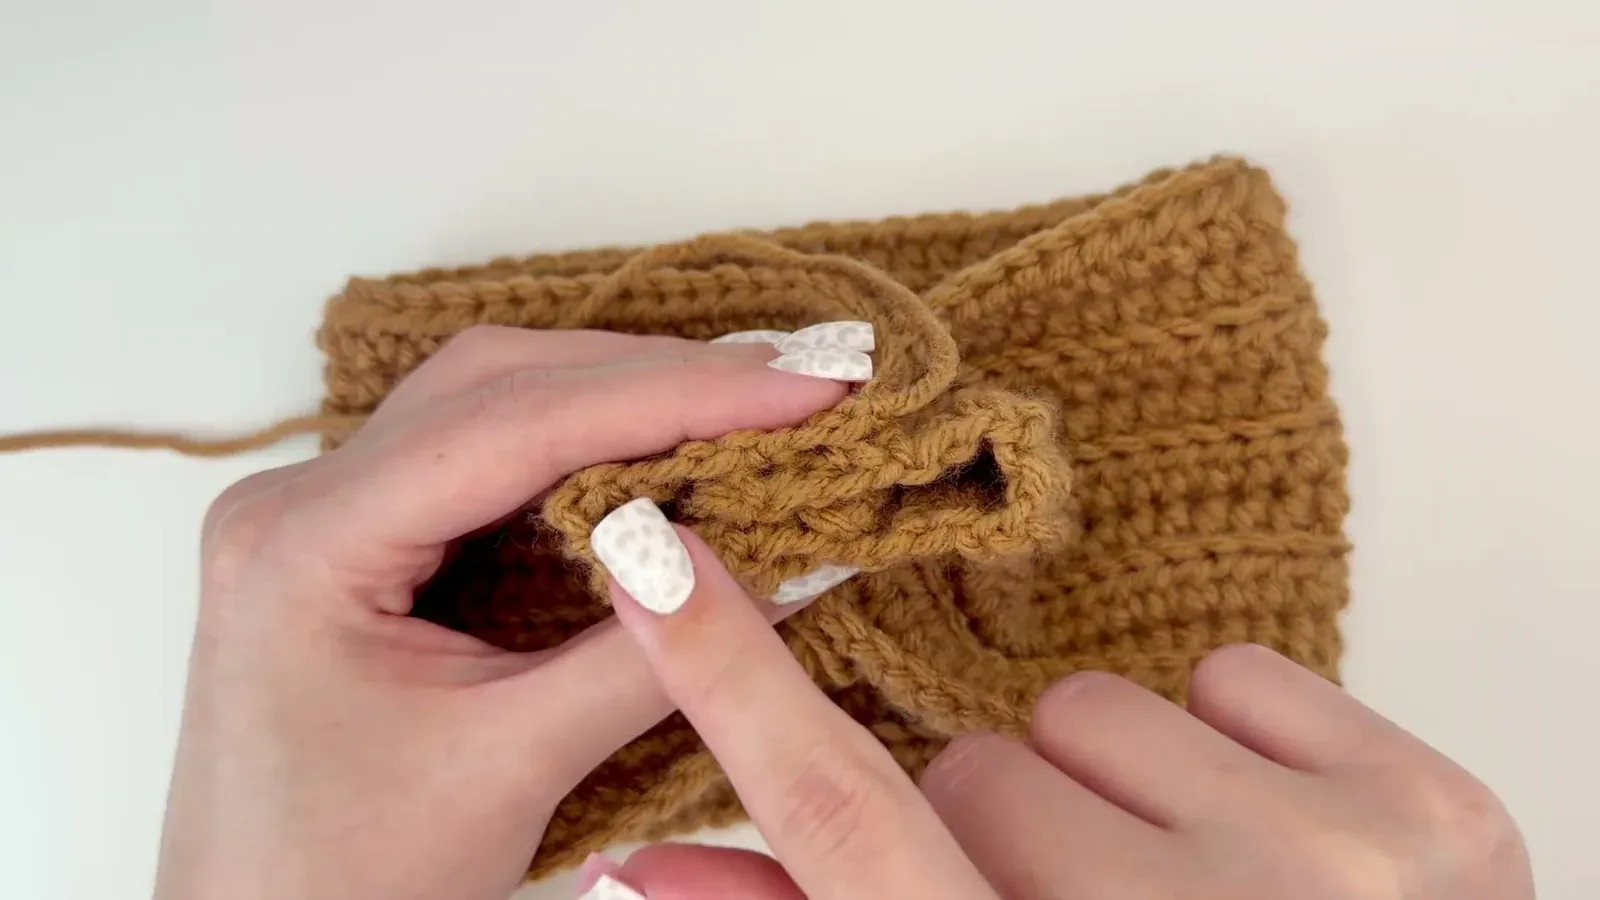
Take a moment to arrange the layers before sewing. Keep the long edges of the band from twisting around themselves, and make sure the visible ribbed side will face outward when the headband is turned right side out. The exact overlap is what creates the twist, so hold the folds in place and inspect the shape from the front before you secure it.
Step 6: Sew the center and close the openings
With the long yarn tail, sew across all the folded layers where they meet at the center. The stitches do not need to be decorative because they will sit inside the gathered twist, but they should catch every layer and hold them securely. Avoid pulling so hard that the fabric puckers unevenly.
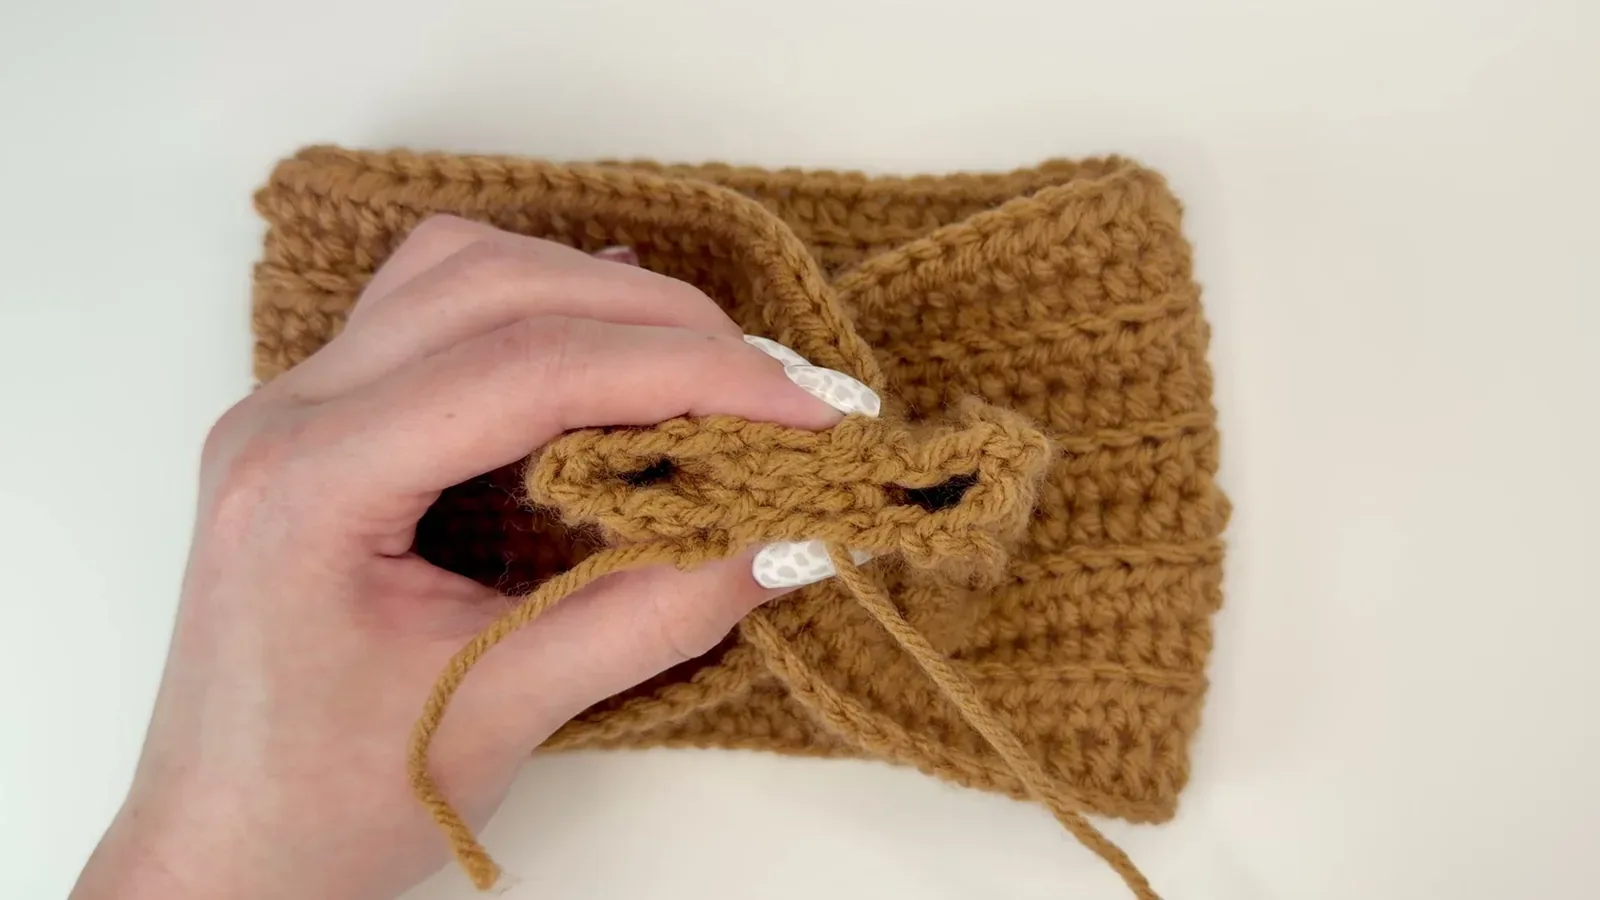
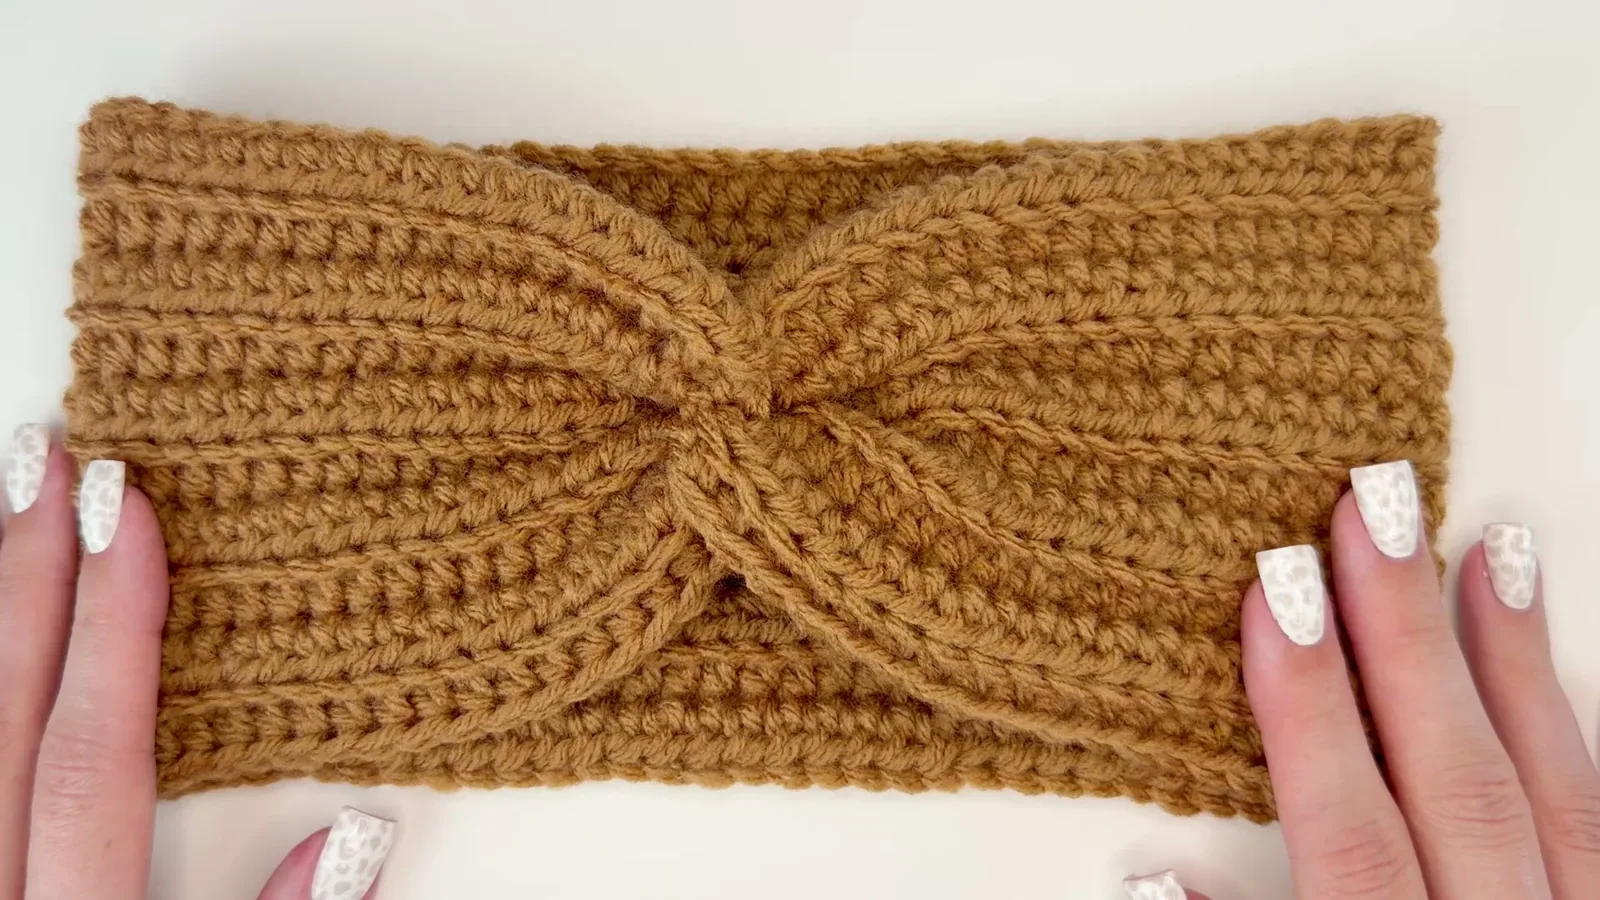
Once the center is secured, flatten the piece and look for the two remaining openings. Sew around the edges of each opening to join them into a continuous band. Tie off the yarn, trim it, and weave in the remaining tails. Finally, turn the headband inside out so the seam and gathered join are tucked away and the twist sits neatly at the front.
Fit and finishing checks
Before you weave in every tail, try the headband on. The band should sit comfortably around the head and cover the ears to the extent you intended. If the circumference feels too tight, the starting chain was too short; if it feels loose, it was too long. Since the band is already joined, it is easiest to catch this before the finishing ends are hidden.
Look at the center from both sides. The folded layers should be securely sewn, the twist should sit at the front, and the remaining openings should be closed so there is no gap through the band. If the center feels loose, add a few stitches through the same layers rather than pulling the existing seam into a hard knot. Weave the yarn tails through the nearby stitches so they are secure and unobtrusive.
The ribbed fabric is meant to flex, but the exact amount depends on your yarn and tension. If you are choosing a different fiber, consider how its feel and care suit an accessory worn against the skin; this fiber comparison explains the trade-offs without requiring you to use the sample yarn.
Common questions
Can I make this headband for a child?
Yes. The construction is made to measure. Use the intended wearer to check the foundation chain, then make the rectangle as wide as you prefer. No age-based stitch count is supplied, so fitting as you go is more reliable than guessing a number.
How many chains should I make?
There is no one chain count for every head. Chain until the foundation wraps comfortably around the wearer without squeezing or sagging. The sample is about 18½ inches long, but your yarn, hook, and tension may produce a different result.
How wide should I make the band?
Choose the width by repeating the back-loop rows and folding the rectangle to preview its coverage. The sample uses 11 rows. Treat that as a reference rather than a required count.
Why is my rectangle getting narrower?
The last stitch at the end of a row is easy to overlook. Make sure you work one HDC into every stitch and keep the stitch count the same from row to row. The turning chain does not count as a stitch.
What makes the knit-like ribbing?
Working each HDC through the back loop only leaves the front loops visible as ridges. Repeating that technique in every row creates the vertical ribbed texture.
A cozy finish from a simple strip
This headband is a satisfying project because the fabric stays simple while the finish gives it a little character. Fit the chain around the wearer, repeat the same back-loop row to the width you like, and take your time arranging the folded layers before sewing. The caramel sample makes a warm autumn accessory, while a different color can give the same shape a completely different feel. Once the seams are secure and the tails are woven in, your handmade twisted ear warmer is ready to wear.


