
· Sunday Crochet
In this pattern
01 · A cheerful square with a stitched-on smile02 · Yarn & tools03 · Pattern notes04 · The pattern05 · Embroider the smile and eyes06 · Finish the back before using the square07 · Common questionsA cheerful square with a stitched-on smile
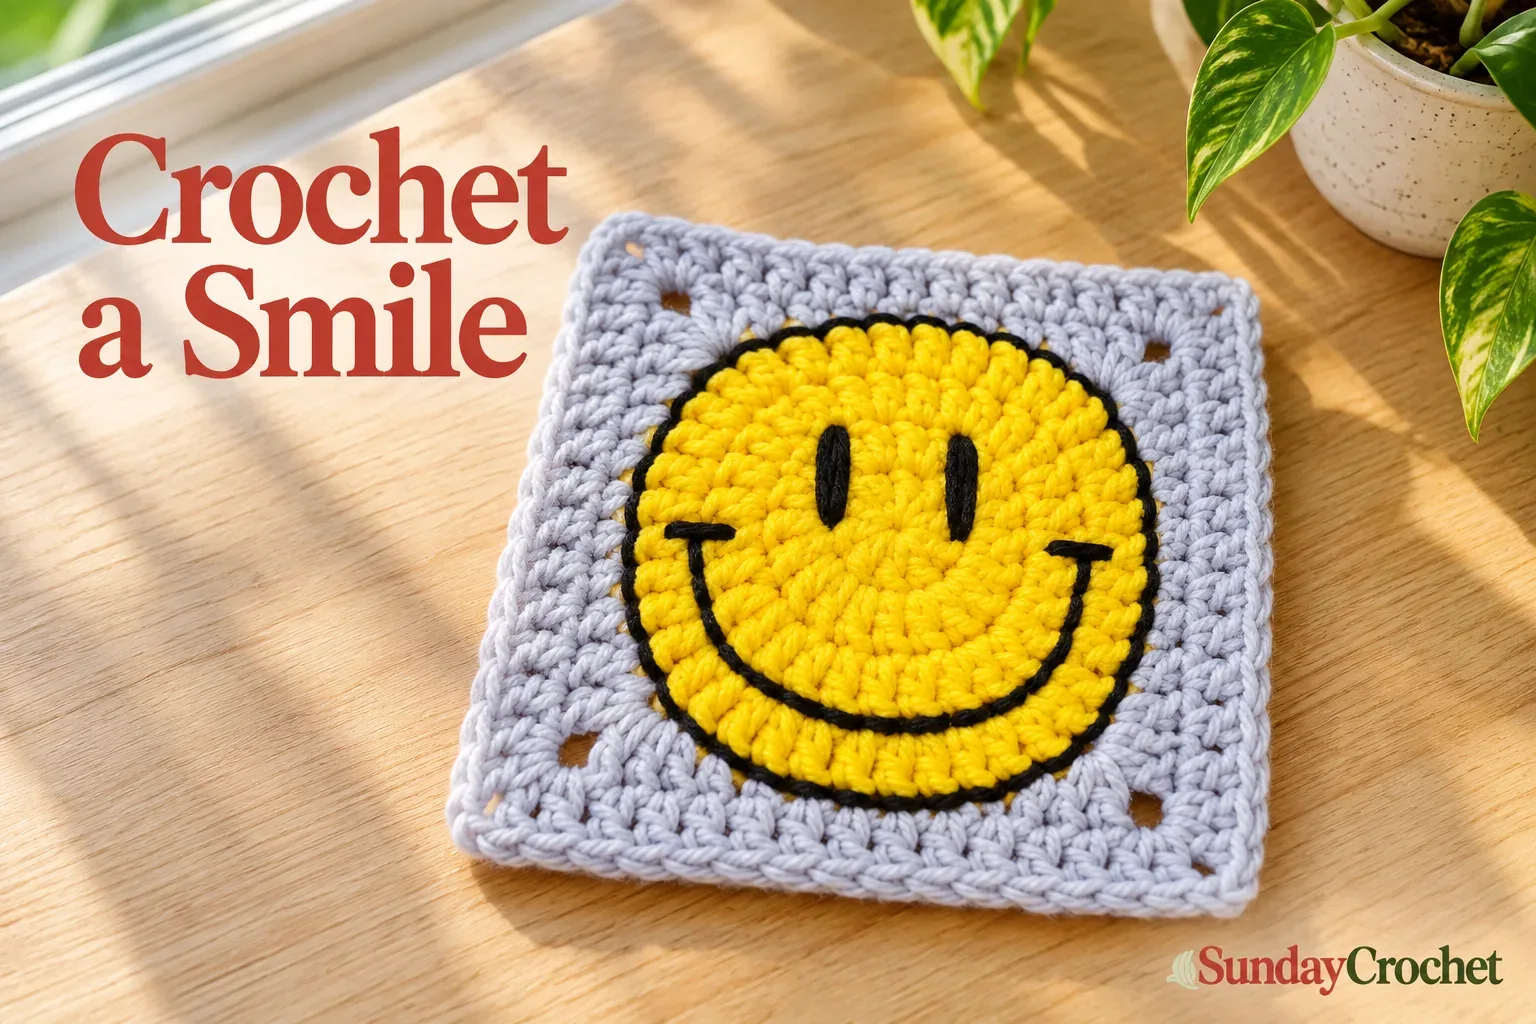
A bright yellow circle, two black eyes, and a wide curved smile are enough to give this crochet smiley face granny square its character. The pale border turns the round center into a square you can use independently or include in a larger project. The face is embroidered after the crochet is finished, so you can concentrate on shaping first and expression afterward.
There is one finishing detail to plan before starting: the embroidered version needs a backing if you want a neat reverse. The black threads travel across the back as you make the features. A fleece-backed blanket is one way to cover them; for another project, consider how its lining will conceal those threads before committing to this version.
I’ll show you how I build the circle, turn it into a square, and add the smile. You’ll use joined rounds, regular increases, and different stitch heights to form the corners. If you are still getting comfortable with the basic hook movements and turning yarn into stitches, practice those first so the shaping feels easier to follow.
Yarn & tools
There is no specified yarn brand, weight, hook measurement, yardage, finished measurement, or gauge for this square. Choose yarn and a compatible hook together rather than treating the photo as a size reference. Keep the circle and border yarns similar in thickness so the transition between them is manageable.
Yellow, pale gray, and black match the sample. You can change the border color without changing the stitch sequence. A strong contrast between the face and the embroidery helps the expression stand out. Before starting a larger set, check the fiber content and care information on your yarn labels so the materials make sense together for the project you have in mind.
Pattern notes
This pattern uses US terminology. Work around the motif in joined rounds without turning. Increase means work two stitches into the same stitch. Read each repeat as an action followed by its destination: “2 dc in the next stitch” puts both double crochets into one stitch; “1 dc in each of the next two stitches” uses two separate stitches.
| Abbreviation | Meaning |
|---|---|
| ch | Chain |
| sl st | Slip stitch |
| sc | Single crochet |
| hdc | Half double crochet |
| dc | Double crochet |
| st(s) | Stitch(es) |
The starting ch 3 in Round 1 counts as the first dc. In the next yellow rounds, the starting ch 2 also counts as a dc. Include that chain in the total; do not add an extra stitch because it looks different from its neighbors. The joining slip stitch closes the round and is not an extra dc.
At the join, the next stitch can look stretched. Catch both top loops rather than ignoring it. Count before closing each round, while an extra or missed increase is still easy to find. If repeats tend to blur together, reading the repeat as one small group of actions can make the counting less tiring.
The pattern
Round 1 — Start the yellow center
With yellow, make a magic ring. Ch 3, then work 9 dc into the ring. Together with the starting chain, that gives 10 stitches.
Check that you have nine actual dc and the ch 3 before joining. Sl st into the top of the starting ch 3. Pull the ring's tail to close the center. Keep that first join identifiable: it is where the next round begins.
Round 2 — Increase in every stitch
Ch 2 and work 1 dc back into the same place as the join. The chain and that dc make the first two-stitch increase. Work 2 dc in each remaining stitch around.
You should have 20 stitches, including the starting ch 2. Sl st into the top of that chain to join. Check the stretched stitch beside the beginning carefully; it still needs its pair of dc.
Round 3 — Alternate an increase and one dc
Ch 2 and work 1 dc in the same stitch. Work 1 dc in the next stitch. Continue [2 dc in the next stitch, 1 dc in the next stitch] around.
Each repeat makes three stitches over two stitches of the previous round. You will finish with 30 stitches, counting the starting chain. Sl st into the top of the ch 2 to close.
Round 4 — Leave two plain stitches between increases
Ch 2 and work 1 dc in the same stitch. Work 1 dc in each of the next two stitches. Continue [2 dc in the next stitch, 1 dc in each of the next two stitches] around.
Think “two, one, one” for the number of dc placed in consecutive stitches. Each repeat produces four dc. Finish with 40 stitches, including the chain, and sl st into the top of the starting ch 2.
Ch 1, cut the yellow yarn leaving a tail for weaving in, and pull it through to fasten off. Secure the magic-ring tail by passing it under stitches on the back a couple of times, without bringing it through the front. Tuck the other yellow tail through a few stitches for now. Leave the stitch tops clear and finish securing that tail after the embroidery.
Round 5 — Turn the circle into a square
With the border color, put a slipknot on your hook. Find the starting ch 2 of Round 4, then move to the next stitch. Work a standing dc there: yarn over, insert under both top loops, pull up a loop, then pull through two loops twice. Hold the loops on the hook so they do not spin off.
In that same stitch, work 1 more dc, ch 2, and 2 more dc. Including the standing dc, this makes (2 dc, ch 2, 2 dc) for the first corner.
Work the following side across the next nine stitches:
- 1 dc in the next stitch.
- 1 hdc in the next stitch.
- 1 sc in each of the next five stitches.
- 1 hdc in the next stitch.
- 1 dc in the next stitch.
In the next stitch, work (2 dc, ch 2, 2 dc) for the next corner. Repeat the side and corner sequence until you have four corners, then work the last nine-stitch side back to the beginning. Sl st into the top of the standing dc, keeping its slipknot behind the work.
The shorter sc flatten the middle of each side; the taller stitches build up toward the corners. You now have 13 stitches between neighboring corner chain spaces: two from one corner, the nine side stitches, and two from the next corner.
Round 6 — Add a half-double-crochet border
Ch 1; it does not count as a stitch. Work 1 hdc in the same stitch as the join, then 1 hdc in the next stitch. Mark the first hdc if helpful.
In the corner ch-2 space, work (2 hdc, ch 2, 2 hdc). Work 1 hdc in each of the next 13 stitches, then repeat that corner and side sequence around. Pull each corner group aside if it hides the first stitch of the following side.
After the fourth corner, work 1 hdc in each of the 11 remaining stitches; the first two were worked at the start. Sl st into the first hdc itself, ignoring the starting chain and previous joining slip stitch. There are now 17 stitches between corner chain spaces.
Round 7 — Finish with single crochet
Ch 1 without counting it. Work 1 sc in the same stitch, then 1 sc in each of the next three stitches. In the corner ch-2 space, work (1 sc, ch 2, 1 sc).
Work 1 sc in each of the 17 stitches along the next side. Repeat the smaller corner and 17-stitch side sequence around. After the fourth corner, work the 13 remaining sc to return to the beginning. Sl st into the first sc.
Ch 1, cut the yarn with a long tail for weaving in, and pull it through to fasten off.
You have 19 stitches between corner chain spaces. These per-side counts are useful checks: 13 after Round 5, 17 after Round 6, and 19 after Round 7. The chain spaces sit between the sides and are counted separately.
Embroider the smile and eyes
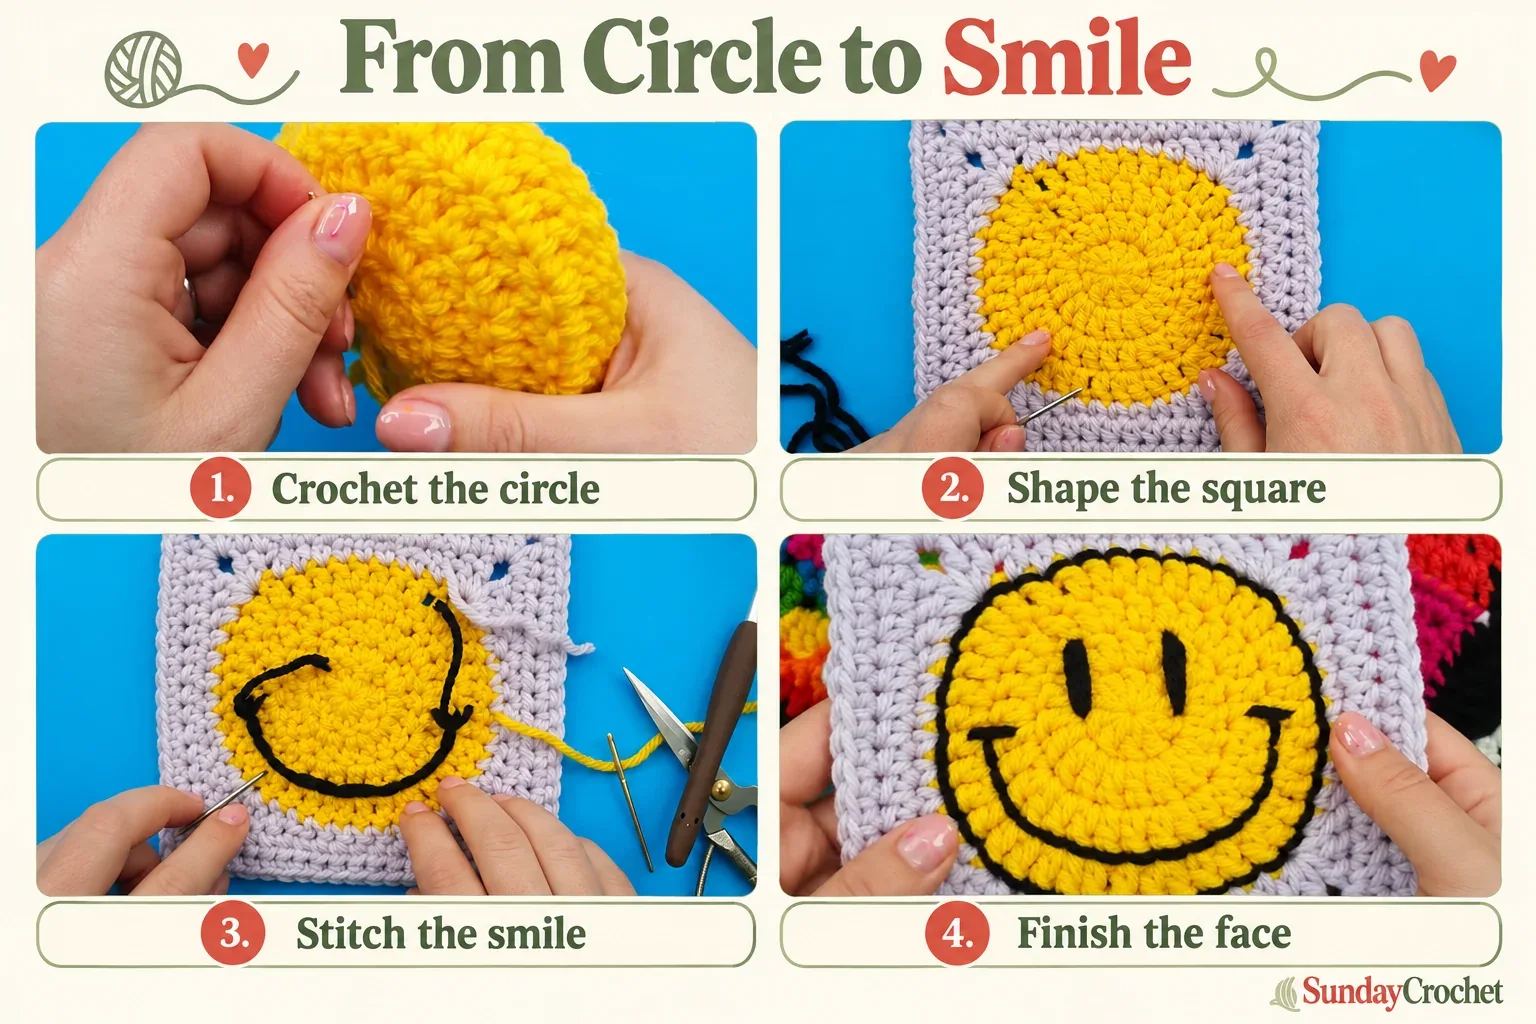
Lay the square flat before choosing where the features will sit. The yellow circle gives you useful guide lines: the mouth follows the base of the outer yellow stitches, and the eyes sit on either side of the initial center round. The placement is approximate, so look at the whole face rather than trying to find an exact numbered stitch for each feature.
Stitch the curved mouth
Thread black yarn through your needle and leave a tail at the back. Bring the needle to the front at roughly the halfway point on one side of the circle, where the smile will begin. Make the first short section of the smile, then add a small horizontal bar across its top. That bar gives the mouth its familiar turned-up tip.
Follow the base of the last yellow round downward and around the lower half of the circle. Use short backstitches: bring the needle up one stitch ahead along the curve, then take it down one stitch behind to meet the previous black section. Repeat so the line joins up rather than becoming a row of separate dashes.
Continue upward on the other side until the two ends of the smile are roughly level. Add the second horizontal bar. Lay the square flat again to see the expression before securing the yarn; it is easier to judge the curve when you are not holding the fabric folded in your hand.
At the back, pass the needle under an embroidery loop, leave a loop of yarn, and pass through it to make a securing knot. Secure the other tail too. The traveling strands and knots will be covered by the backing, so the reverse does not need to look like the front.
Make two narrow eyes
Position the eyes on either side of the first yellow round. Their lower ends sit roughly level with the horizontal tips of the smile. Bring the needle up at the bottom of one eye, leaving a tail behind, then take it in a straight line upward and back through the fabric at the inner ring.
Repeat through those same entry and exit points so the eye has two black strands. Cut and secure the yarn at the back. Make the second eye the same way on the other side. Keep the square flat as you compare them; the aim is a pair of simple upright eyes, not a complicated filled shape.
Add the optional black outline
You can stop with the smile and eyes. For the outlined version, work the same short backstitches around the outside edge of the yellow circle, where it meets the border color. Bring the needle up ahead of the previous stitch, then go back to join the line, following the circle all the way around.
This outline emphasizes the round face against the pale square. It is embroidery, so it does not add a crochet round or change the border's stitch count. Secure its tails at the back when you have completed the circle.
Finish the back before using the square
Now finish weaving in the yellow tail that was tucked out of the way earlier, along with the border ends. Trim the secured embroidery tails while leaving a little length beyond the knots. Cutting right against a knot risks undoing the work you have just secured.
The completed face leaves black strands and knots on the reverse. Choose a backing that suits the way you intend to use the motif. A full blanket can have a fleece backing; a project using only a few smiley squares can have individual backings instead. The crochet and embroidery steps above do not include a complete blanket-lining or assembly pattern.
There are several finishing options:
- Back each motif with fabric. A small fabric circle or square can cover the embroidery. It can be sewn in place, or attached with a fabric adhesive suitable for the materials and intended care. Check the adhesive's own instructions before choosing it.
- Crochet a second yellow circle. Repeat Rounds 1–4 and attach that circle to the reverse to hide the embroidery. This keeps the front's integrated circle-and-square appearance.
- Use the face as a separate applique. Make only Rounds 1–4, embroider the features, and attach the completed face to a separately made solid granny square. That changes the construction, so it needs a suitable solid-square pattern and an attachment plan.
The last two options reuse the same four-round face; they do not require inventing another increase sequence. Choose your finishing route before making a whole set so you know how each motif's reverse will be covered.
Common questions
Does the starting chain count as a stitch?
Yes for the yellow rounds: ch 3 counts in Round 1, and ch 2 counts in Rounds 2–4. No for the ch 1 at the start of Rounds 6 and 7. Join those border rounds to the first actual hdc or sc, rather than to the chain.
Why does the first stitch after a corner seem to disappear?
The corner group can cover it. Gently move the group aside and find the stitch's top loops. Skipping it changes the side count, so check for 13 stitches to work into in Round 6 and 17 in Round 7 before assuming you have reached the next corner.
Can I leave off the outline or the backing?
The black outline is optional. The backing serves a different purpose: it conceals the reverse-side embroidery. If you want that neat finish without lining an entire project, use an individual fabric or crochet backing for the motif instead.


