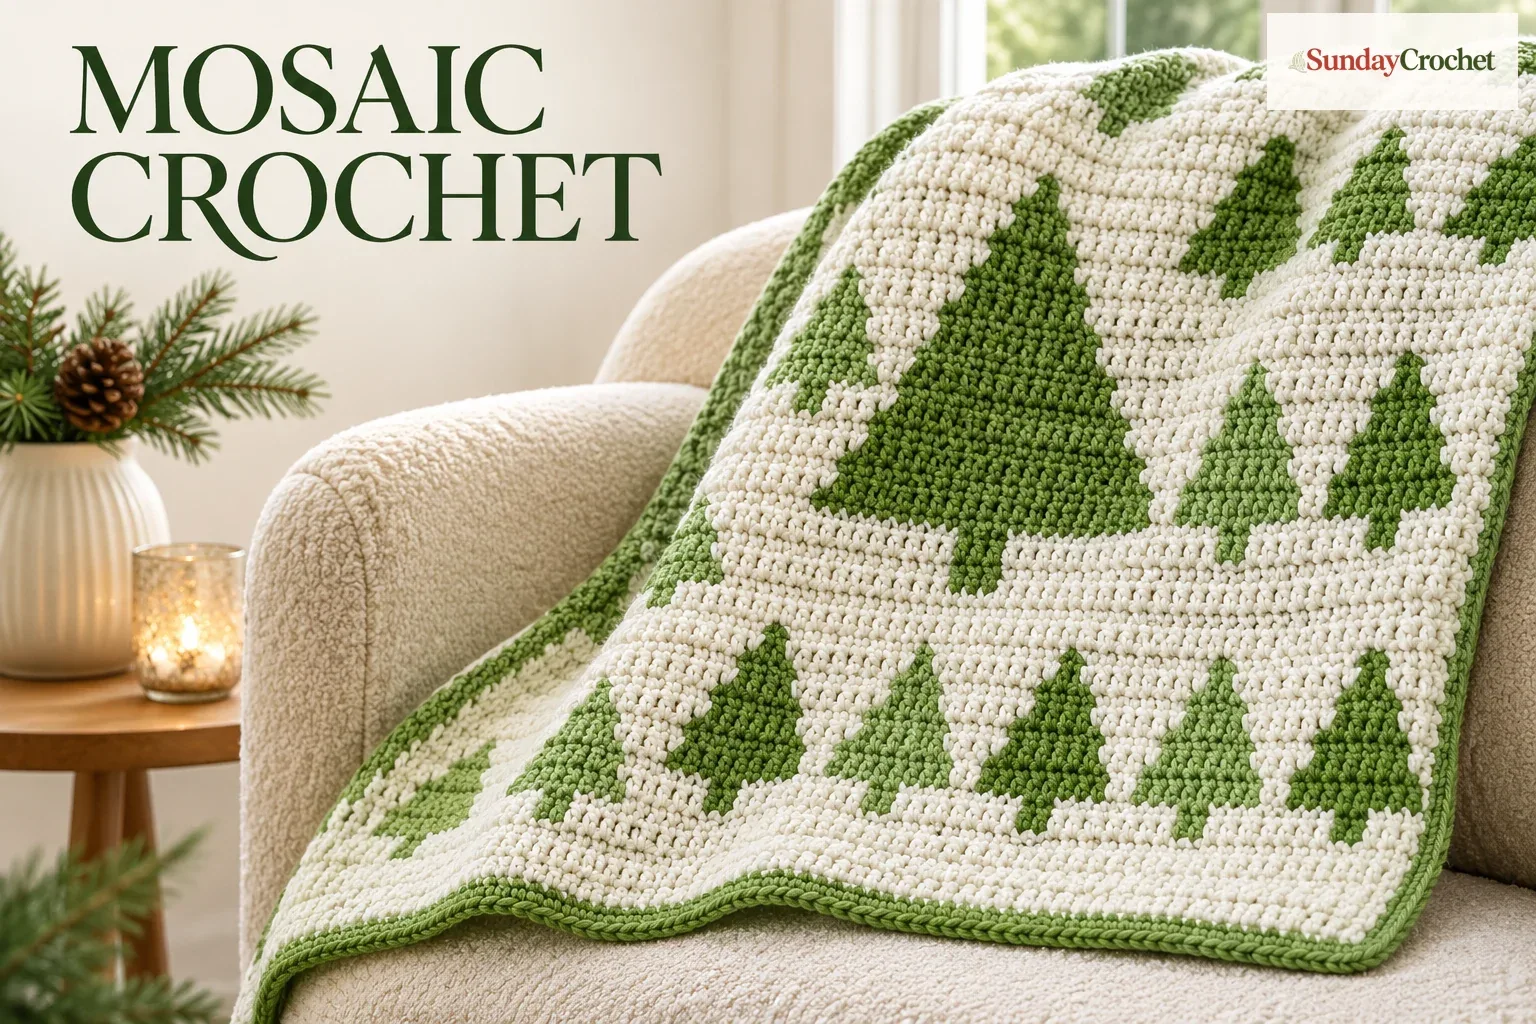
Raised green trees stand out against the ivory rows of this winter forest colorwork. · Sunday Crochet
In this article
01 · A forest motif made with simple colorwork02 · At a glance03 · Yarn and tools04 · Abbreviations05 · Read the mosaic chart06 · Practice swatch: confirmed steps07 · Make the double border08 · Gauge, sizing, and what is not specified09 · Common questionsA forest motif made with simple colorwork
Overlay mosaic crochet creates a picture without carrying two strands across every row. A row in one color leaves selected front loops open. On a later row, a taller stitch reaches down into those loops and lays over the background. In this winter forest design, the contrast between ivory and green turns those stitches into evergreen trees.
I’ll show you how I work the technique on the small two-tree sample and how I build the double border that hides the cut ends. This is a technique tutorial, not a complete charted blanket pattern. The full forest design uses several charts, and every X placement matters. The information below gives the confirmed sample setup, stitch method, and border construction without guessing at missing chart rows.
At a glance
- Skill level: Intermediate. You should be comfortable with single crochet, half double crochet, double crochet, changing colors, reading a chart, and working into front or back loops.
- Terminology: US crochet terms throughout.
- Sample blanket size: About 48 × 64 in (122 × 163 cm).
- Practice swatch: Two tree repeats, started with a chain of 23. The finished swatch measurements are not stated.
- Gauge: Not stated. Use the swatch to learn the technique, not as a measured gauge square.
- Construction: A striped foundation is followed by charted overlay mosaic rows. A crocheted border forms a front and back layer around the outside edge.
Yarn and tools
The color names are less important than clear contrast. The trees need to stand apart from the background, so choose a green that reads distinctly against the light yarn. If you substitute yarn, check its label and make a swatch first. Comparing yarn weight and care details before changing fibers can help you choose a practical substitute. The finished dimensions may change with yarn weight, hook, and tension.
Abbreviations
- BLO: back loop only
- ch: chain
- dc: double crochet
- hdc: half double crochet
- sc: single crochet
- sl st: slip stitch
- MDC: mosaic double crochet, a double crochet worked into the exposed front loop two rows below
- A / B: the two colors. In the sample, A is white and B is green.
Read the mosaic chart
Each square in the chart represents one stitch across. Read the chart row by row, keeping the side marked as the beginning at your right-hand edge. The first and last stitch of a mosaic row are regular single crochets to keep the edge tidy. In the middle of the row, a blank square is a single crochet through the back loop. An X is a mosaic double crochet.
The taller stitch does not go into the top of the row immediately below. Yarn over, find the exposed front loop two rows underneath, insert the hook there, and draw up a loop to the height of the current row. Finish the double crochet by pulling through two loops twice. The stitch lies over the intervening row and gives the tree its raised color block.
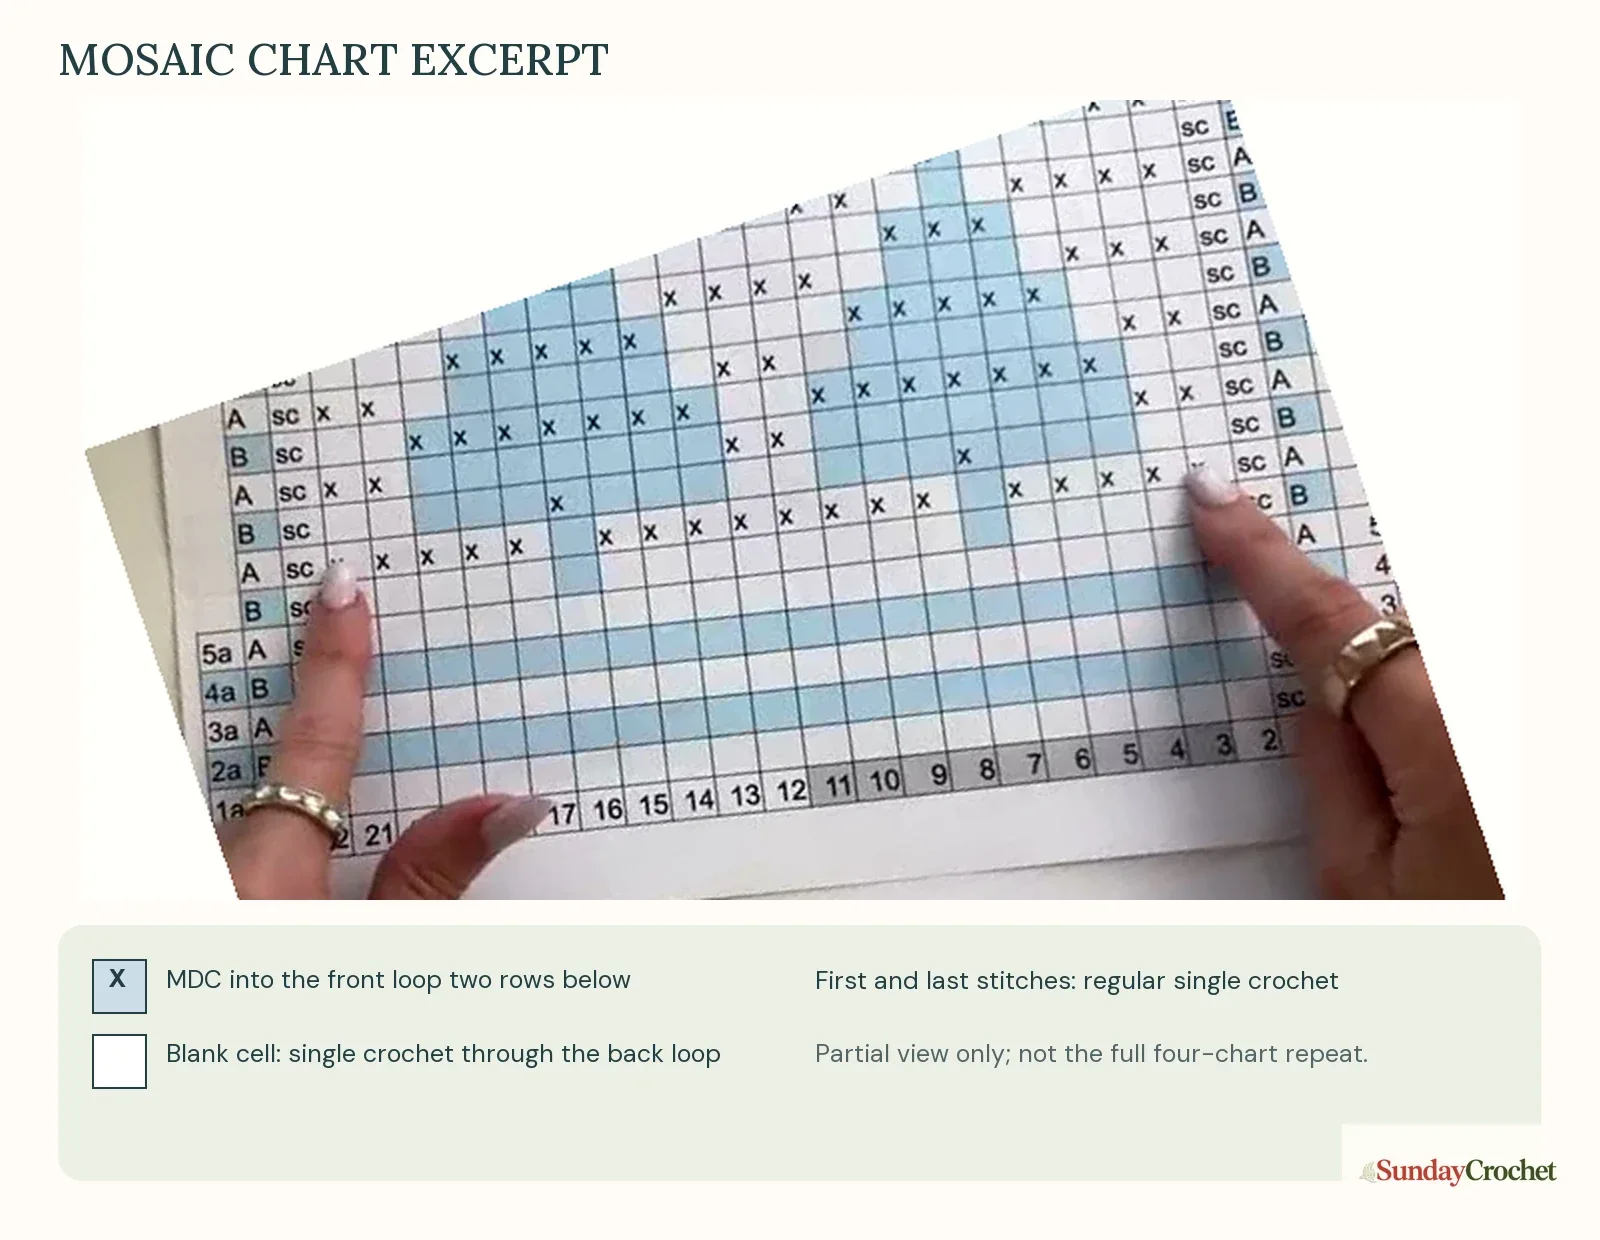
This is only the chart portion visible in the demonstration, paired with its stitch key. It helps identify the symbols but does not replace the complete four-chart sequence needed to reproduce the full blanket.
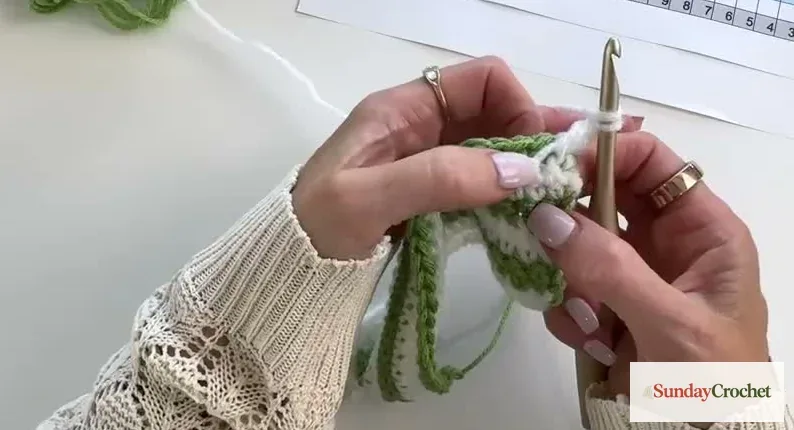
The shaded area on a chart may mark a repeat. Work the repeat the stated number of times, then continue to the ending stitches. Don’t count a long run of Xs as one repeat just because they touch on the chart. The repeat begins and ends where the chart marks it, and the edge stitches remain outside it. If chart symbols feel unfamiliar, taking a moment to read the stitch key and repeat boundaries carefully can prevent a misplaced tree from shifting across the row.
Practice swatch: confirmed steps
The sample swatch begins with a 5 mm hook and a chain of 23. Work into the back bump if it is comfortable; using the back loop is also shown as an acceptable option. In the second chain from the hook, make a single crochet, then single crochet across. This produces 22 stitches. Keep the same count on the return row.
Color A and color B are worked in alternating rows for the striped setup. At a color change, complete the last single crochet up to its final yarn-over, then finish the stitch with the new color. Chain one and turn. You can crochet over a short yarn tail at the edge to secure it, then let the unused color rest rather than carrying it across the row. When the next color change brings that strand back, crochet over the tail again at the edge. This keeps the sides neater and reduces loose ends.
The exact number and color order of the preparatory stripe rows are chart-dependent. The sample begins its mosaic section at row six. For that row, change to the 6 mm hook and use color B. Work a regular single crochet in the first and last stitch, then single crochet through the back loop in the intervening stitches. The row remains 22 stitches. Fasten off and secure the tail, since the following chart row starts again at the right edge.
For the next row, join color A at the right edge, chain one, and single crochet in the first stitch. Use the chart: work a mosaic double crochet for each X and a back-loop single crochet for each blank square, with a regular single crochet at the far edge. The demonstrated row begins with five mosaic double crochets. The chart then shows a repeated group built from four mosaic double crochets and a back-loop single crochet, followed by the next tree segment. Keep the stitch total at 22 on the two-tree sample. The exact full sequence of Xs must come from the chart; it cannot be reconstructed safely from a verbal summary alone.
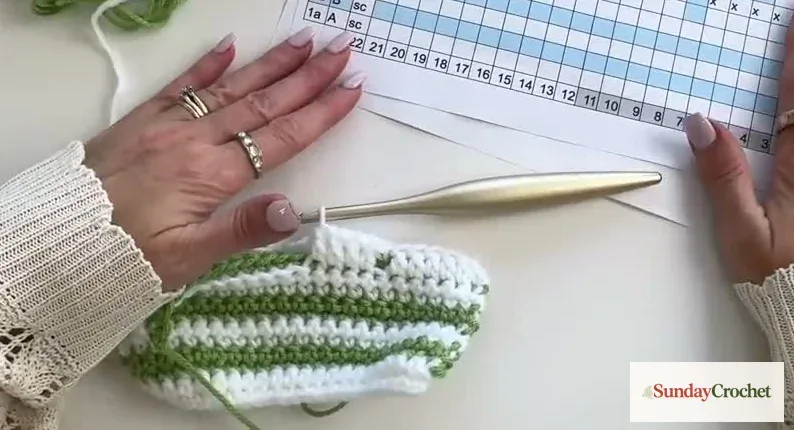
For every mosaic row, work from right to left, fasten off at the end, and rejoin the next color at the right edge. That means more starts and ends than ordinary striped crochet. The border is designed to cover those edges, so secure each tail with a firm chain and tug it snug before cutting. Do not skip the chart to improvise the tree shape. The four motif charts needed for the complete blanket are not included here, so the full row-by-row pattern and exact count for every chart row cannot be stated accurately.
Make the double border
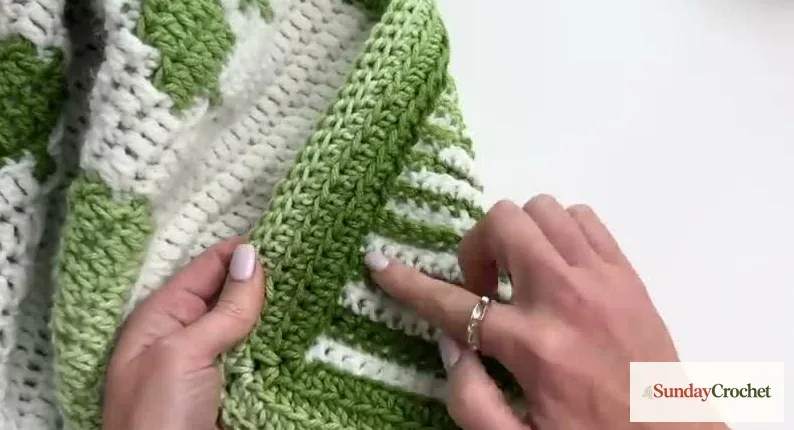
The border has two faces. A loose foundation round follows the edge, then half double crochet rounds cover the yarn ends from the front and back. The blanket directions describe three rounds in total, while the tutorial shortens one repeat for demonstration. The steps below explain the construction shown; the omitted repeat is not expanded into an invented pattern.
1. Crochet a relaxed foundation edge
With the larger 6 mm hook and green yarn, join anywhere along the top edge and slip stitch toward a corner. At each corner, chain two. Down the sides, make one slip stitch for each row. Continue around the blanket, chaining two at every corner. Keep these slip stitches loose. If they are tight, the next hook will struggle to find their back loops and the border can pucker.
At the end, fasten off and make the seamless join shown: skip the first stitch, insert into the next stitch, then come back under the back loop to form a small faux stitch over the join. Secure the tail. This round gives you a clean line to crochet into on both sides.
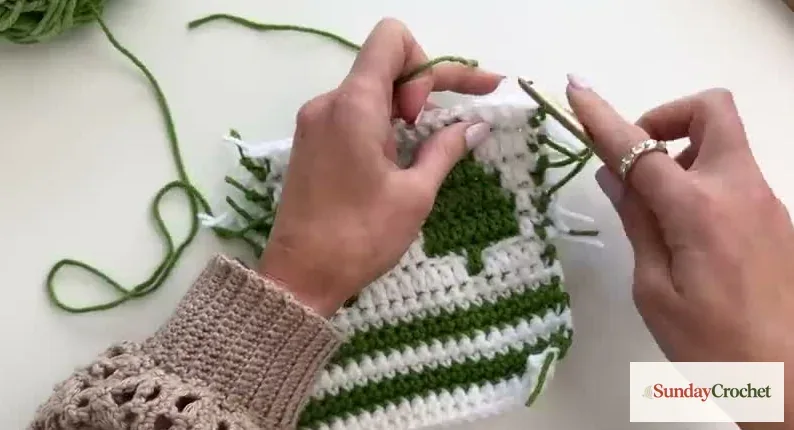
2. Work the first face from the wrong side
Switch to the smaller 5 mm hook and turn the piece to its wrong side. Join into the back leg of a chain at the edge. Chain two; here it counts as the first half double crochet. Work one half double crochet through the back leg of each chain or available stitch around. At a chain-two corner, work one half double crochet into the corner space, chain two, then one half double crochet into the next part of the corner. Keep the tails lying inside the border rather than letting them poke out.
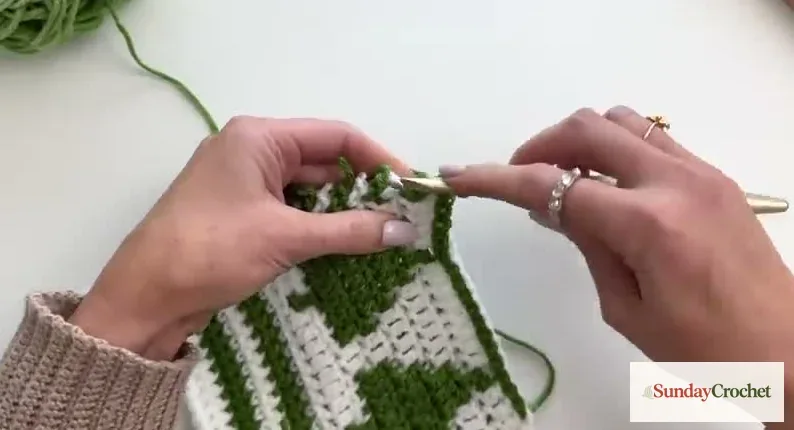
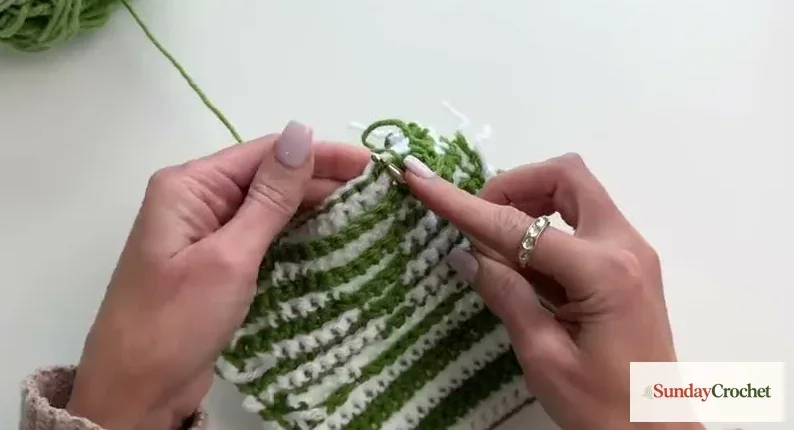
Join with a slip stitch in the second chain of the starting chain-two. Continue with half double crochet through the back loop around the face. The ridge gives the border a tidy texture and builds a shallow pocket for the loose ends.
3. Repeat on the front face
Turn the work to the right side and join into the unworked loop of the edge chain. Chain two, then half double crochet through the back loop around. At each corner, use the same half double crochet, chain two, half double crochet increase to keep the edge square. Fold the fabric as needed to see the back loops clearly, especially where green stitches cover the original color changes.
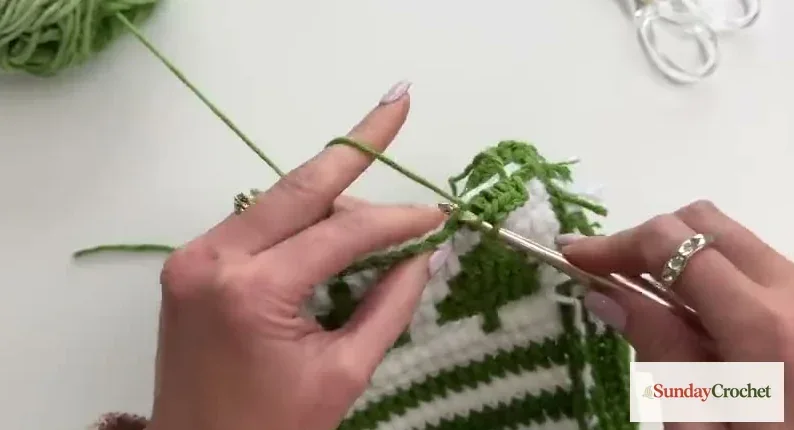
The written blanket setup calls for one additional border round beyond the shortened demonstration. Keep the same yarn and hook plan, and check the complete written border sequence before treating this tutorial as a full round count. More rounds can use more yarn; the green amount is described as close for the sample size, so an extra ball is useful if your tension or measurements run larger.
4. Close the two layers
Place the two faces of the border together so the wrong sides meet inside and the right sides remain visible. Before joining, pull every yarn tail between the layers. Join green yarn in a corner, chain one, then single crochet, chain two, single crochet in the corner. Along each side, insert through the back loop of the stitch on the near layer and the front loop of its matching stitch on the far layer. Single crochet through both loops together. At each corner, repeat single crochet, chain two, single crochet.
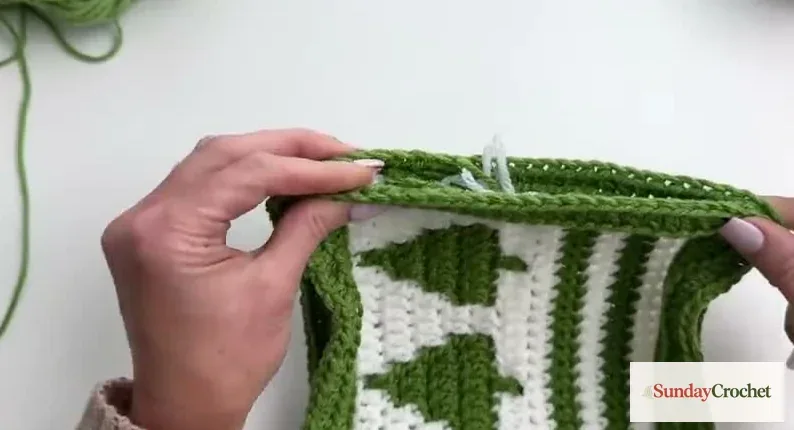
Work all the way around, slip stitch to join, fasten off, and weave in the final tail. The enclosed strands should sit inside the border rather than on either face. Check the corners before cutting the yarn: they should lie flat, with no pulled-in gaps or loose loops.
Gauge, sizing, and what is not specified
The sample blanket is described as approximately 48 × 64 in (122 × 163 cm). The full foundation begins with 140 chains, which gives 139 single crochets when worked into the second chain from the hook. The two-tree practice swatch begins with 23 chains and gives 22 single crochets. The exact swatch measurement, stitch-and-row gauge, complete chart rows, and yarn yardage are not stated here. Treat the full blanket dimensions as an approximate reference, not a promise that every yarn substitution will produce the same size.
This project is a single fabric with a framed edge, not a set of motifs sewn together. The border is its assembly step: it encloses the short ends created by color changes and gives both faces a finished edge. If your fabric waves, check that each side row receives one slip stitch and that corner chains are not too tight. If the edge cups, relax the stitches and verify that you have not missed a side row. Gentle blocking can help even the fabric once the border is complete, but it cannot correct a stitch count that changes from row to row.
Common questions
Is this the complete winter forest blanket pattern?
No. It teaches the overlay mosaic method on a small two-tree swatch and demonstrates the double border. The full four-chart sequence needed to reproduce the entire blanket is not provided in this tutorial, so use a complete charted pattern for the exact tree placement and row sequence.
Does overlay mosaic crochet carry both colors across the row?
The method shown works one color per row. The next color is joined at the right edge, and the previous strand is cut. The double border hides the resulting ends. This is why securing the tails and keeping them inside the border matters.
How many border rounds should I make?
The blanket instructions describe three rounds, but the demonstration omits a repeat to save time. The complete border sequence is needed to place every round precisely. The construction shown here covers the foundation and the two faces, but it does not fill in the shortened repeat.
What gauge should I use?
No stitch-and-row gauge is given. Make a swatch with the yarn and hooks you plan to use, and compare its fabric and dimensions with your project goals before committing to the full blanket.
Overlay mosaic crochet rewards slow chart reading. Once you can spot the open front loops and reach into them consistently, the raised trees become easier to follow. Work a small swatch first, keep each row's count even, and leave enough room inside the double border for every tail to disappear neatly.