
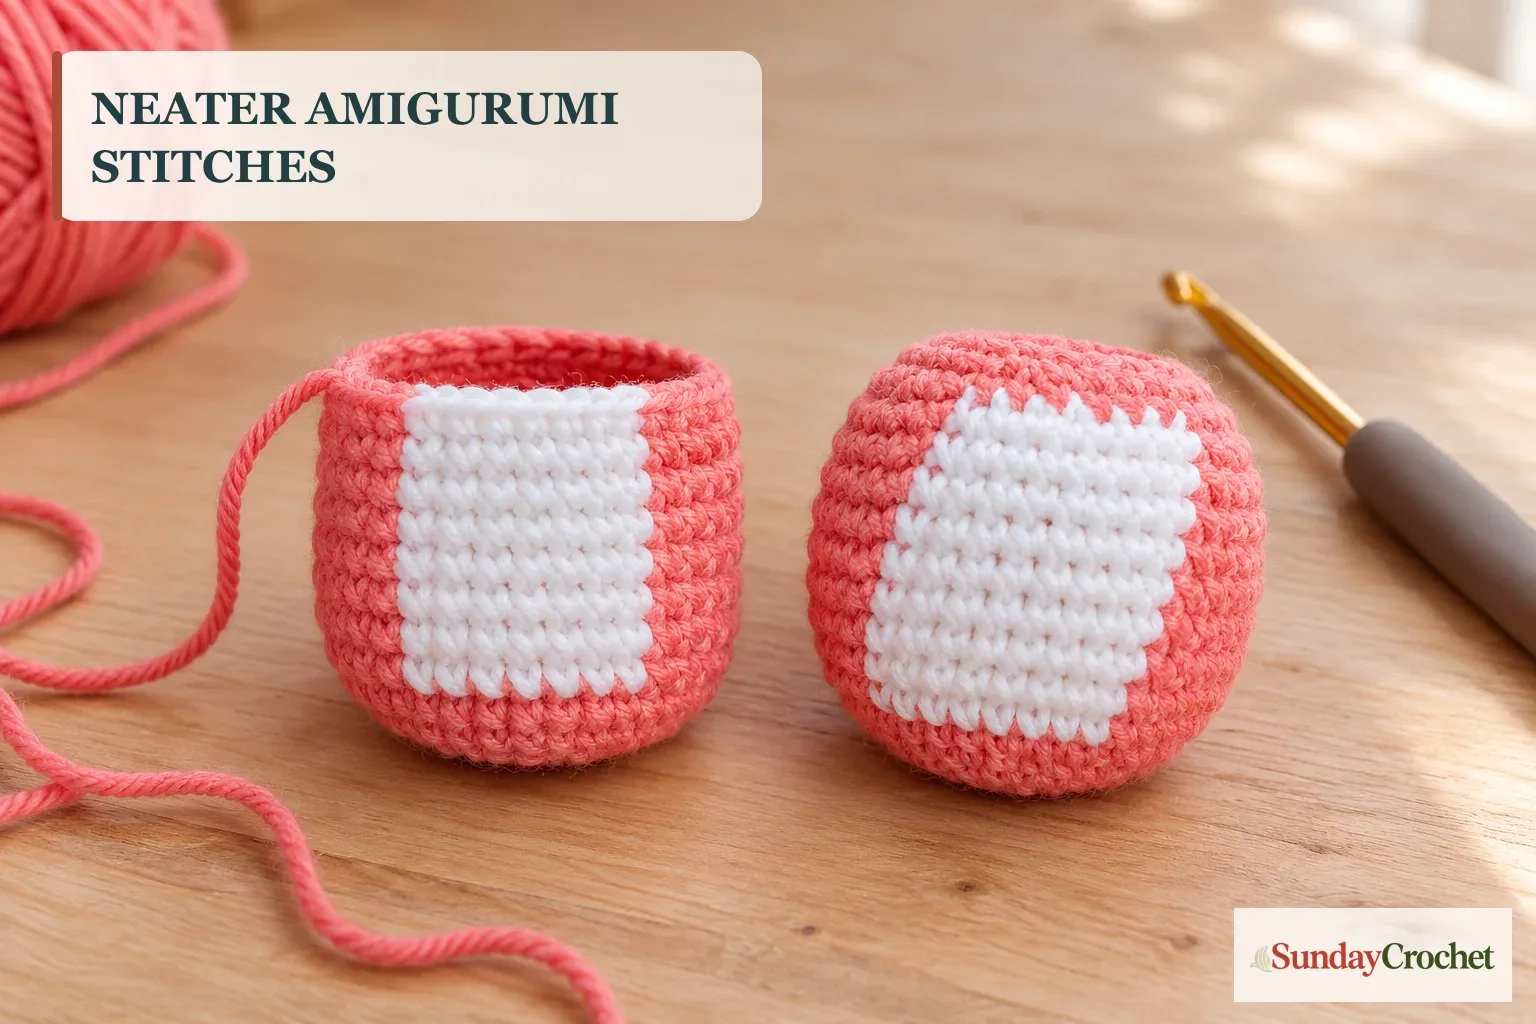
Colorwork can shift as you crochet in a continuous spiral. · Sunday Crochet
In this article
01 · Why amigurumi stitches can lean02 · Yarn-over and yarn-under make different stitches03 · The second adjustment: pull the yarn up04 · Try the motion on a small colorwork sample05 · What to check if the stitches still slant06 · Common questionsWhy amigurumi stitches can lean
If the colored section on your amigurumi seems to wander a little as you work upward, you may be doing everything correctly. Most amigurumi is crocheted in continuous rounds that spiral rather than joining at the end of each round. That spiral changes where each new stitch sits in relation to the row below, so a vertical color panel may shift instead of forming a perfectly straight column.
I’ll show you two small adjustments that can make the stitches look more evenly stacked: the way you form a single crochet and the direction you pull the working yarn. Neither one makes a spiral behave exactly like joined rows, and neither guarantees a perfectly straight line. They can help reduce the slant, especially when you are working a contrasting color section.
A spiral is not a stack of flat rows
In joined rounds, each round closes before the next one begins. In a continuous spiral, you keep crocheting around and around without a join. This creates a gentle diagonal path. The stitches are still where the pattern places them, but their tops do not line up like bricks in a straight wall.
That matters most when color changes create a clear vertical edge. A small shift is easy to see against a contrasting color, even when the rest of the fabric looks neat. It is normal for the line to move slightly. The aim here is a tidier visual column, not a perfectly geometric result.
Yarn-over and yarn-under make different stitches
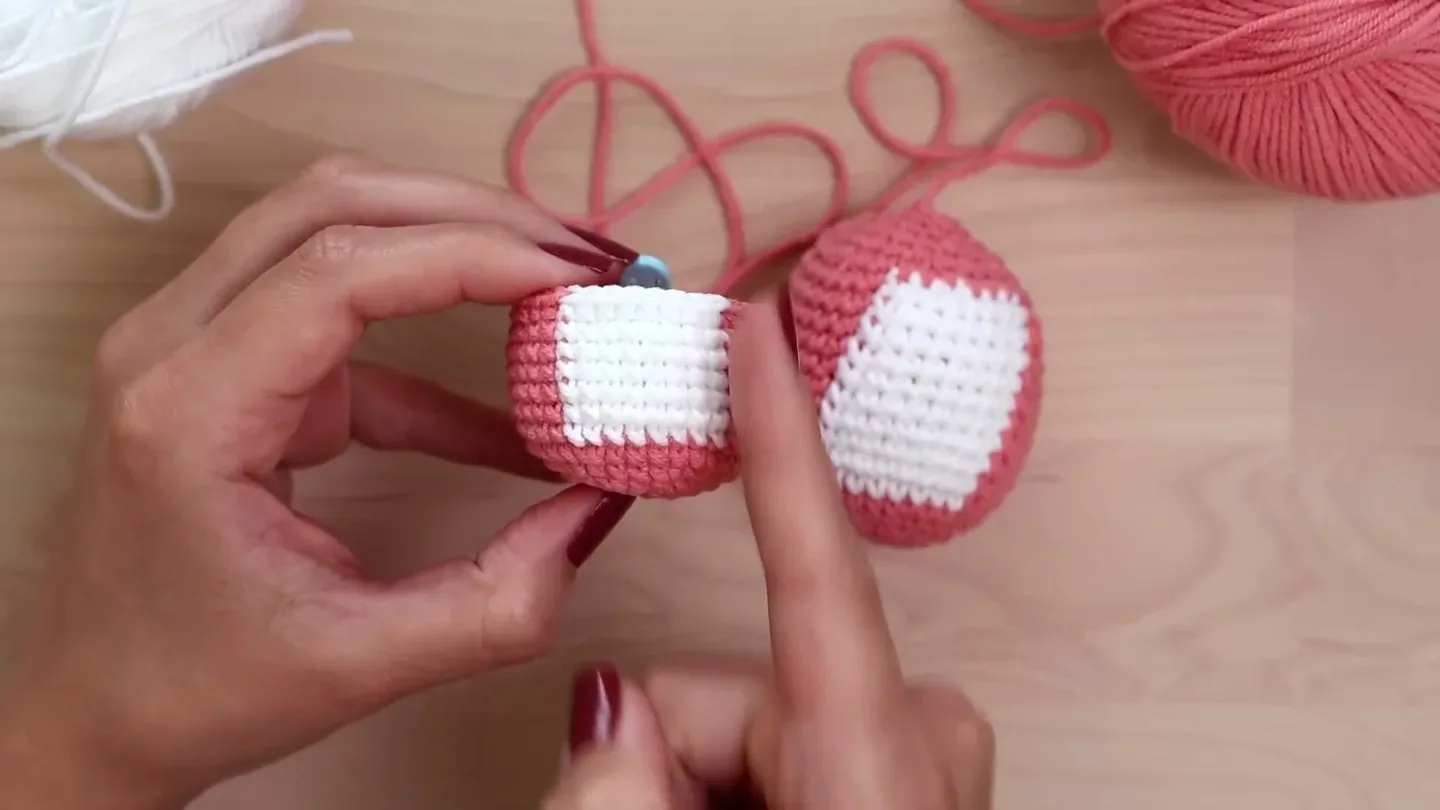
The familiar single crochet is often made by inserting the hook into a stitch, catching the yarn over the hook, and pulling up a loop. This is commonly called yarn-over. From the outside, its stitch top tends to show a V shape. In a dense amigurumi fabric, those V-shaped stitches can create a woven-looking surface where the stitches angle across one another. Depending on your tension, a color section may appear to lean a little to the right or left.
With yarn-under, the hook catches the yarn from underneath as you pull up the loop. This gives the visible stitch a more X-like appearance. In the sample, those X-shaped stitches sit more directly above the stitches below them, so the contrasting panel can look straighter.
The terms describe how the yarn passes around the hook, not whether you are using the front or back loop of the fabric. You are still making a single crochet through the stitch your pattern specifies. The difference is the path the working strand takes as you form the stitch.
Yarn-under can make a compact fabric and may feel tighter than the way you usually crochet. Keep your loop size comfortable and consistent. If you already have a project underway, try the motion on a small sample first so you can compare its fabric with your usual stitches. If the basic single crochet motion still feels new, the fundamentals in a first-stitch walkthrough can help you recognize the parts of the stitch before you adjust the yarn path.
The second adjustment: pull the yarn up
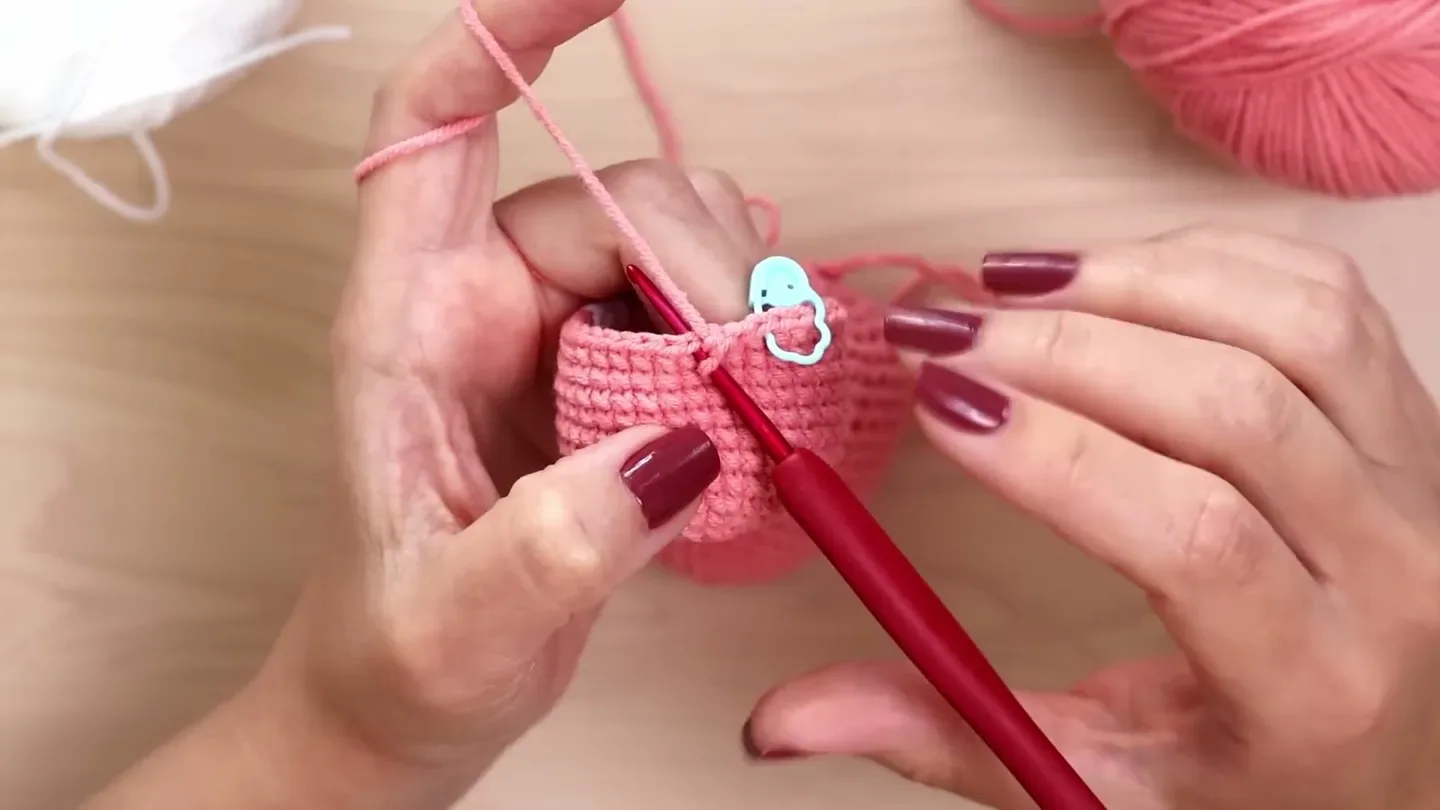
Changing to yarn-under may help, but there is another detail that can affect the direction of the stitches. After inserting your hook, notice what your working yarn does as you draw up the loop. If you pull the strand sideways in the same direction on every stitch, that repeated movement can nudge the stitches toward that side.
Instead, draw the loop upward from the stitch. Keep the movement small and controlled. The point is not to yank the yarn or stretch the loop tall. Bring the hook and loop up, then finish the single crochet with your usual comfortable tension. Think of the motion as lifting the loop away from the fabric rather than sweeping it across the top edge.
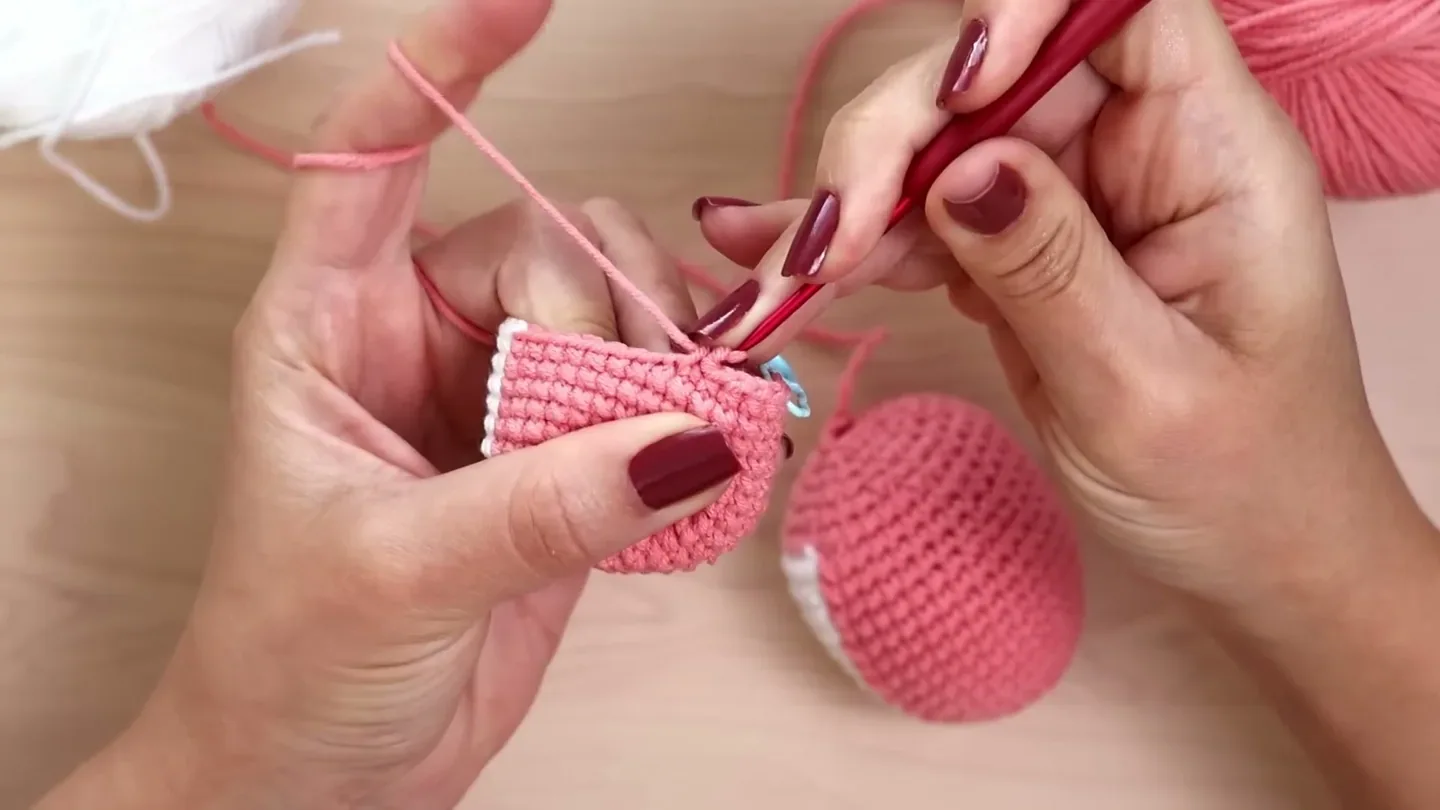
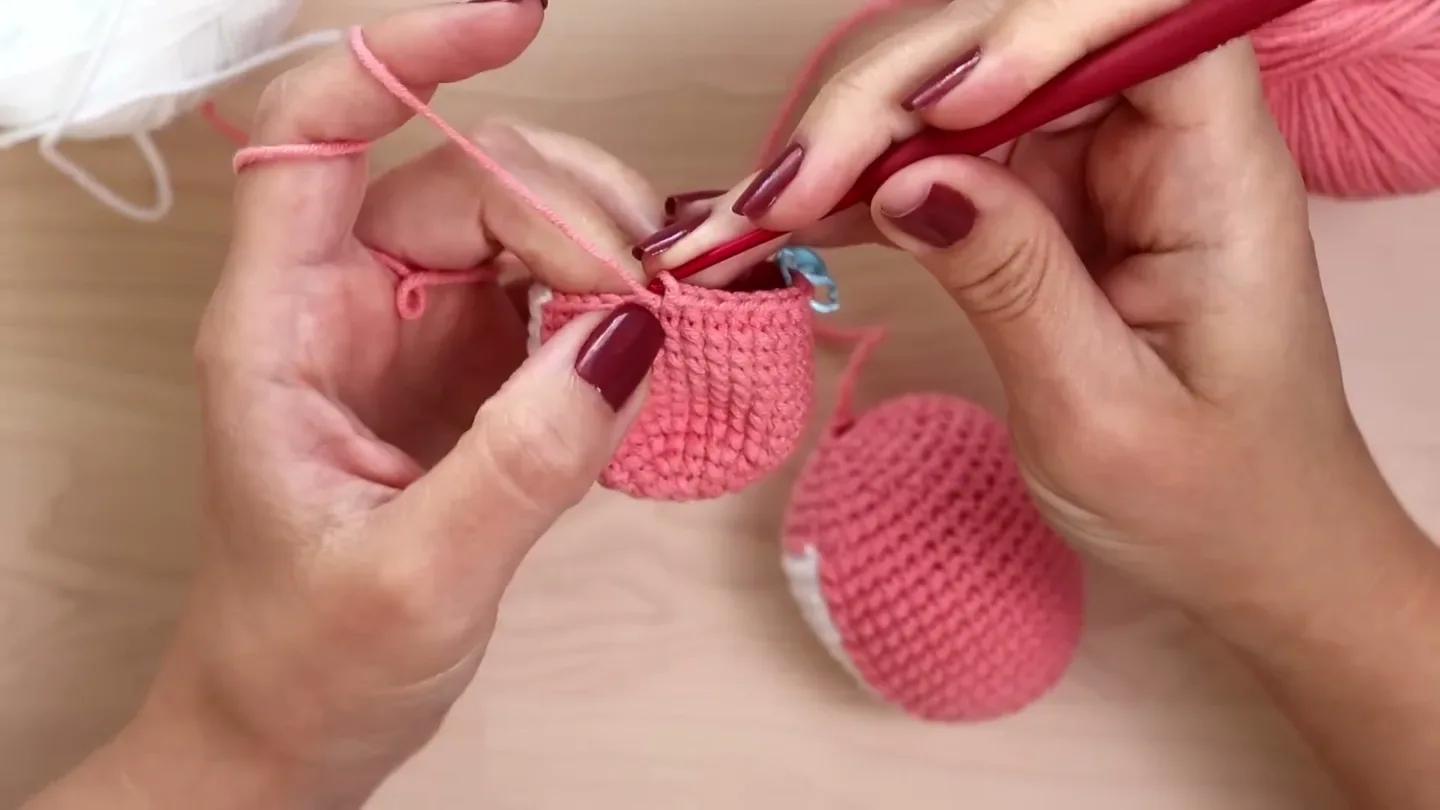
The demonstration shows this from a right-handed position, but the useful cue is the same for either hand: lift the loop upward instead of pulling it toward the side. If you crochet left-handed, mirror the hook movement as you normally would, while keeping the loop’s path upward relative to the fabric.
Try the motion on a small colorwork sample
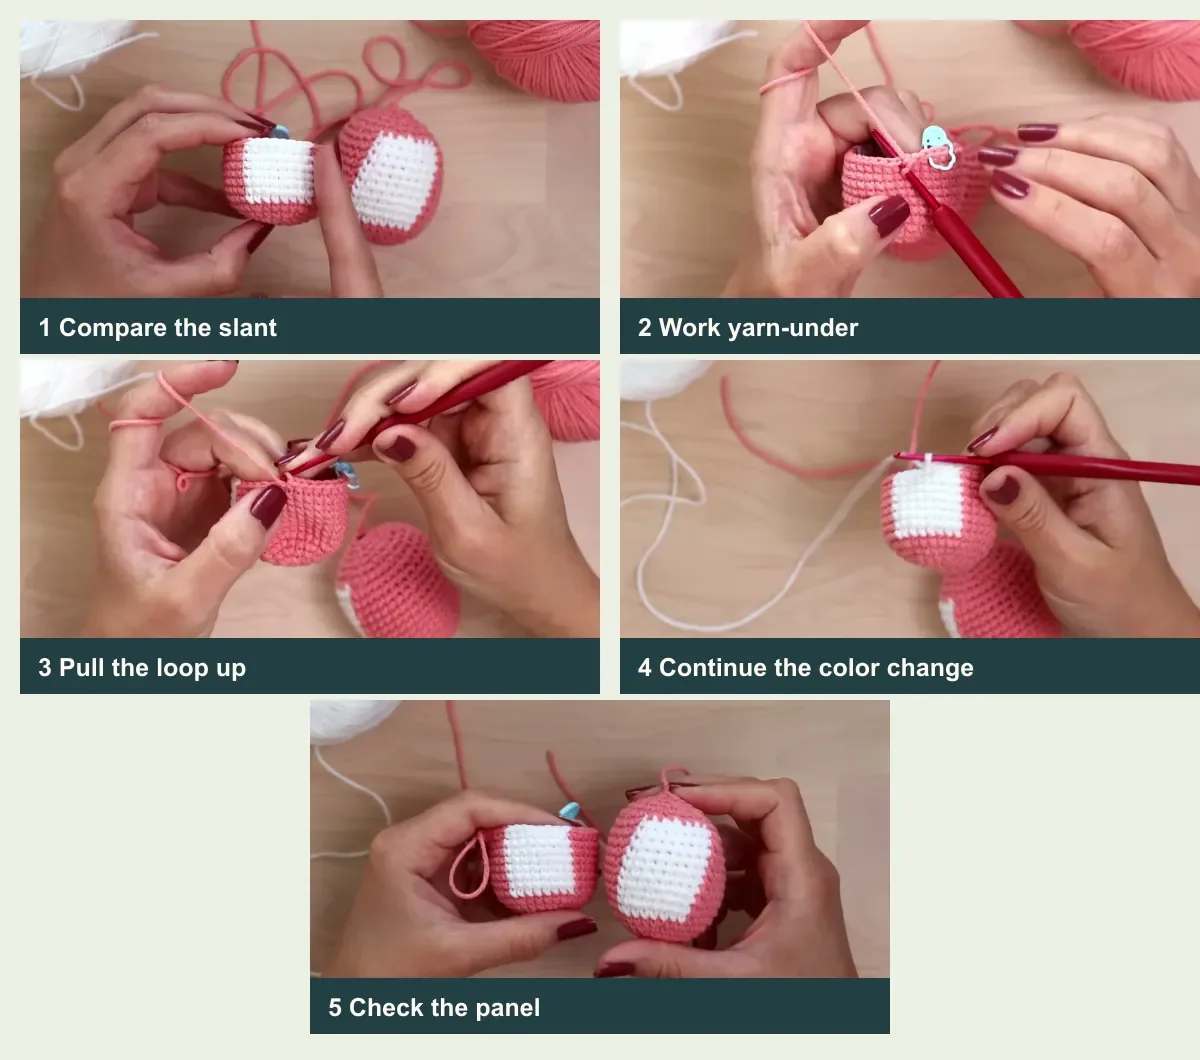
You do not need to undo a whole stuffed toy to test the change. Choose a small amigurumi tube or a sample that already includes two colors. A simple swatch is useful too, although a tube worked in the round shows the spiral effect more clearly. Use the same yarn and hook for each comparison so the stitch direction is the main difference.
- Look at the color edge first. Hold the work so the section you want to keep aligned is facing you. Notice whether the boundary already drifts to one side. A stitch marker may help you keep track of the round if that is part of your usual setup, but it does not remove the spiral offset.
- Make a yarn-under single crochet. Insert the hook into the next stitch as your pattern directs. Catch the working yarn from underneath the hook to pull up a loop, then complete the stitch. Keep the stitch count and placement from your pattern unchanged.
- Lift the loop upward. As you draw up the loop, guide the hook upward rather than dragging the strand sideways. Avoid pulling so hard that the stitch becomes noticeably taller or tighter than its neighbors.
- Repeat the same motion. Continue around the sample, using yarn-under and the small upward lift consistently. Changing direction from stitch to stitch can create uneven tension, so pay attention to the movement rather than trying to force each stitch into a visual line.
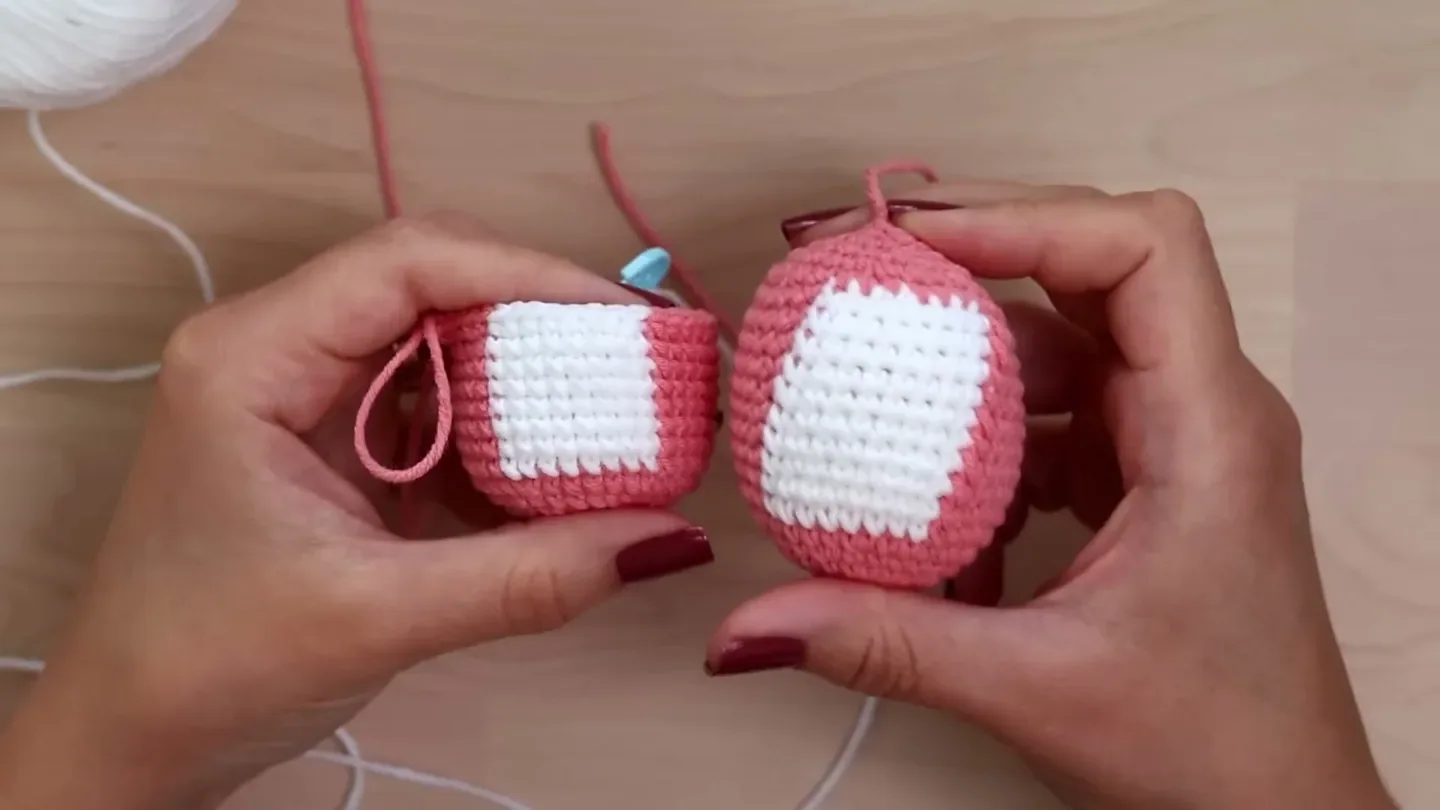
- Compare after several rounds. Set the sample beside one made with your usual yarn-over or sideways pull. Look at the color edge from a short distance. You are checking whether it appears steadier, not whether every stitch forms a perfect vertical column.
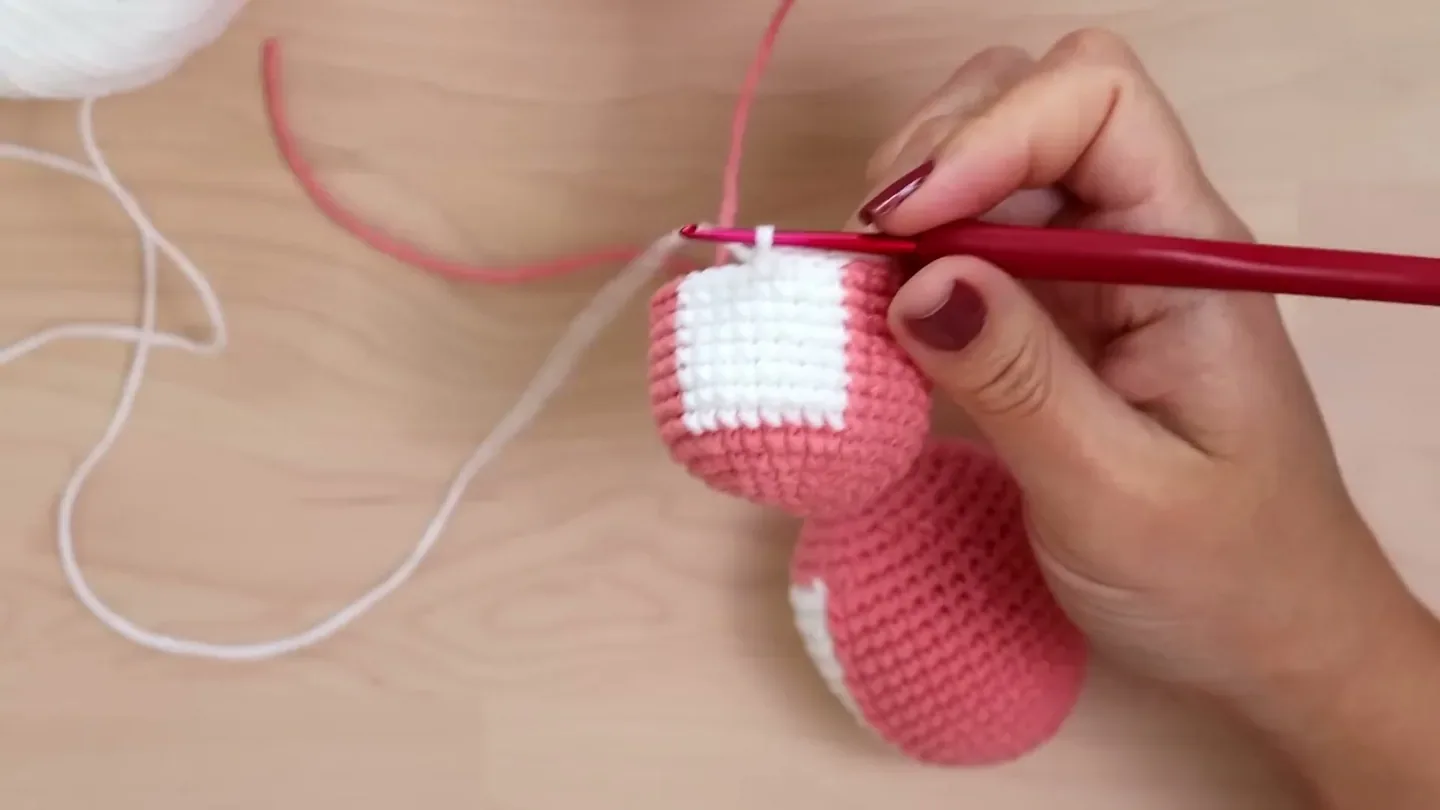
If your pattern changes color, use its existing color-change instructions. Once the new strand is attached and ready to work, continue with the same yarn-under stitch and upward pull. The movement is the adjustment; there is no need to change the stitch count or add shaping to compensate for a slight spiral.
If you want to check a written sequence while practicing, a guide to reading pattern directions can help you keep the round instructions separate from this small technique change.
What to check if the stitches still slant
First, remember that continuous rounds naturally move. If the line is only slightly angled, your tension feels even, and the toy is taking the shape the pattern calls for, that may be the normal result of the spiral. You do not have to chase a ruler-straight line in every amigurumi project.
If the slant is pronounced, pause and check the movement of your hook and yarn. Are you using yarn-over out of habit even though you meant to try yarn-under? Is the strand being pulled toward the same side on each stitch? Make a short comparison sample and look closely at the stitch tops. Yarn-over V shapes and yarn-under X shapes are easier to distinguish when you can see a few rows side by side.
Also check that the yarn-under stitches are not becoming much tighter than the rest of your work. A tighter stitch can change the look and firmness of the fabric. Relax your grip, keep the loops consistent, and focus on lifting the working loop rather than forcing the fabric into position with your fingers.
When you reach a color change, keep following the pattern’s placement and stitch counts. The upward pull helps the stitches sit more evenly; it does not move a color boundary or replace the pattern’s instructions. If the color section itself is offset by the written stitch placement, the pattern may be designed that way because it is worked in a spiral.
Common questions
Do yarn-under stitches stop amigurumi from spiraling?
No. Continuous rounds still form a spiral. Yarn-under changes the stitch shape, and lifting the working loop can reduce the sideways lean, but these adjustments do not turn spiral rounds into joined rows.
Should every amigurumi pattern use yarn-under?
Not necessarily. Use the stitch method your pattern specifies or the fabric you prefer. Yarn-under is worth testing when you want compact stitches and a more aligned-looking color panel. Try it on a small sample first because the fabric can feel different from your usual yarn-over single crochet.
Do I change how I crochet when I switch colors?
Keep the color-change method and stitch placement from your pattern. After the new yarn is ready to work, use the same stitch method and upward loop path. The adjustment should stay consistent across both colors.
Is a slight slant a mistake?
Usually not. A little shift is expected in continuous rounds, and tension can make the result vary. Focus on even stitches and a clear, steady color edge. Perfectly stacked stitches are not a requirement for a well-made amigurumi.


