· Sunday Crochet
In this pattern
01 · A warm layer with two kinds of texture02 · Yarn & tools03 · Pattern notes04 · The pattern05 · Finishing and fit checkA warm layer with two kinds of texture
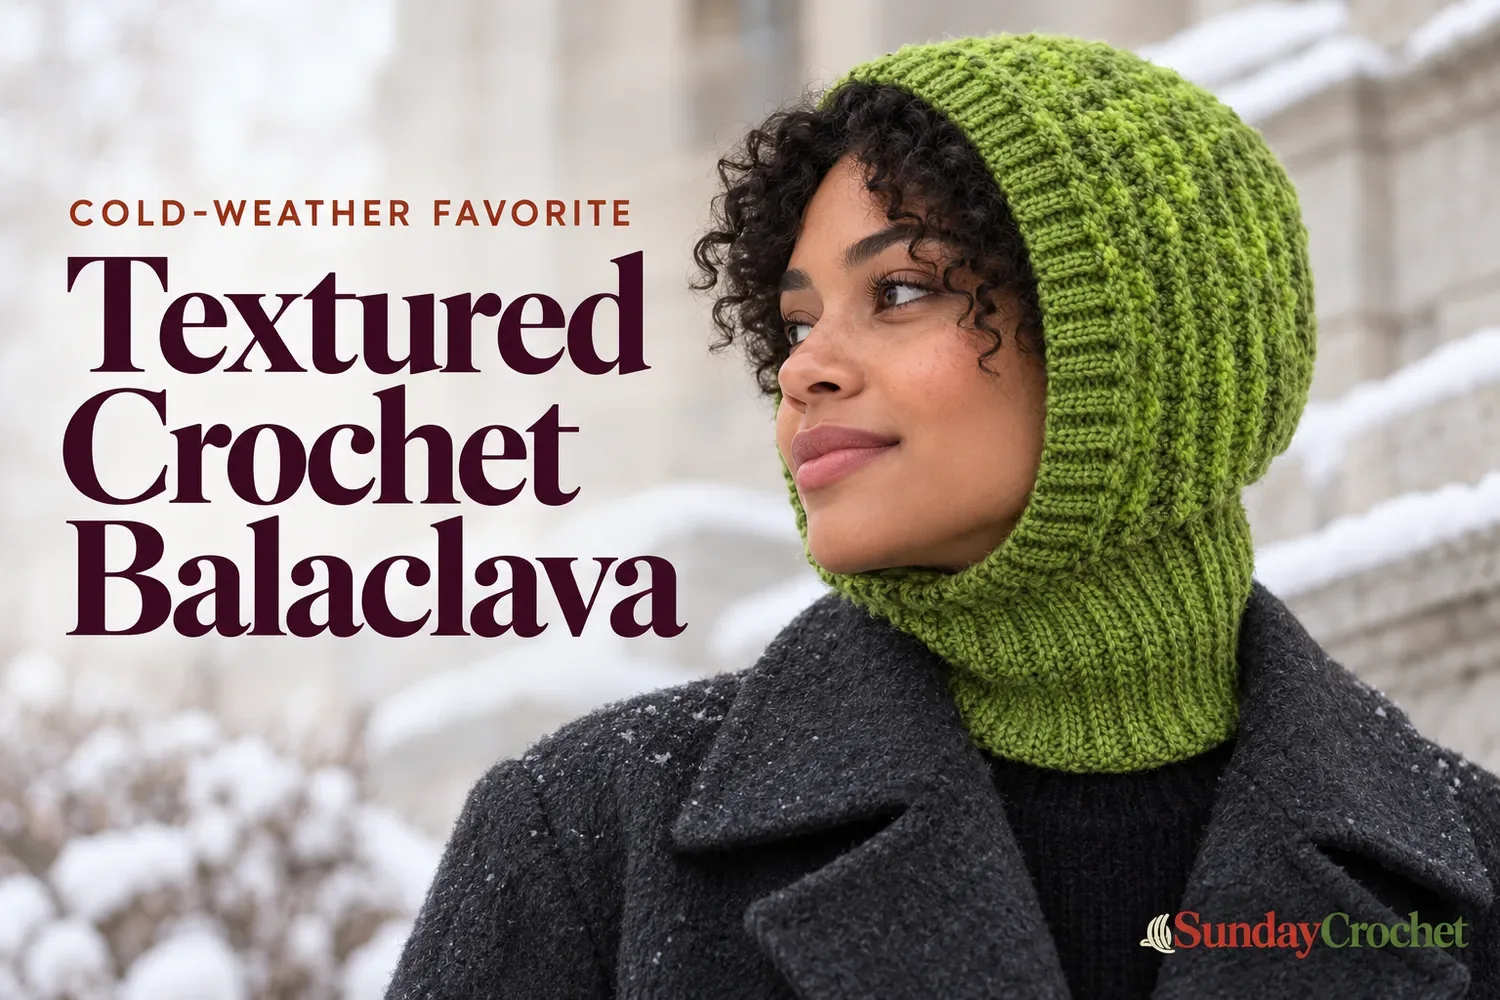
This crochet balaclava is built from a ribbed band, a shaped panel over the back and crown, and a second ribbed section around the face. Alternating single crochet and slip stitch makes the fabric springy, while pairing a smooth yarn with a textured yarn gives the sample its distinctive surface. The construction is worked flat in sections and joined with a needle, so you can check the fit as you go.
I’ll show you how I make the sample and where to adjust it for your own head. The tutorial does not give a finished-size chart, yarn yardage, or measured gauge, so the counts below describe the demonstrated sample. Treat the measurements as fitting checkpoints rather than universal sizing.
Yarn & tools
The amount of yarn is not stated, so have enough of each yarn to complete your chosen size. A smooth yarn is easier to see while learning the stitch pattern; a textured yarn adds surface interest but can hide individual loops. If you are substituting, compare the yarn labels and fiber behavior using this guide to crochet yarn weights. Wool may relax with wear or blocking, so check the fit before finishing.
Pattern notes
This pattern uses US crochet terminology throughout. The fabric is worked in the back loop only (BLO), which creates the raised ridges. The starting width and the number of rows around the side, crown, neck, and face bands are adjustable. The video sample uses 20 rows for each side panel, 19 rows across the back and crown section, and 24 rows for the front neck band. It does not provide inches or centimeters for those sections.
Gauge: not provided. No stitch or row measurement is stated, and I have not invented one. For a wearable, make the first side band and test it against the wearer before you build the crown. If you change yarn weight or hook size, expect the sample counts to produce a different fabric and fit.
| Abbreviation | Meaning |
|---|---|
| ch | chain |
| sc | single crochet |
| sl st | slip stitch |
| BLO | back loop only |
The turning chain does not count as a stitch. Keep slip stitches relaxed enough that your hook can enter them on the next row. When changing yarn, pull the new strand through the final loops of the last stitch in the previous section, then carry the resting strand along the wrong side as shown. For help reading abbreviated directions, use these crochet pattern-reading basics.
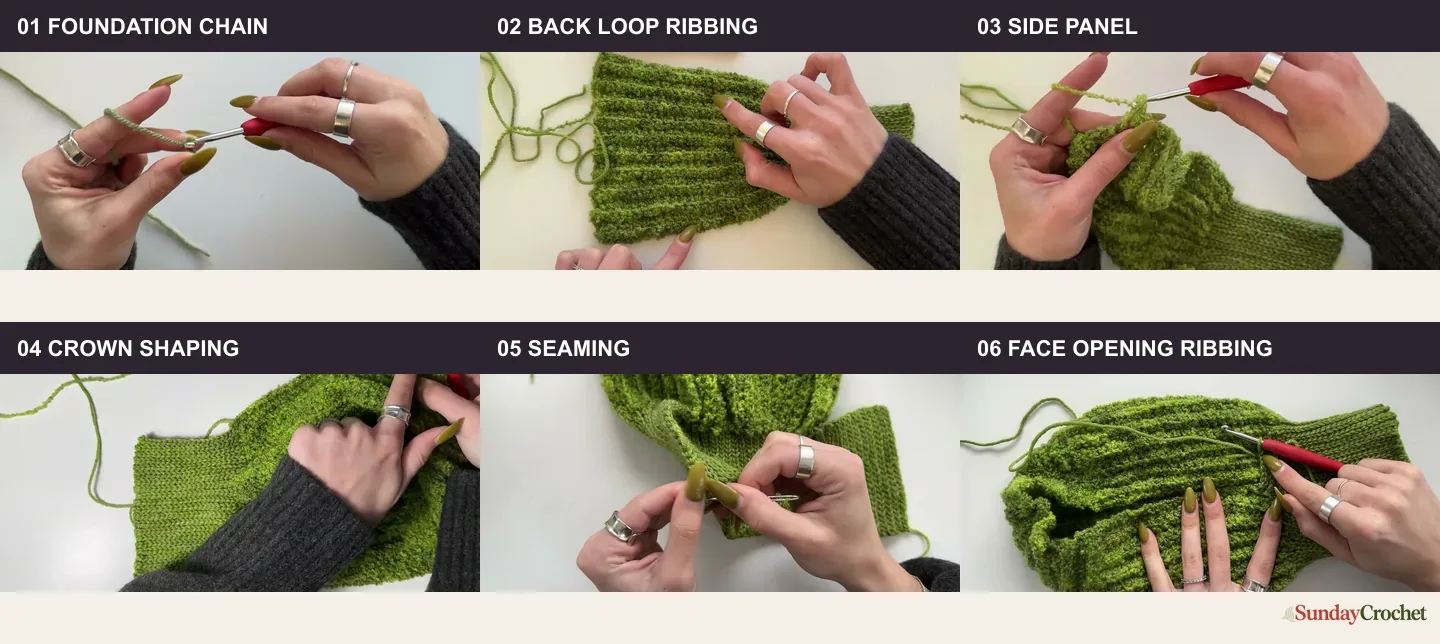
The pattern
Foundation and textured side band
With the yarn chosen for the neck ribbing, make a slip knot and ch 21. Bring in the second yarn and ch 23. The first color section provides 22 working chains once the color-change loop is counted; the second section has 22 working stitches plus its turning chain. Confirm you have 22 stitches for each half before continuing.
Foundation row: Starting in the first color section, work 22 sc across. At the last stitch, stop before pulling through the final two loops; use the second yarn to complete that stitch. Work 22 sl st into the remaining chains. Keep these slip stitches loose. Total: 44 stitches (22 sc, 22 sl st).
Ribbing row A: Ch 1 and turn. Working in BLO, make 22 sl st across the slip-stitch half. Change to the second yarn by pulling it through the last slip stitch. Bring the resting strand to the wrong side, then make 22 sc across. Total: 44 stitches.
Ribbing row B: Ch 1 and turn. In BLO, make 22 sc across the single-crochet half, change yarn at the section end, then make 22 sl st across the other half. Total: 44 stitches. Keep the two stitch types in their established halves; the texture reverses direction with each turn.
Repeat ribbing rows A and B, always working into BLO and changing yarn at the same transition. The sample side band has 20 rows total, or 10 two-row repeats, and the maker recommends ending on an even row. For a custom fit, continue until this band covers the side of the head as desired. Count the raised two-row ridges if helpful: 10 ridges equal 20 rows in the sample. Keep track of your count because the next panel uses one stitch for each row along this edge.
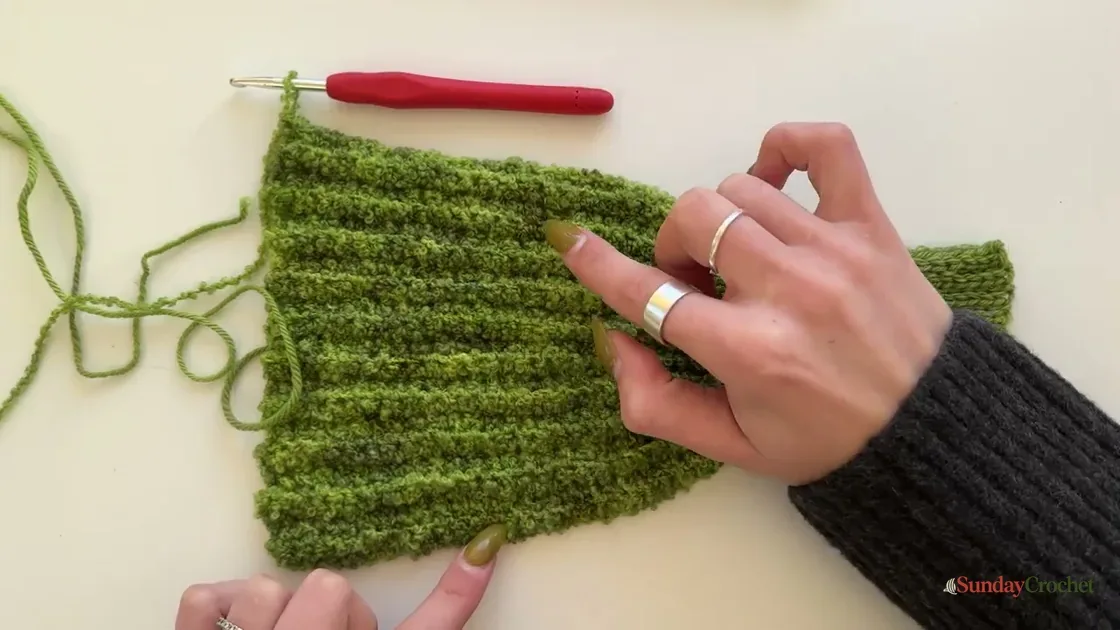
Extend the panel over the back and crown
With the work positioned at the end of an even number of rows, do not add a turning chain before picking up stitches along the row edge. Work 1 sc into the edge of each row. The sample has 20 side rows, so it picks up 20 sc. If your side band has a different even number of rows, pick up that same number. This edge becomes the vertical side of the L-shaped piece.
Ch 1 and turn. Continue the established texture across the original band and then along the new edge, all in BLO. In the sample, each full row across this expanded panel contains 22 sl st and 42 sc, 64 stitches total: the original 22-stitch slip-stitch section, the original single-crochet half, and 20 stitches along the picked-up edge. Keep the two-yarn change at the same boundary as before. Ch 1 and turn after each row.
Work back and forth until the panel covers the back and crown comfortably. The sample works 19 full rows across this section and stops on the slip-stitch side to set up the next part. Since head shapes and yarn stretch vary, try the panel against the wearer rather than treating 19 as a universal size. Maintain the texture and count each row; the sample count remains 64 stitches per full row.
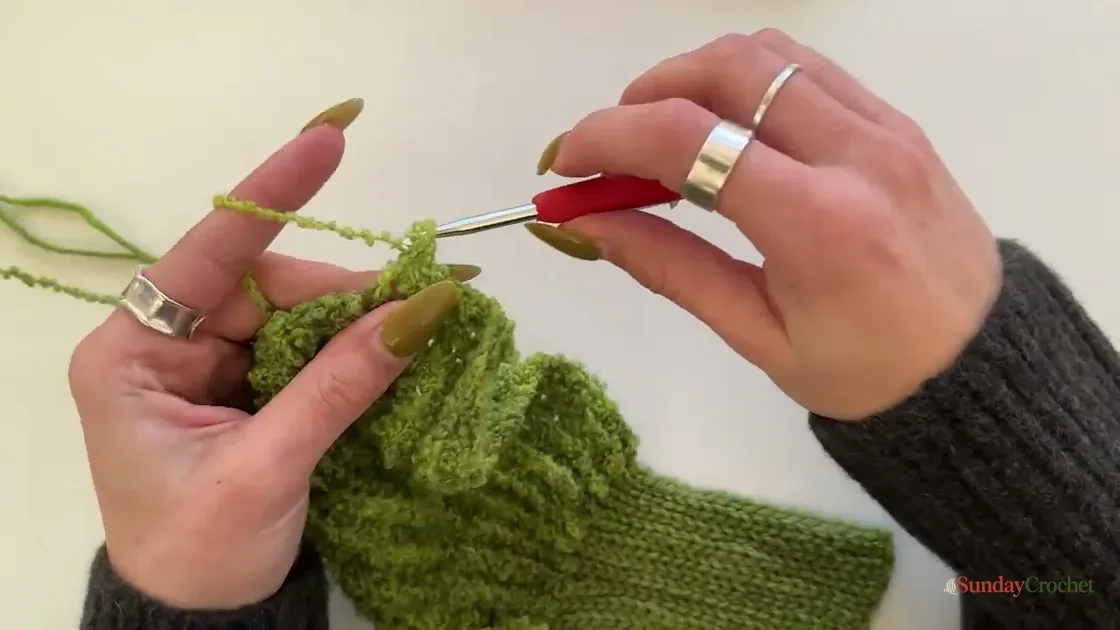
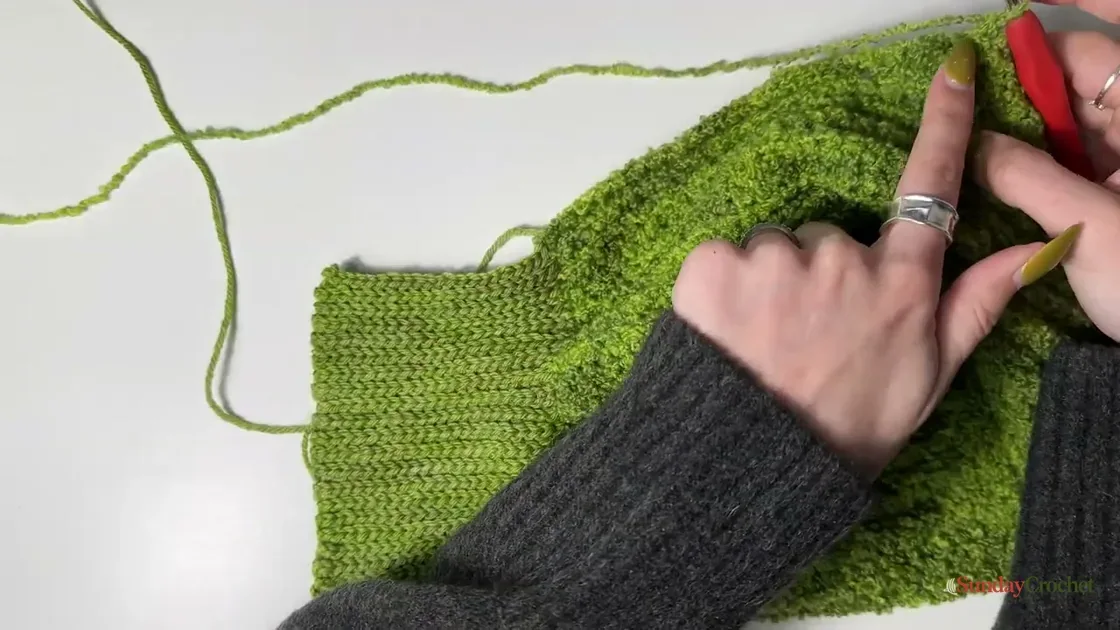
Return to the original width with short rows
At the end of the expanded panel, return to the original 44-stitch width. Ch 1 and turn. Work 22 sl st and 22 sc in BLO across, keeping the yarn change at the same transition. Total: 44 pattern stitches. On the next row, reverse the halves as before: 22 sc and 22 sl st. Work the same 44-stitch texture back and forth.
At the outside edge of each short row, attach it to the next two stitches along the expanded panel with 2 sl st through both loops. These two joining slip stitches connect the row to the crown edge; they are not part of the 44-stitch row count. Turn, skip the attachment stitches and turning chain, and begin the next row in the first actual back loop. Repeat the process, attaching each short row to the next two crown-edge stitches. The sample makes 20 short rows to match its 20 picked-up edge stitches on that side. Put a marker in the last single crochet of the row if the attachment stitches make it difficult to see where the 44-stitch section ends.
Continue until the opposite side is joined and the narrow section returns to the ribbed band. The sample aligns the number of short rows with the number of rows in its side band. Keep checking that the joined edge lies flat and that you are not accidentally working into the connecting slip stitches.
Make the front neck band
With the ribbing yarn, work across 22 sl st in BLO at the front edge. Ch 1, turn, and work 22 sl st back across in BLO. Repeat these 22-stitch rows until the band wraps comfortably around the front of the neck. The sample uses 24 rows (12 back-and-forth pairs), but this part is deliberately made to measure. Stretch the fabric gently and wrap it around the neck to judge the length; the wool sample has noticeable stretch.
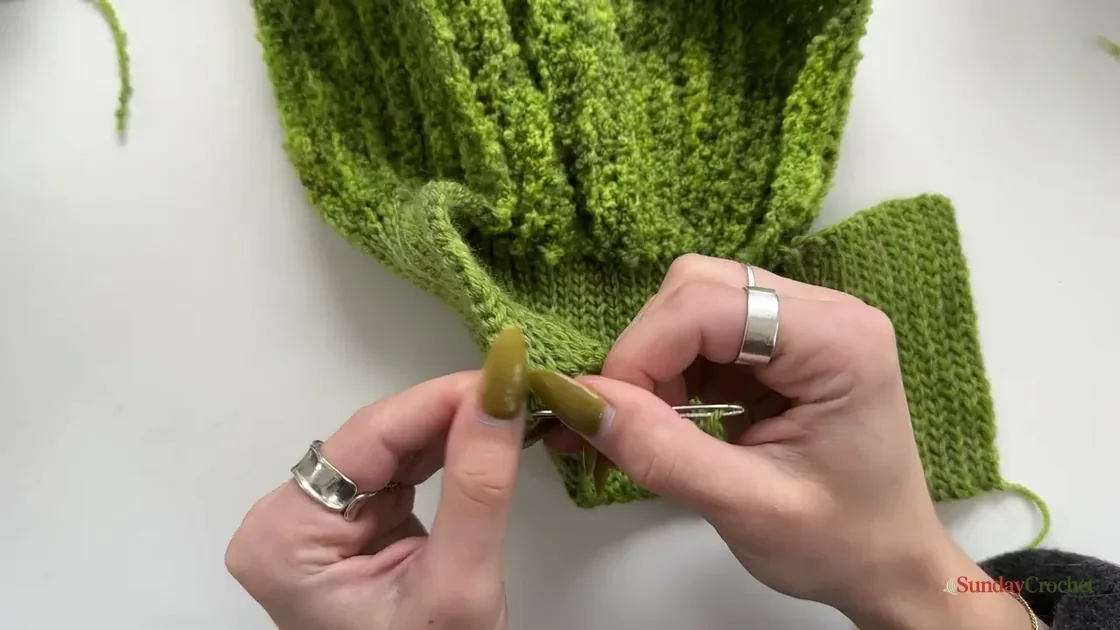
Fasten off with a long tail for seaming. Keep the fabric right side up and align the chain edge with the final row edge at the top/back. With a tapestry needle, join the corresponding middle loop on one edge to the back loop on the other, repeating along the seam. Pull the yarn snugly as you go so the crown closes without a bulky ridge. Weave the tail on the wrong side. This seam closes the top/back of the balaclava; the face and neck openings remain open.
Add ribbing around the face opening
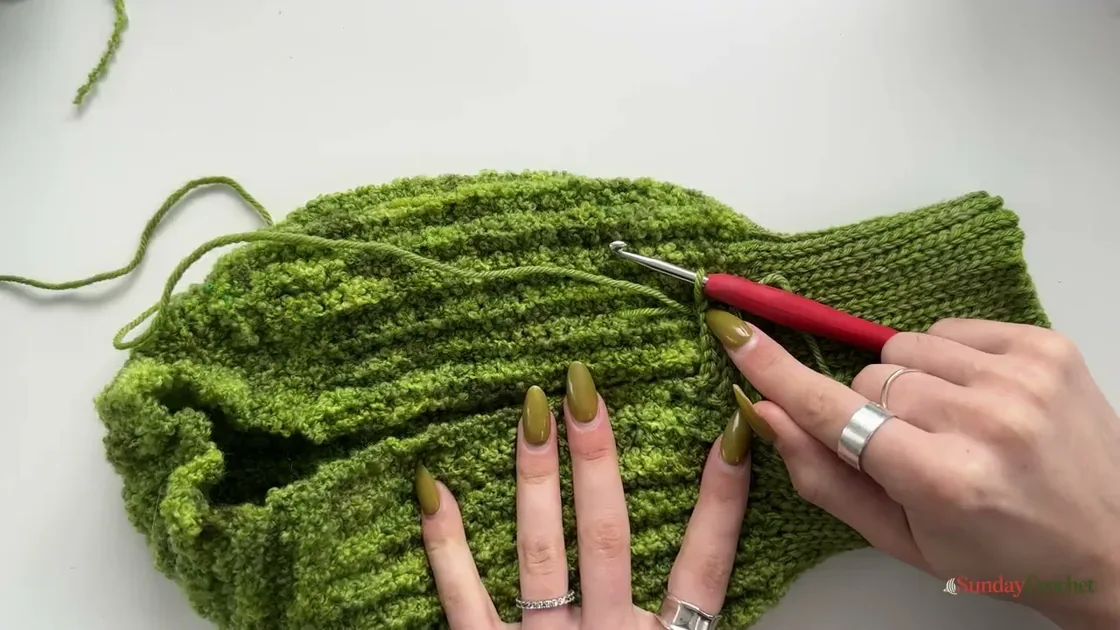
Join yarn at the face edge where the second yarn section begins. The sample face ribbing is 6 stitches wide. To begin, ch 7: six working chains plus one turning chain. Skip the first chain, then work 6 sl st back along the chain. Attach the strip to the face opening with 2 sl st into the next two body stitches. These attachment stitches are not part of the six-stitch ribbing row.
Ch 1 and turn. Skip the turning chain and the two attachment slip stitches, then work 6 sl st in BLO along the ribbing strip. Ch 1, turn, and work 6 sl st back. Attach to the next two stitches on the body edge with 2 sl st. Repeat this back-and-forth sequence around the opening: each ribbing row has 6 sl st, followed by 2 attachment slip stitches at the edge. Avoid working into the turning chain or into the attachment slip stitches when you start the next ribbing row.
For a wider or narrower face band, chain one more than the desired stitch width and work that many slip stitches along the strip. The sample uses six. Continue until you return to the starting point, keeping the edge comfortable around the face. Cut the yarn with a sewing tail and join the two ends of the ribbing with the same mattress-style seam used at the crown. Weave in the remaining ends on the wrong side.
Finishing and fit check
Try the balaclava on before weaving every tail away. Check that the crown seam sits at the top, the side bands cover the ears, and the face ribbing rests comfortably without pulling. The neck section should overlap or meet as intended for your fit. If an edge feels tight, undo the last few rows and add length; if it feels loose, remove a pair of rows and test again. The textured yarn may make individual stitches harder to see, so feel for the back loop and use stitch markers at section changes.
There is no stuffing or separate component assembly in this wearable. The construction is completed by joining the crown, sewing the neck-band ends, and finishing the ribbed face edge. Weave each tail through several stitches on the wrong side, change direction once, and trim only after the yarn is secure. Handle the fabric according to the care guidance for your yarn, especially if it contains wool; avoid assuming that every fiber can be blocked in the same way.
The most useful adjustment is to fit each section before moving on: side band around the head, expanded panel over crown and back, neck band around the front, and face ribbing around the opening. With those checks, the sample counts give you a reliable construction map while leaving room for a comfortable personal fit.