
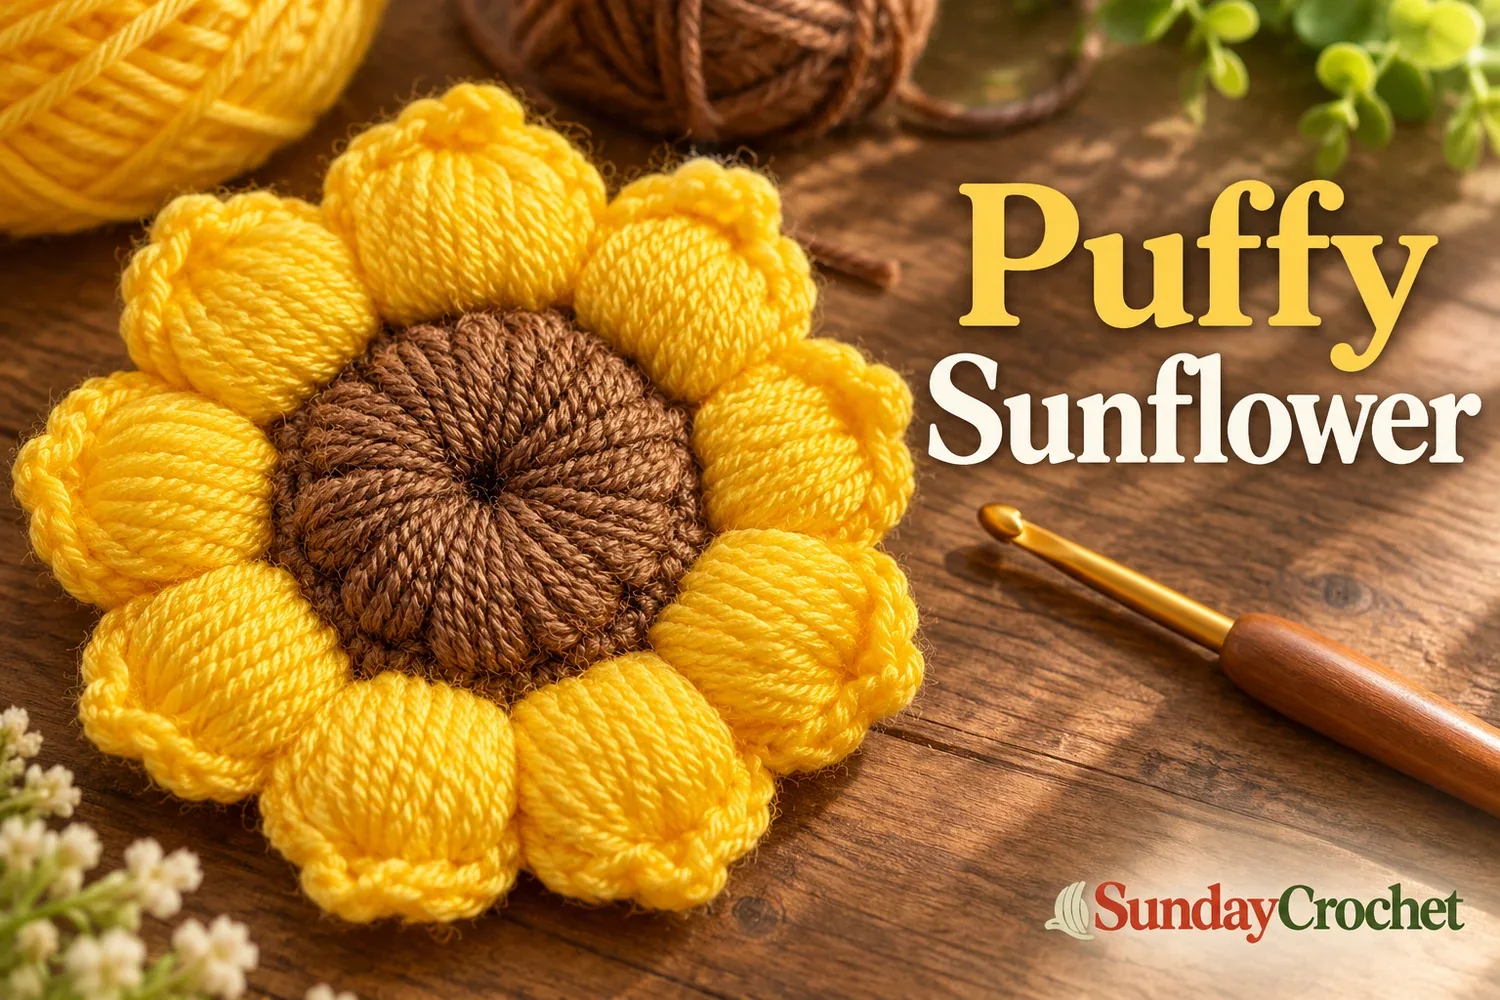
A raised yellow petal ring surrounds a textured brown crochet center. · Sunday Crochet
In this article
01 · A cheerful flower with a little extra dimension02 · What gives the sunflower its shape03 · Yarn & tools04 · Before you begin: keep a count that works for you05 · Step-by-step sunflower06 · How to keep the texture balanced07 · Common questions08 · A sunny finishing touchA cheerful flower with a little extra dimension
A crochet sunflower is an easy way to bring a bright, handmade detail to a bag, a hair accessory, a pin, or a small piece of home decor. This version has a compact brown center with a seed-like texture and a ring of plump yellow petals that stand up from the base. The contrast between the dense middle and the soft, raised edge gives the flower its character.
I’ll show you how I approach the shape, the color change, and the petal repeat so you can work it neatly and understand where to adjust your tension. The instructions below stay with the details that are clear: a circular brown center, yellow petals worked around its edge, and a final hand-shaping. Exact stitch names, hook size, and numeric stitch counts are not specified, so I’ll point out where you need to use your own established circular start and keep count as you work rather than pretend there is a fixed count.
What gives the sunflower its shape
Think of the flower as two connected areas. First comes the center: brown yarn is worked around a circle, with stitches kept close enough to make the fabric look firm and textured. Then the yellow yarn is worked at the perimeter in repeated sections. Those sections build height and width, becoming the rounded, padded petals that surround the center.
This is a useful design to understand even if you already crochet flowers. The center does not need to be perfectly flat like a small coaster; it is slightly raised and substantial. The petals are not long pointed triangles. They are short, full shapes that sit close together. If you keep those two proportions in mind, it is easier to judge the work as it grows.
Yarn & tools
- Brown yarn for the center
- Yellow yarn for the petals
- A crochet hook that suits your yarn and gives you a fabric you can work comfortably
- Scissors and a yarn needle for finishing
- Optional stitch markers to mark the start of your circle or a repeat you want to track
The materials shown use brown and yellow yarn, but the fiber, yarn weight, and hook size are not identified. Choose yarns of a similar thickness so the center and petals feel balanced. If your yellow yarn is much thicker than your brown, the petals may overwhelm the center; if it is much thinner, they may not look as full. The feel of the yarn matters too, and a quick look at how cotton and acrylic behave in crochet can help you decide which texture you want.
There is no fixed gauge or finished measurement to match here. Make a small sample of the center and one petal first. It lets you see whether the hook feels comfortable, whether the center stays firm, and whether the petal has enough body to hold its rounded shape.
Before you begin: keep a count that works for you
Because the exact number of center stitches and petals is not fixed, decide on a repeat you can maintain consistently. As you make the brown circle, count the spaces or stitch tops around its outside edge. When you switch to yellow, use that edge as your map. Keep each petal similar in width, and space the next one beside the previous one so the brown center remains visible without leaving large gaps.
You do not need to force the flower into a particular petal total. The number of petals depends on the size of the center and how wide you make each repeated section. What matters is that the last petal meets the first neatly. A quick note on paper can help: record how many petals you make and how many center spaces you used between them. That gives you a personal count to repeat if you make another flower with the same yarn and hook.
Keep your hands relaxed. Dense stitches can tempt you to pull the yarn tightly, but a very tight center is hard to work into when you add the petals. Aim for a firm circle that still flexes enough for the hook to enter its edge.
Step-by-step sunflower
Step 1: Build the brown circular center
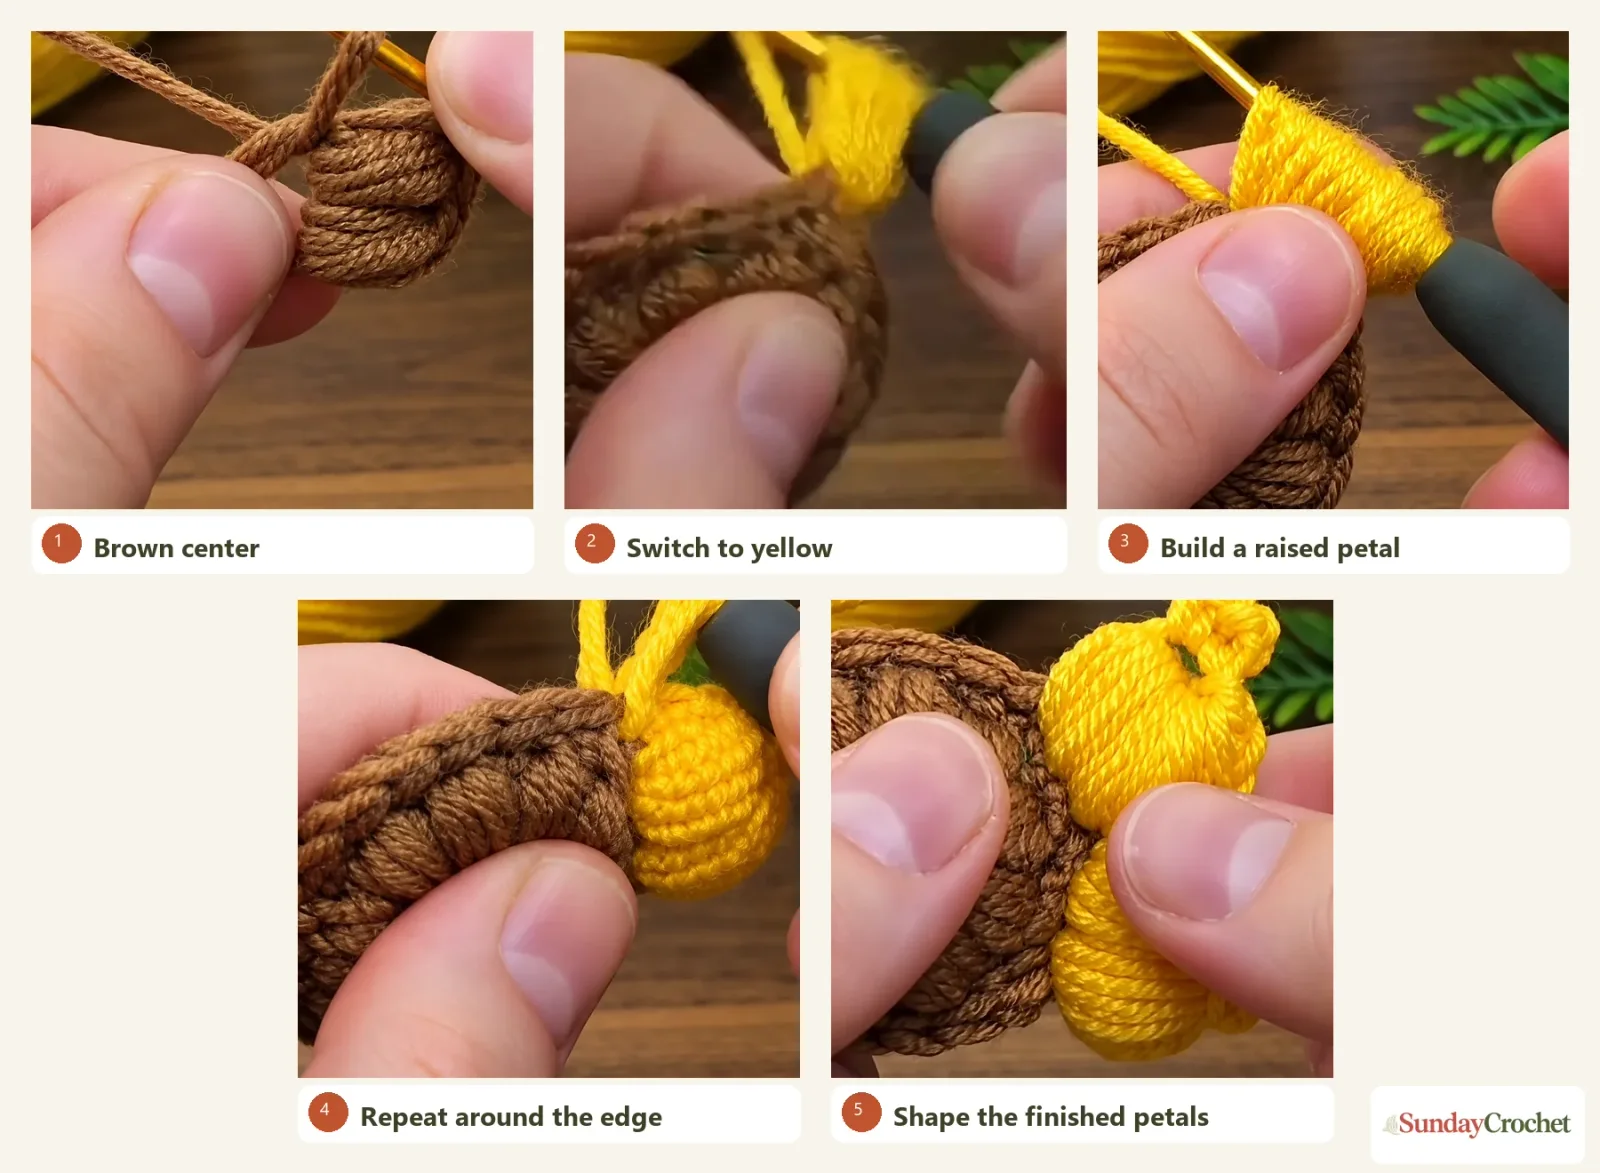
Begin with brown yarn and form a small circular base using a circular start you already know. Work around the circle, keeping the stitches close together. The goal is a compact, even center rather than a lacy one, because the yellow petals will attach around its outside edge. If you want to refresh the basic hook movements first, a gentle first-stitches walkthrough can help you settle into the yarn before starting the circle.
As the circle grows, look at it from the front every few stitches. It should stay round, and its middle can rise slightly into a soft dome. If you see open holes between stitches, ease your tension a little and bring the stitches closer together. If the fabric begins to cup sharply, loosen your tension and check that you are distributing the stitches evenly around the circle.
The precise starting loop and stitch count are left open here. Use a familiar method that produces a secure circle, and write down your own count so you can reproduce the size. The brown section should be large enough to give the petals a stable edge, but not so large that the yellow ring becomes an afterthought.
Step 2: Prepare the outer edge
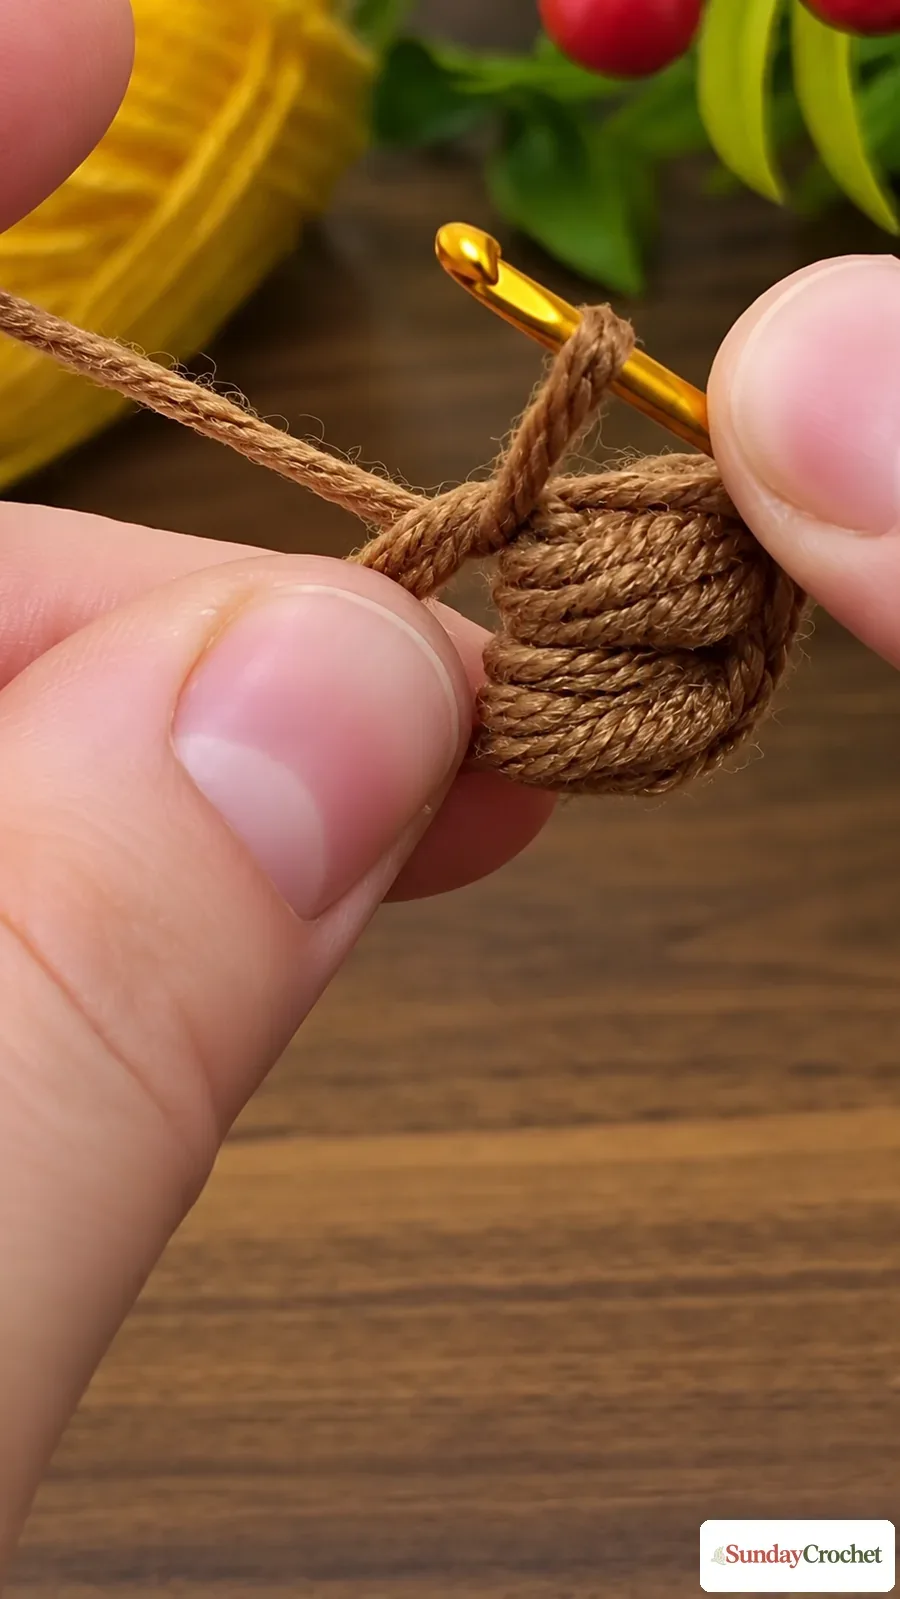
When the center is the size you want, take a moment to check its perimeter. Smooth the fabric between your fingers and find the outer stitches or spaces where the yellow sections will sit. This small pause makes the next stage easier: you can see where each petal begins and avoid accidentally working several into one spot.
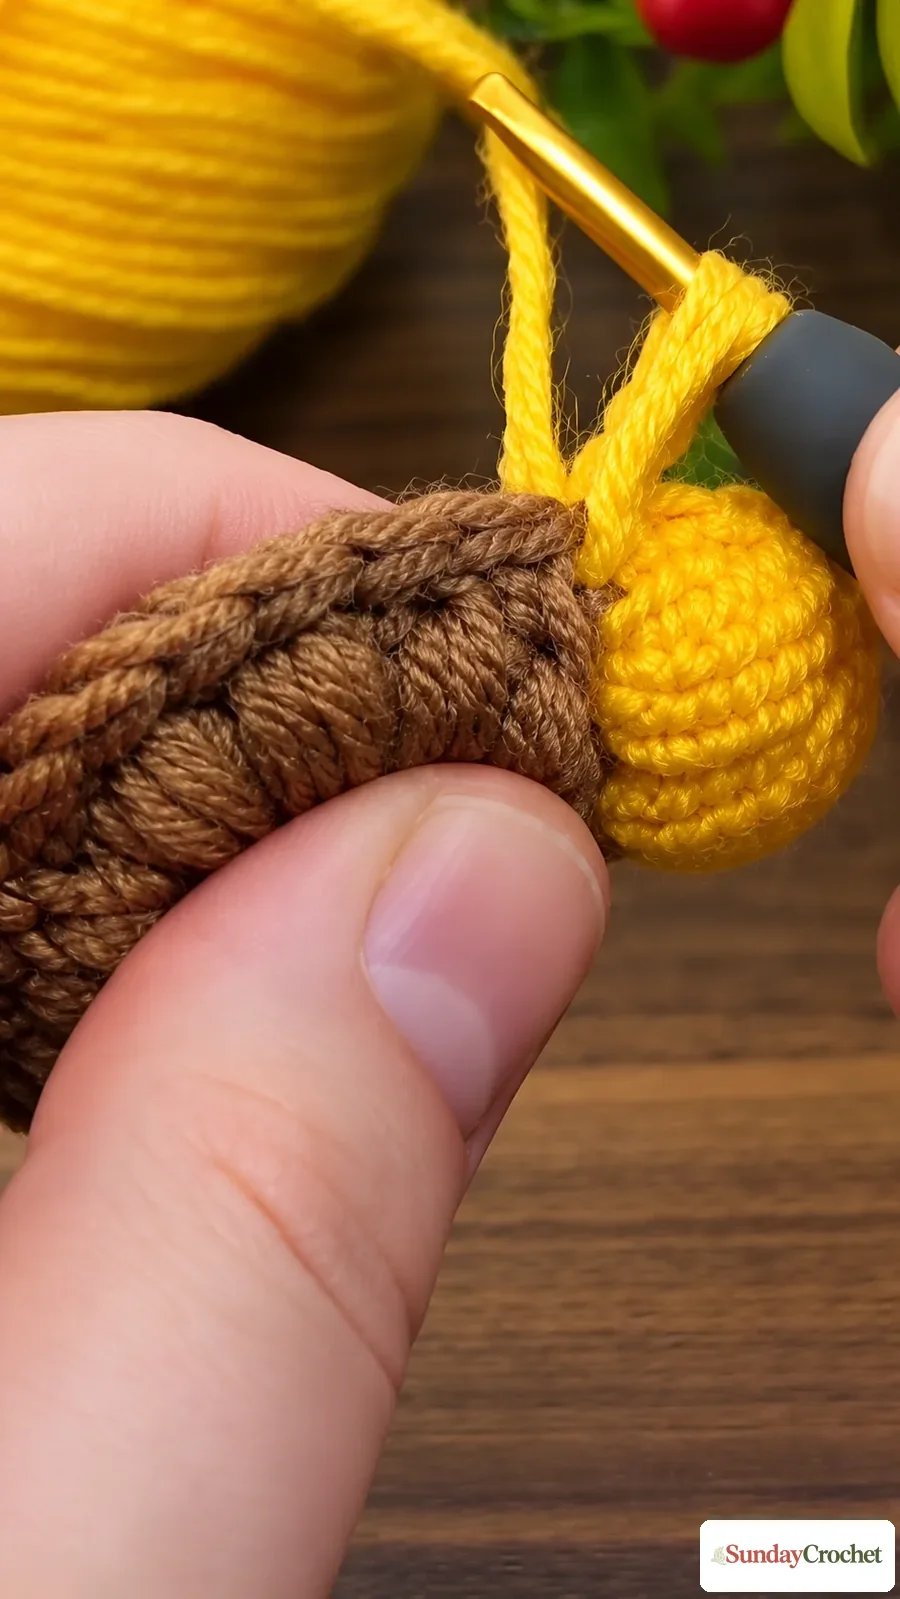
Change to yellow at the edge of the brown circle. Secure the color in the way you normally change yarn, leaving a tail long enough to weave in later. Keep the brown yarn tail available for finishing too. A clean change helps the two colors meet without a loose gap at the base of the petals.
Step 3: Shape the first rounded petal
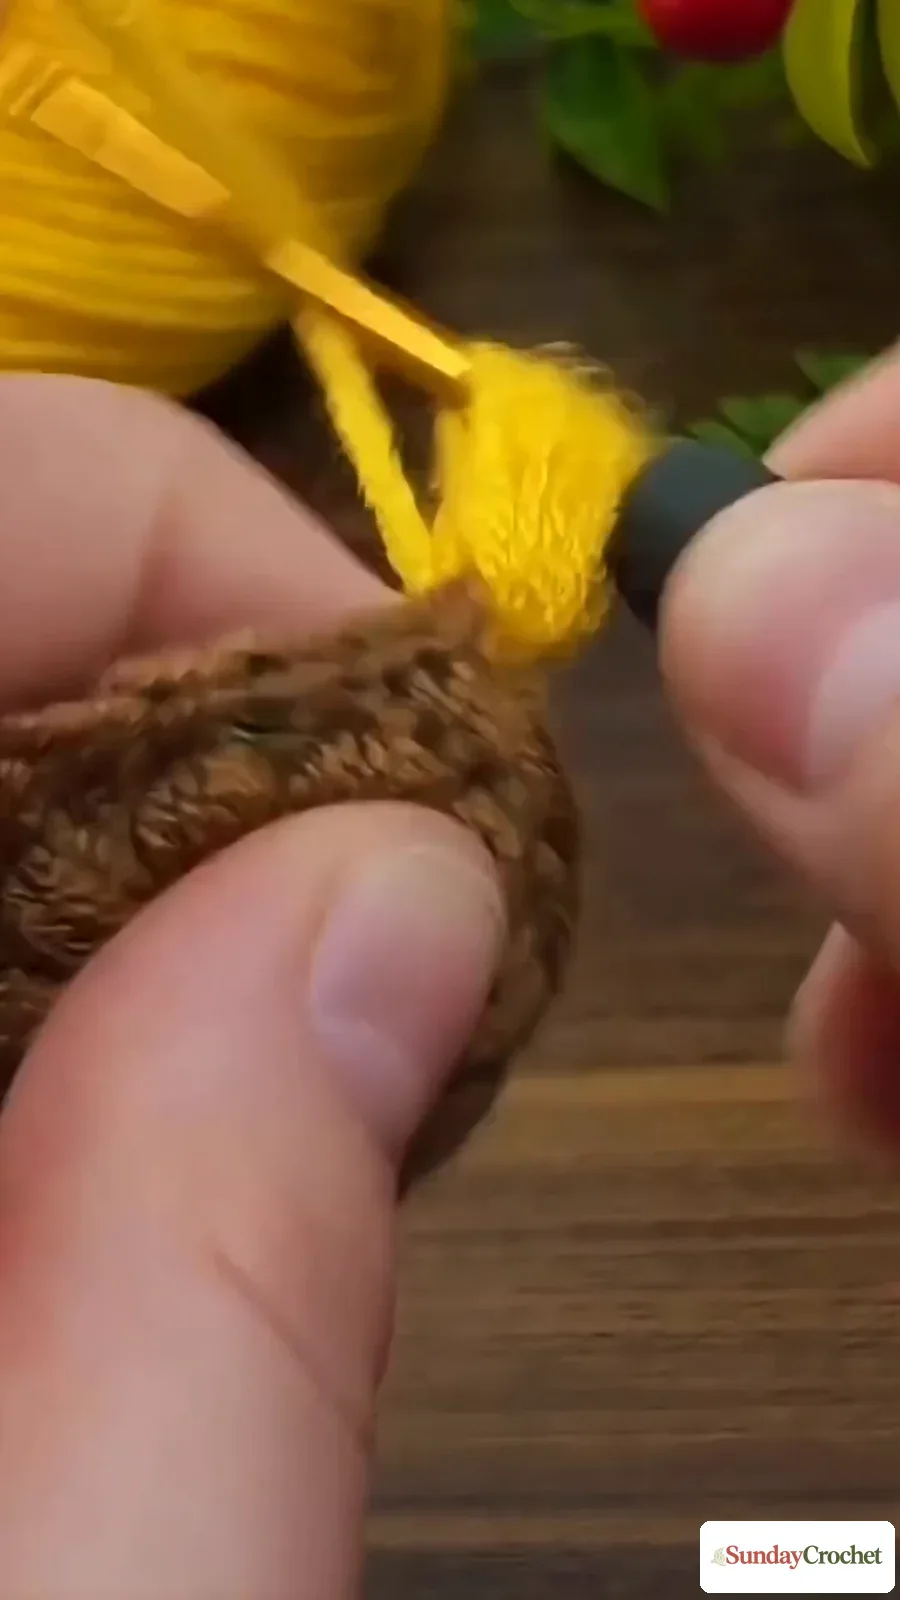
Work the yellow section directly at the edge of the center. Build it upward and outward until it has the height and fullness you want. The finished flower uses thick, rounded petals, so give each one enough yarn to look plush. Keep the base anchored to the brown edge as you form it; a loose base can leave a visible gap between the two colors.
Pay attention to the outline as the petal develops. A petal that is too narrow will look pointed or stringy. One that is too wide can crowd its neighbors. You are aiming for a raised oval or soft lobe that sits beside the next one, not a long, flat strip. Once the first one looks right, use it as your visual guide for the remaining repeats.
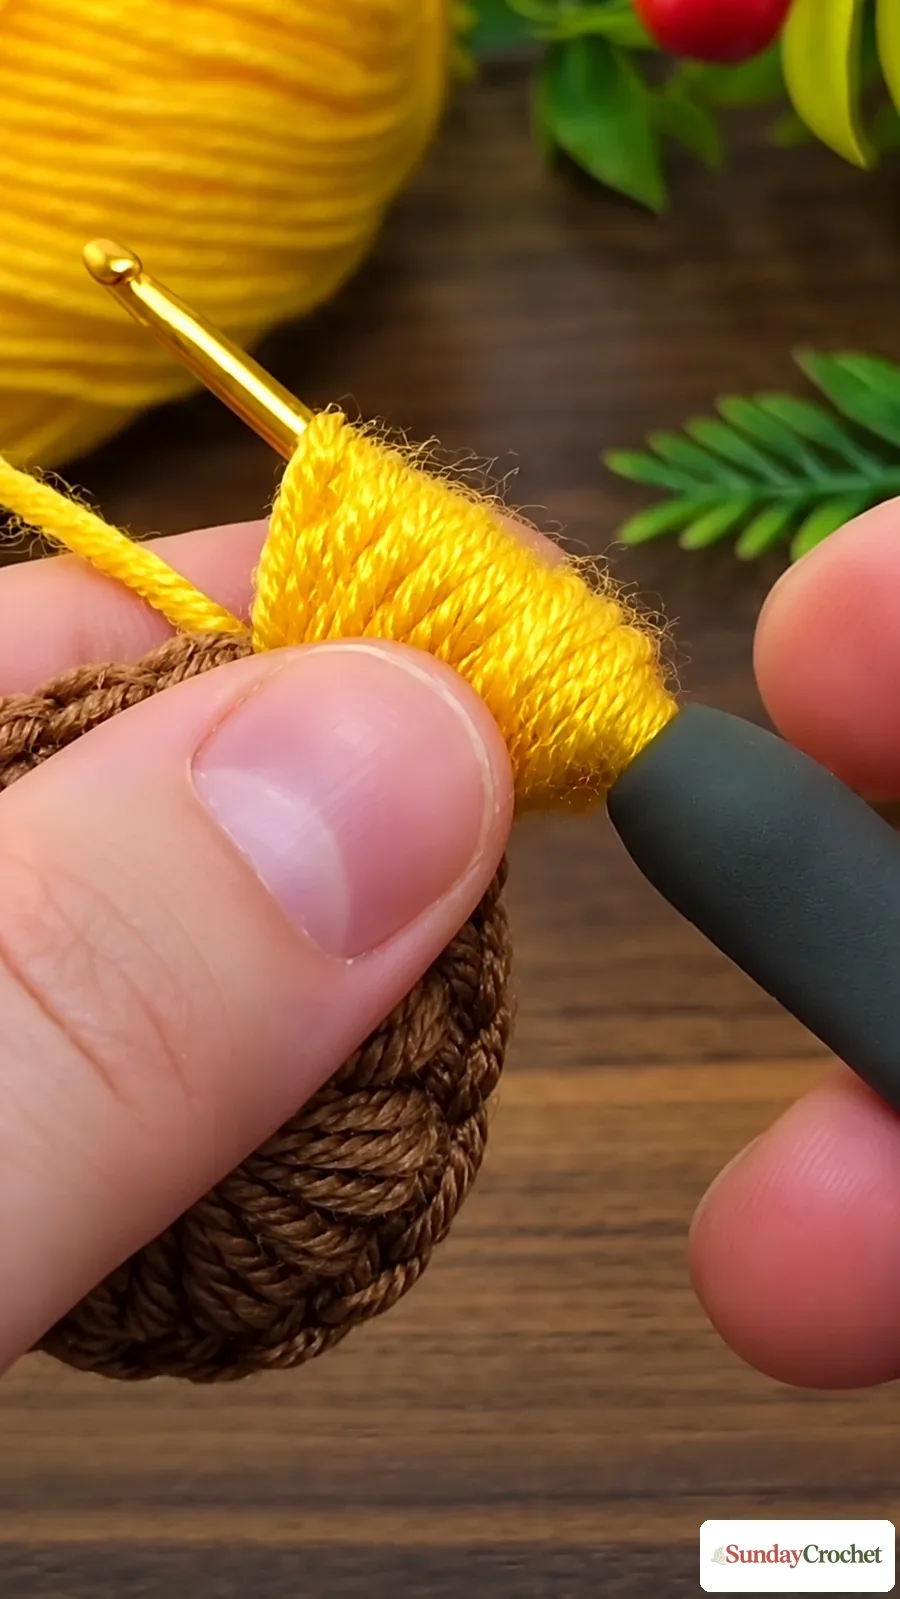
The exact stitch combination is not named, so follow the same loop-and-stitch movement you are comfortable repeating with your hook. Keep the working loops at a consistent height and avoid tightening the final pull-through so much that the petal collapses. The picture below focuses on the rounded profile and its attachment point.
Step 4: Repeat the petal around the circle
Continue the same petal sequence around the center. After each one, check that the next attachment point is beside it and that you have not skipped a wide section of the brown edge. Turn the flower in your hand as you work; looking at the whole perimeter helps you keep the spacing even.
If you are counting, mark each completed petal in your notes or with a removable marker. The flower should close with the final section meeting the first without a large bare patch or an awkward pile-up. If the remaining space is slightly wider or narrower than a normal repeat, adjust the spacing gradually over the last few petals rather than trying to hide the difference in one spot.
Use the same tension for every repeat. Similar height and fullness are what make the petals read as a ring. Small variations are part of a handmade flower, but large differences can pull the center out of shape.
Step 5: Close the ring and arrange the petals
Once the yellow sequence has gone all the way around, pause before finishing the yarn. Check the join and make sure the first and last petals sit beside each other in the same way as the others. The finished edge should feel complete, with the brown center framed all the way around.
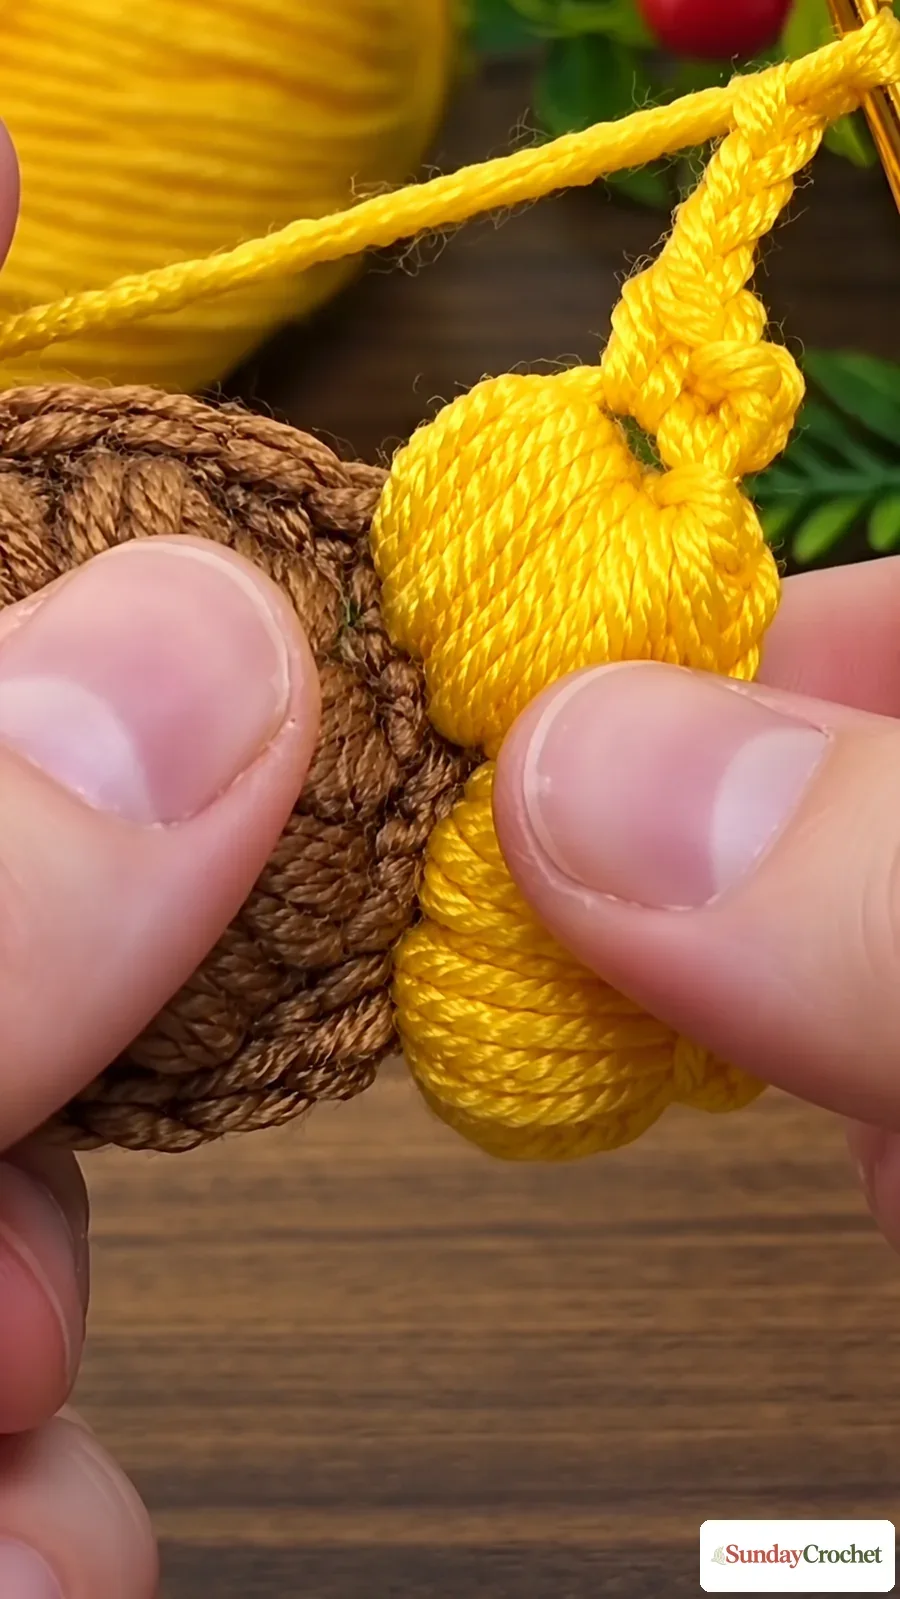
Gently arrange each petal with your fingers. Separate any that have folded under, smooth the tops, and nudge them into a regular circle. This hand-shaping is part of the finish: it makes the petals look more uniform without adding another stitch round. Weave in the ends securely with your usual finishing method, taking care not to pull the center into a point.
How to keep the texture balanced
The flower looks best when its two textures are easy to distinguish. Keep the brown center dense enough to feel substantial, but leave its outer edge workable. The yellow petals need more height and volume, but they should not be so loose that the loops snag or lose their shape. Try to maintain the same yarn feed and hand position across each repeat.
If your yarn is smooth and tightly twisted, the stitch definition may look crisp. A softer yarn can make the petals feel even puffier, though very fuzzy fibers can blur the shape. Either can work for a decorative applique. Choose a yarn you can see clearly while crocheting, especially if this is your first time making a raised flower.
The hook is a personal choice because the exact size is not specified. Start with the size recommended for your yarn, then adjust if the fabric feels too stiff or too loose. Your sample is the best guide: the center should not be difficult to enter, and a petal should hold its rounded silhouette when you set the work down.
Common questions
How many stitches and rounds does the sunflower use?
There is no fixed stitch count, round count, or petal total specified here. The construction is shown as a circular brown center followed by yellow petals worked around its edge. Count the stitches in your own center and note how many petal repeats fit evenly. That count will be specific to your yarn, hook, and desired flower size.
Which crochet stitches make the puffy petals?
The petal stitch combination is not identified by name. What is clear is the result: repeated yellow sections built into thick, rounded petals. If you already know a raised crochet stitch or looped petal technique, make a small sample and check that it produces a similar padded shape before continuing around the flower.
Can I make the sunflower larger or smaller?
Yes, the overall scale changes with your yarn, hook, and center size. A larger center gives you more perimeter to fill; a smaller one calls for a tighter, more compact petal ring. Change one variable at a time and make a sample so you can see how the petal proportions respond.
What can I use the finished flower for?
It works as a bright applique for decor, a brooch, or an accessory. You can also bring a dimensional bloom into a larger project when you want one raised focal point.
A sunny finishing touch
This sunflower comes together through contrast: a close, textured brown middle and a ring of soft yellow petals. Work the circle evenly, repeat one petal shape around its edge, and take time to arrange the petals before you secure the ends. Keep your own stitch notes as you go, since the exact counts are not fixed, and you will have a repeatable version sized to the yarn and hook you enjoy using.


