
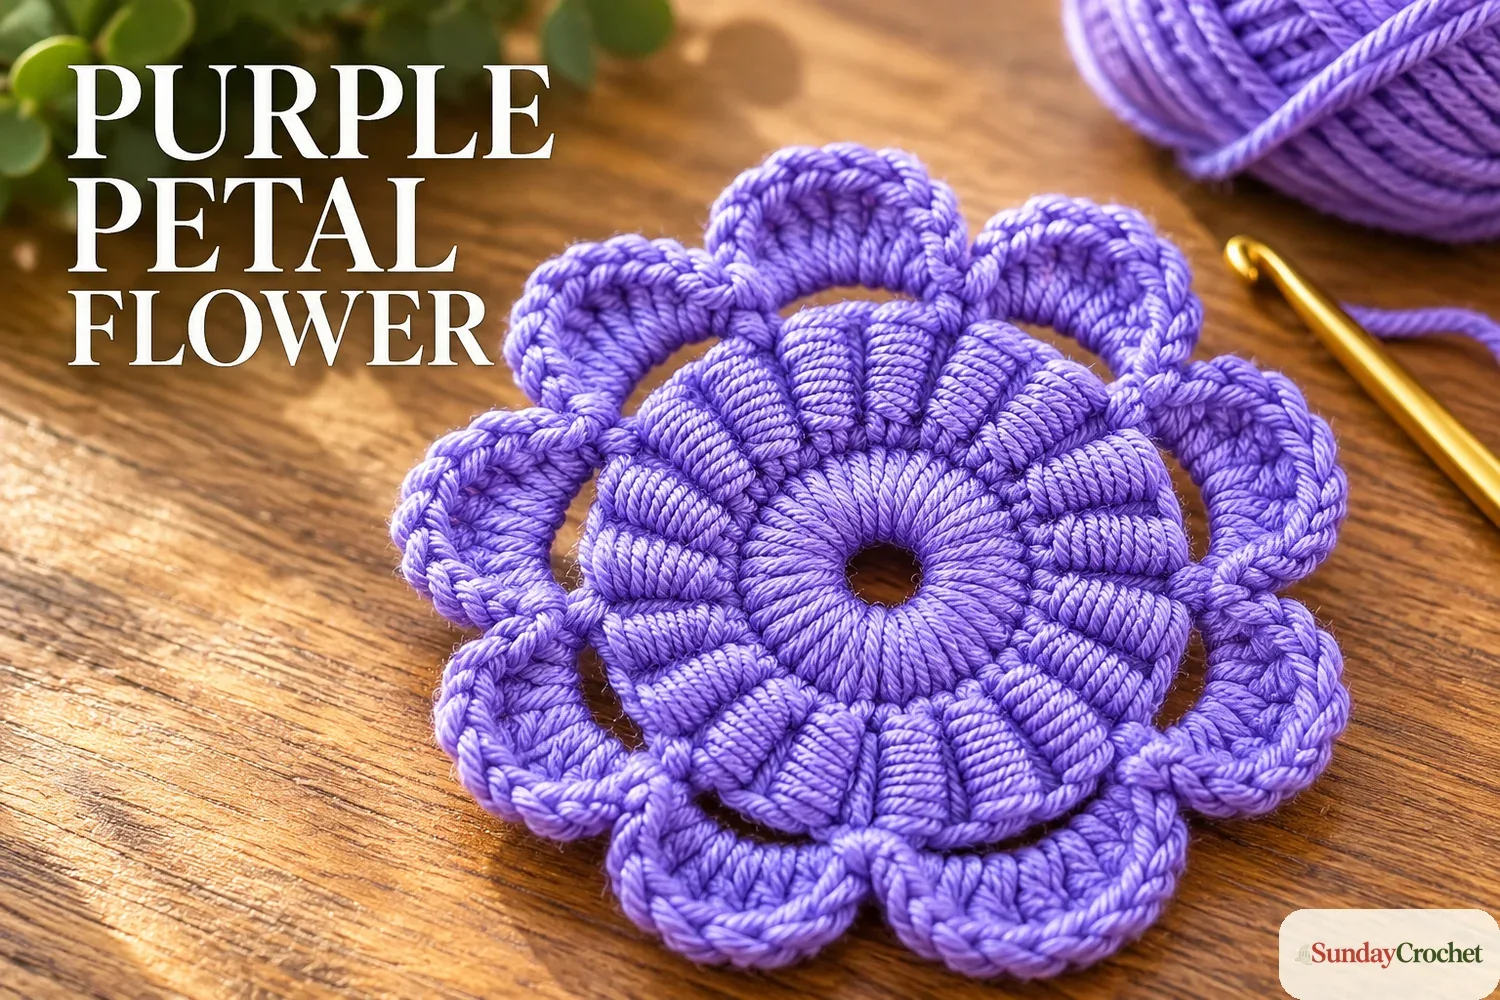
A raised inner petal ring sits inside a softer scalloped outer layer. · Sunday Crochet
In this article
01 · A flower with two distinct layers02 · Yarn & tools03 · Before you begin04 · The pattern05 · Keep the layers even06 · Common questions07 · A dimensional finish from a simple repeatA flower with two distinct layers
This crochet flower gets its character from contrast: a compact center supports a ring of tall, tightly wrapped petals, while a second round of open arches holds the softer petals at the edge. Worked in one shade of lavender, the layers show up through texture rather than color changes. It makes a small decorative motif for adding a floral touch to a crochet project.
I’ll show you how I do this, one round at a time. The directions below use US crochet terms. The repeat has a few useful numbers—three chains to start a wrapped petal, ten yarn wraps, and five chains for each outer support arch—but the demonstration does not specify every stitch total. I’ll keep those counts honest instead of guessing.
Yarn & tools
The flower is shown in smooth lavender yarn with a gold hook, but the yarn weight, fiber, hook size, gauge, and finished diameter are not specified. If you are still getting familiar with the basic motions, a short refresher on the foundational crochet stitches can help before you begin.
Before you begin
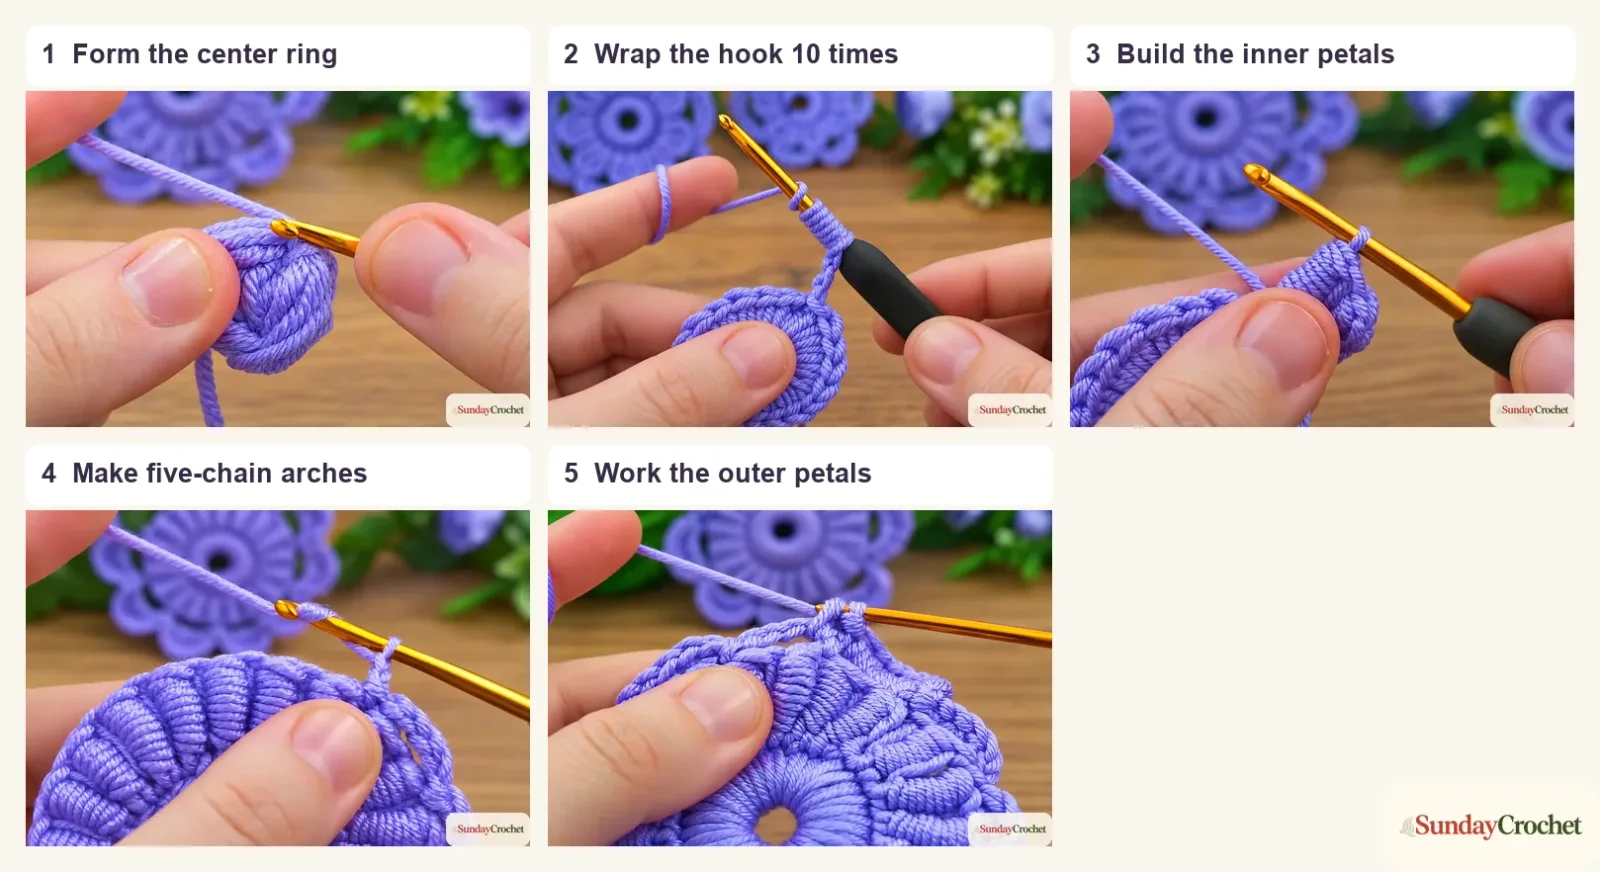
The flower grows in four rounds: a firm center, a first layer of long wrapped petals, a support round of chain arches, and the larger outer petals. Keep the work facing you as you move around it so you can see where the next stitch or arch belongs. The center should be compact enough to support the heavier-looking inner petals; the outer arch round then creates space for the edge to open out.
I use these US abbreviations below:
- ch — chain
- sc — single crochet
- sl st — slip stitch
- dc — double crochet
The long inner petal is a wrapped, elongated stitch motif, not a standard named US stitch with a universal abbreviation. Count the wraps on the hook carefully: each motif uses 10 wraps. The finished center-stitch count, the number of inner motifs, and the exact number of outer-petal stitches are not specified, so the written directions describe the repeat rather than assign an invented total.
The pattern
Round 1 — Make the center ring
Wrap the yarn around a finger several times to form a small, compact ring. Hold the ring securely and work the first stitches into its center, continuing around the base so it becomes firm enough to support the flower. The stitch type and total for this foundation are not stated, so I’m not assigning a specific single-crochet count here. What matters for the next round is a stable, continuous base with an edge you can work into.
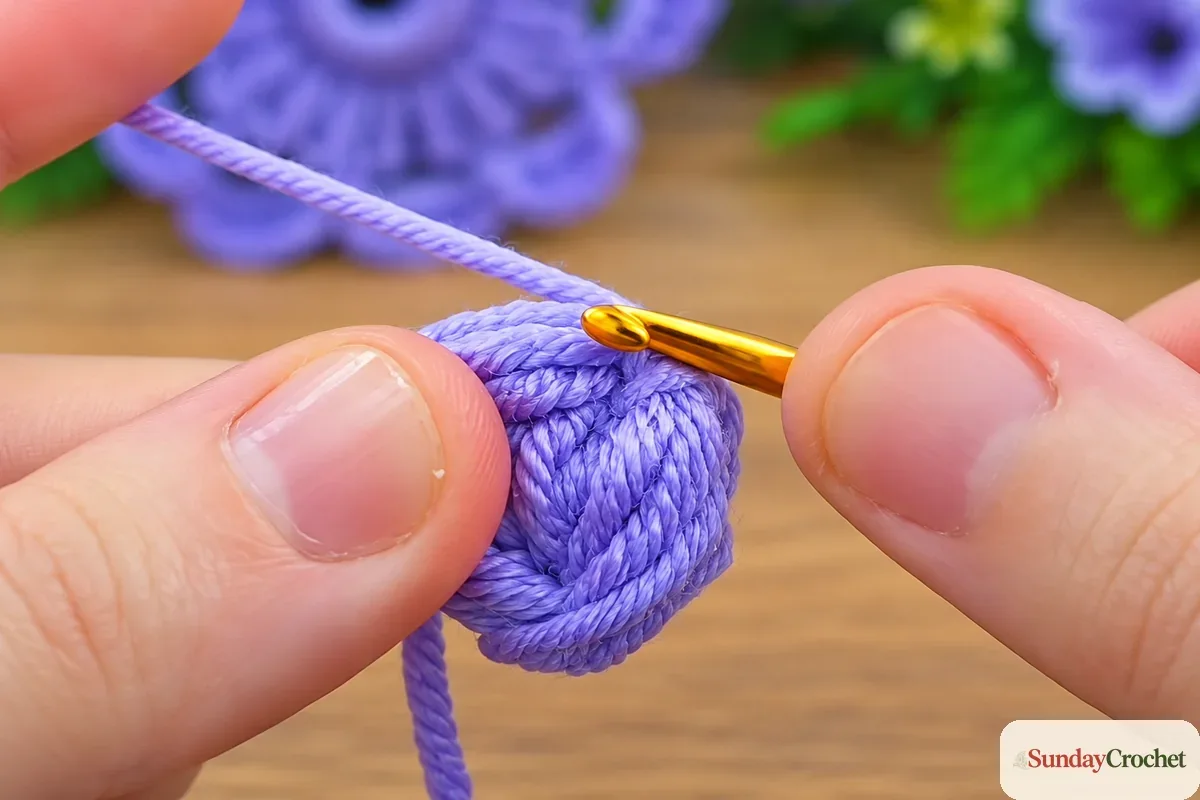
Try not to make the starting ring so tight that the hook cannot enter its center. At the same time, a loose center can leave the inner layer feeling floppy. Hold the ring between your fingers while placing the first stitches, and pause to check that the base lies evenly before beginning the tall motifs.
Round 2 — Add the ten-wrap inner petals
Begin a motif with ch 3. Wrap the yarn around the hook 10 times, keeping the wraps together on the shaft so they do not slide off the hook’s throat. The yarn is drawn through the accumulated loops and the motif is secured to the base; the demonstration uses a sc as the anchor and then a securing stitch before moving on. Work the same raised, elongated motif around the center until the first petal layer is complete.
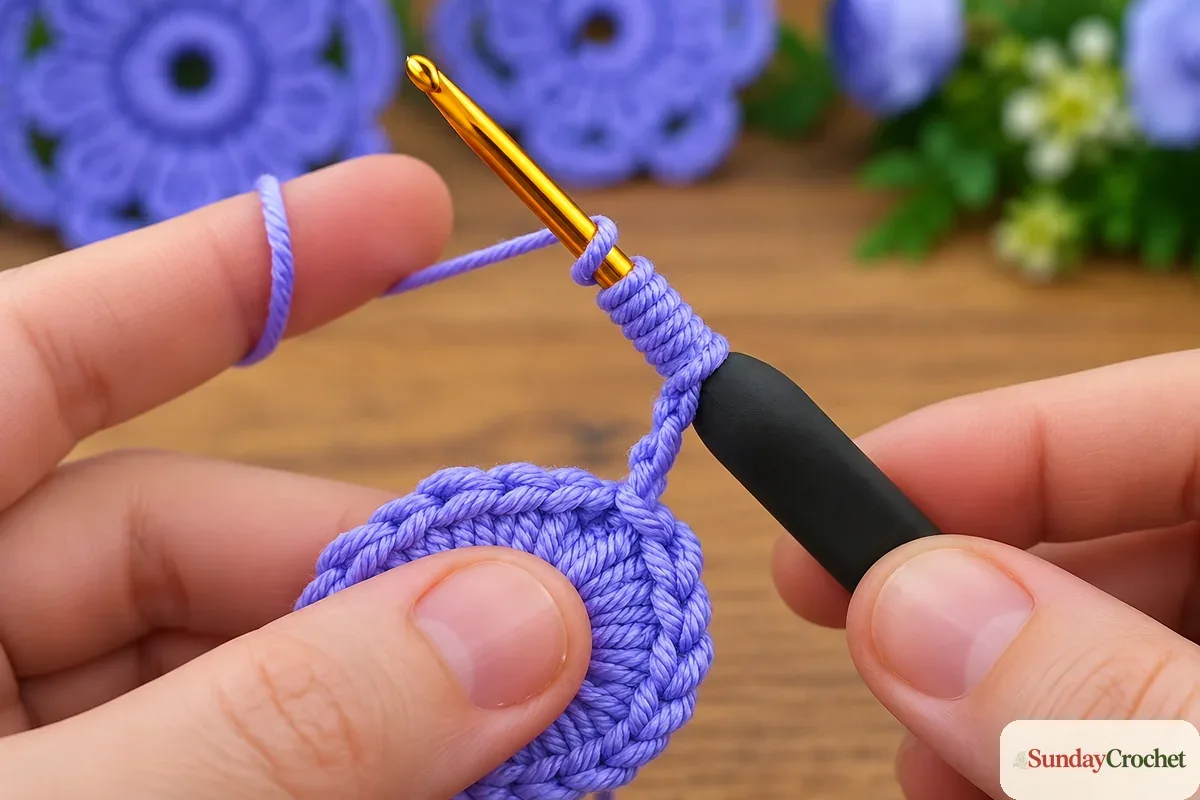
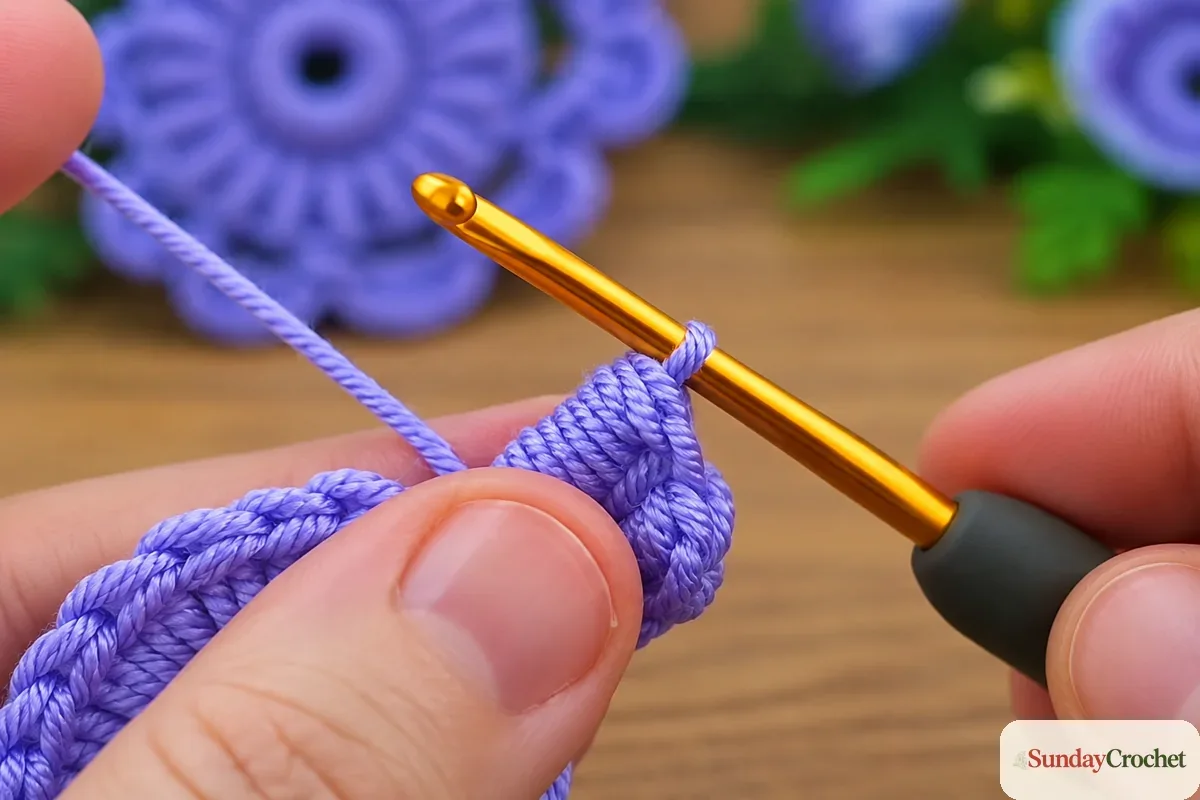
The tall wraps create the thick, ribbed look. As you pull the yarn through them, use your other hand to steady the base and avoid tugging the whole ring out of shape. If a wrap slips off, pause and gather the loops back onto the hook before continuing; the next motif should begin only after the previous one is anchored. The source does not give a total number of these motifs, so repeat around the base and use the visible spacing to keep the inner ring balanced.
Round 3 — Create the support arches
When the inner layer is complete, work a support round with chain spaces and slip stitches. For each arch, ch 5, skip 1 stitch, then work 1 sl st into the next stitch. Repeat that sequence around the flower. These small arches sit outside the raised petals and create separate openings for the larger edge motifs.
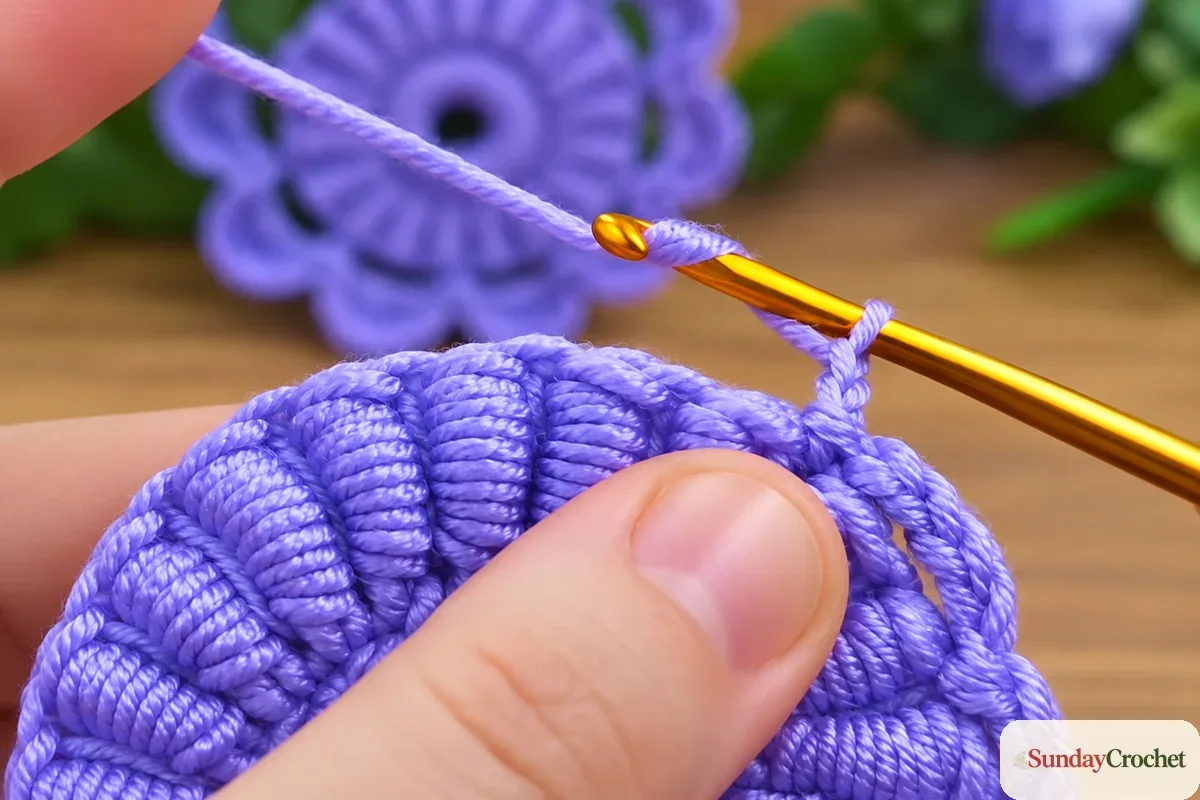
Count each chain as you make it, especially while turning the flower in your hand. The five-chain spaces should be easy to spot as little bridges. If an arch looks noticeably tighter than its neighbor, check that you made all five chains before anchoring it. Keep the slip stitches snug but not so tight that the next round becomes difficult to work into.
Round 4 — Shape the outer petals
Work into each chain arch. The repeat begins with 1 sc, followed by chains and a group of dc stitches that forms a larger petal. Repeat the same treatment in every arch around the flower. This creates the scalloped outer edge and gives the motif its second, more open layer.
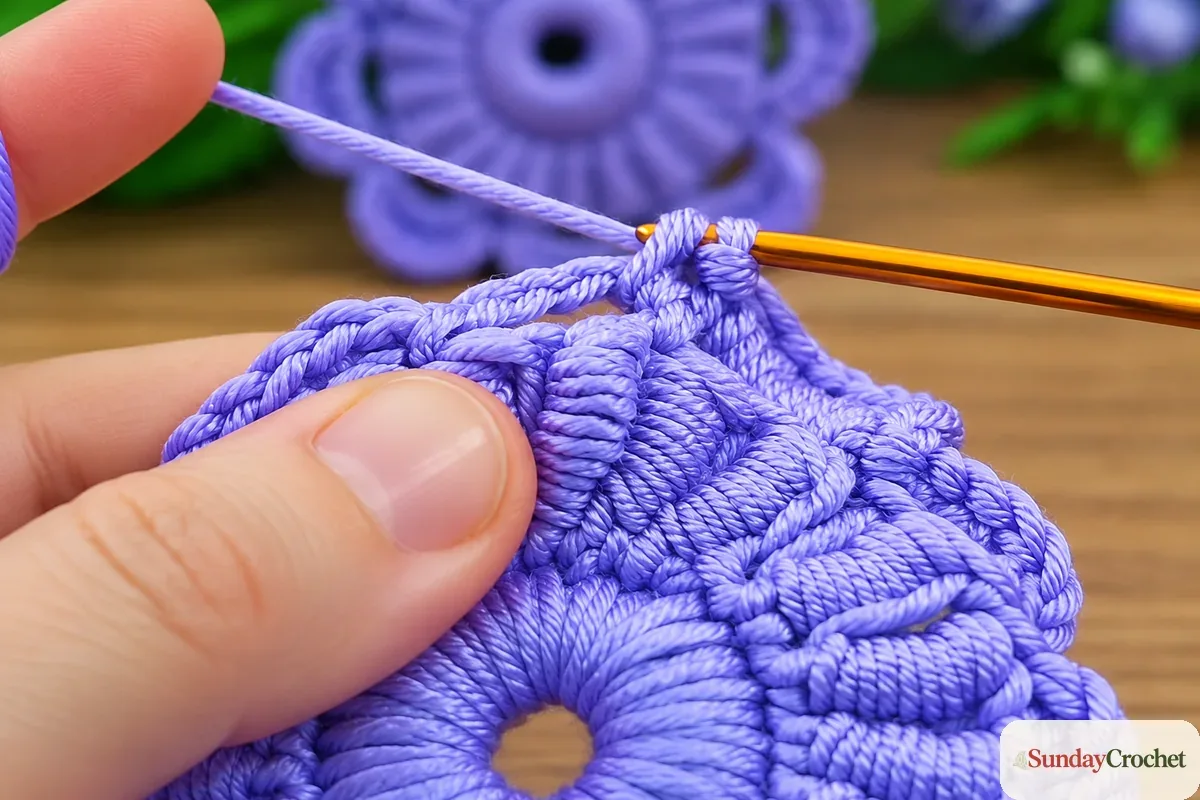
The number of chains and dc in each outer petal is not stated, so use the completed petal as your visual guide and keep the groups consistent around the round. The important structure is clear: each petal is built over one support arch, and the same stitch combination is repeated from arch to arch. When you reach the last arch, compare it with the first so the edge looks balanced.
Keep the layers even
A few small checks make this dimensional flower easier to manage:
- Keep the center firm. The first round carries the weight of the wrapped motifs. If the ring is loose, the raised petals may pull it out of shape.
- Count the wraps, not a guessed petal total. Ten wraps belong to each inner motif. The total number of motifs is not supplied, so work evenly around the actual base rather than forcing an unsupported count.
- Protect the five-chain spaces. Each Round 3 arch is the foundation for one outer petal. Skipping one stitch between arches keeps those openings distinct.
- Repeat consistently. The written source leaves the outer stitch count open, but each arch should receive the same combination so the scallops have a similar height.
- Check both layers as you work. The inner petals are close and raised; the outer ones are larger and more open. If the arches disappear behind the first layer, gently spread the flower to find them before inserting the hook.
There is no gauge or finished-size target for this motif. A different yarn and hook will change the scale and definition, so choose them as a pair and expect the final flower to vary in size. The photographed sample uses one purple shade throughout; the texture alone separates its center, inner petals, and outer edge.
Common questions
How many stitches go into the center?
The center is worked around a ring until it forms a firm base, but no stitch type or total is given. I have left that count open rather than present a visual estimate as an exact pattern instruction.
How many inner and outer petals should I make?
The instructions say to repeat around the center and then into each chain arch, but they do not give a fixed count for either layer. Follow the spacing of your own base and keep the repeated motifs evenly distributed.
Is the ten-wrap petal a regular loop stitch?
It is best described here as a long, wrapped petal motif. The useful count is 10 wraps around the hook per inner motif. Stitch names vary for techniques that hold many wraps, so this pattern describes the action instead of assigning a potentially confusing standard name.
Can I use another yarn color?
The sample uses one color, and the pattern does not include color changes. A single shade keeps the relief clear; if you choose another color, the stitch sequence remains the same, but the finished appearance will differ.
Is there an exact finished size?
No finished dimensions or gauge are supplied. The flower’s diameter will depend on your yarn, hook, tension, and the number and height of repeated motifs. Treat it as a decorative motif rather than a size-specific garment component.
A dimensional finish from a simple repeat
Once the four rounds are complete, the flower has a sturdy center, a close ring of elongated wrapped petals, and an open scalloped edge. The three most useful numbers to remember are ch 3 to begin an inner motif, 10 wraps around the hook, and ch 5, skip 1, sl st for each support arch. The remaining stitch groups are repeated consistently without a stated total. That combination of clear counts and flexible spacing is what gives this purple flower its layered shape while leaving room for the yarn and tension you have on hand.


