
· Sunday Crochet
In this pattern
01 · Meet Chai Chai, the red panda plush02 · Yarn & tools03 · Abbreviations04 · The pattern05 · Assembly and finishingMeet Chai Chai, the red panda plush
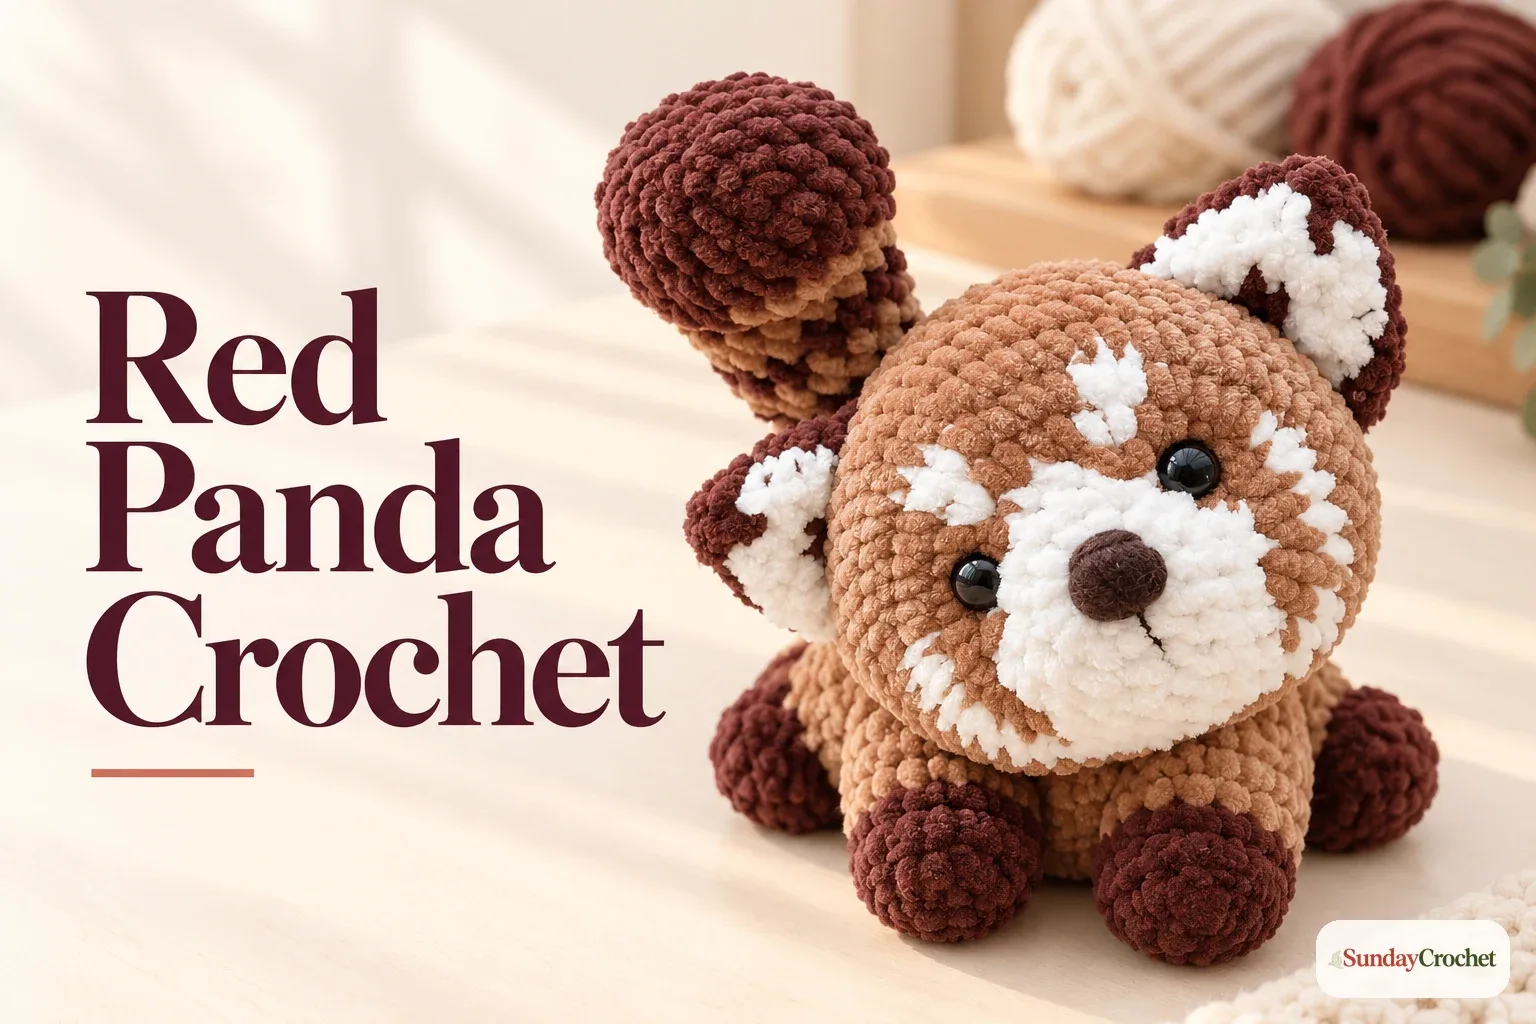
Chai Chai is a 6.5-inch (16.5 cm) red panda with a colorwork head, oval body, four paws, and striped tail. Crochet the pieces in continuous spiral rounds, then sew and shape them into the finished plush.
I’ll show you how I make it. These US-term rounds include stitch totals. Gauge and skill level are not specified; confident beginner is my estimate because the project includes color changes, small openings, and sewn joins. If plush yarn is new to you, practice the magic ring and invisible decrease first. Steady, easy-to-count stitches help keep the colorwork clear.
Yarn & tools
Keep a marker in the first stitch. Feel for the top V when plush yarn hides the loops. The pattern uses yarn-under single crochet for a compact fabric; a different yarn or hook can change the finished size.
Abbreviations
- MR: magic ring
- ch: chain
- sc: single crochet
- inc: 2 sc in the same stitch
- dec: invisible decrease, joining the next 2 stitches
- rnd / rnds: round / rounds
- st / sts: stitch / stitches
- W: cream/white
- B: medium brown
- DB: dark brown
Color instructions are written in the order worked. For a clean color change, begin the last sc in the old color and stop with two loops on the hook; draw the new color through both loops to finish that stitch. For a color section that will not be used again soon, the unused strand may be cut and tied inside. Secure every end where it will be hidden inside the plush.
The pattern
Ears (make 2)
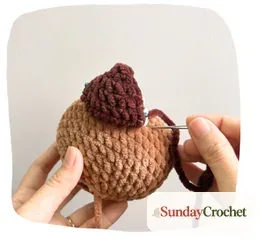
With DB, make a magic ring. These are worked as small cups. After the colorwork, flatten the opening and sew the open sides together. Leave a long dark-brown tail for attachment.
- Rnd 1: 4 sc in MR (4)
- Rnd 2: DB 2 inc, W 2 inc (8)
- Rnd 3: DB (1 sc, 1 inc) twice; W repeat the same sequence (12)
- Rnd 4: DB (1 sc, 1 inc, 1 sc) twice; W 1 sc, 1 inc; DB 2 sc; W 1 inc, 1 sc (16)
- Rnd 5: DB (3 sc, 1 inc) twice; W 3 sc; DB 1 inc, 2 sc; W 1 sc, 1 inc (20)
Fasten off the white yarn and weave in its end. Flatten the ear, then sew through both layers to close its base. Use the long DB tail to sew the ears to the head between rounds 10 and 12, leaving about seven stitches between them.
Head
Begin in DB and follow the color map as written. The cream and medium-brown patches are built into the head, so make each color change on the final yarn-over of the preceding stitch. The eye placement is described after round 12. Insert and secure both safety eyes before stuffing and closing the head.
- Rnd 1: 6 sc in MR (6)
- Rnd 2: 6 inc (12)
- Rnd 3: 1 sc, (1 sc, 1 inc) twice, 2 sc, (1 inc, 1 sc) twice, 1 sc (16)
- Rnd 4: W 3 sc, 1 inc; B 2 sc, 1 inc; W 2 sc; B 1 inc, 2 sc; W 1 inc, 3 sc (20)
- Rnd 5: W 3 sc; B 5 inc; W 1 inc; B 2 inc; W 1 inc; B 5 inc; W 3 sc (34)
- Rnd 6: W 4 sc, (1 inc, 1 sc) 3 times; B 1 inc, 1 sc, 1 inc; W 1 sc, 1 inc; B (1 sc, 1 inc) twice; W 1 sc, 1 inc; B (1 sc, 1 inc) twice; W (1 sc, 1 inc) 3 times, 3 sc (48)
- Rnd 7: W 3 sc, B 45 sc (48)
- Rnd 8: B 42 sc, 1 dec, 4 sc (47); cut W
- Rnd 9: 5 sc, 1 dec, 35 sc, 1 dec, 3 sc (45)
- Rnd 10: 4 sc, 1 dec, 39 sc (44)
- Rnds 11–12: 44 sc each round (44 each)
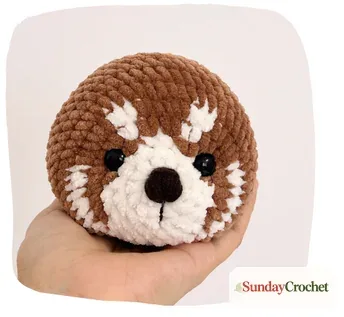
Place the eyes between rounds 4 and 5. Starting at the beginning of round 4, skip 6 stitches to position the first eye, then leave 7 stitches between the eyes before placing the second. Check the expression from the front before locking the backs in place.
Continue shaping the head:
- Rnd 13: 5 sc, (1 dec, 9 sc) 3 times, 1 dec, 4 sc (40)
- Rnd 14: (6 sc, 1 dec) 5 times (35)
- Rnd 15: (5 sc, 1 dec) 5 times (30)
- Rnd 16: (3 sc, 1 dec) 6 times (24). Begin stuffing.
- Rnd 17: (2 sc, 1 dec) 6 times (18)
- Rnd 18: (1 sc, 1 dec) 6 times (12). Add firm stuffing, fasten off, and close the opening by threading the tail through the front loops of the final round and pulling tight.
Oval body and back paws
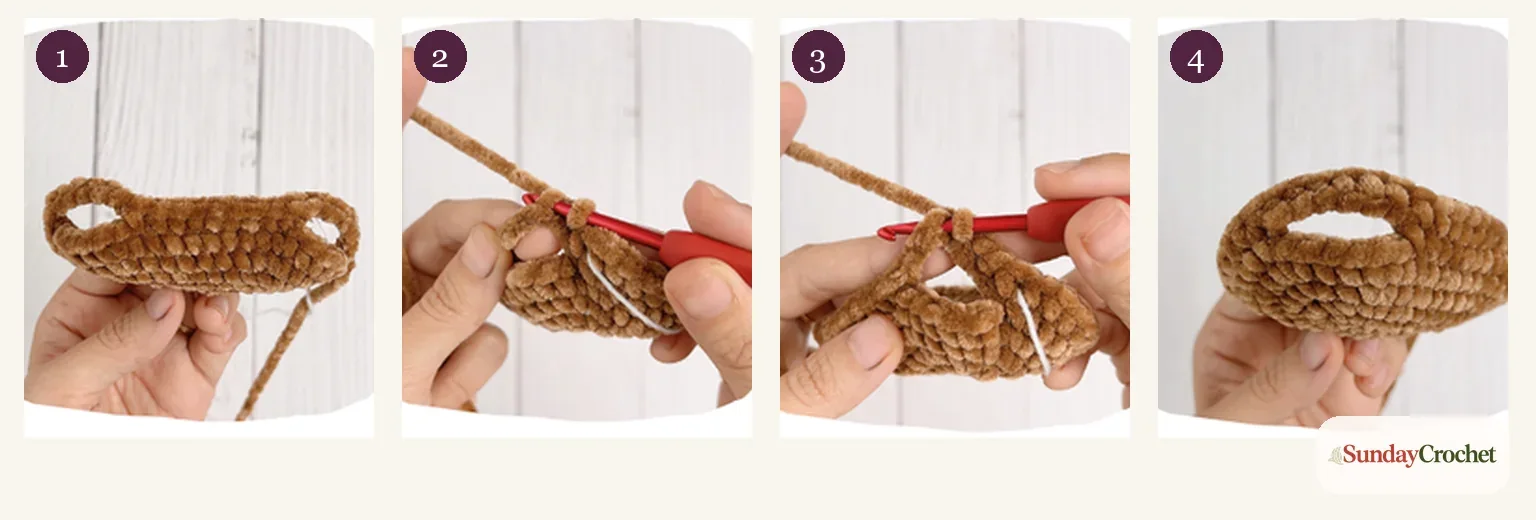
With medium brown, ch 9. The first round works around both sides of the starting chain to form an oval. Later, chain spaces create the openings for the two back paws. Keep the oval flat as you work those increases, and check that the openings sit opposite one another.
- Rnd 1: Starting in the second ch from hook, inc, 6 sc, 4 sc in the last chain; work along the other side of the chain, 6 sc, inc (20)
- Rnd 2: 2 inc, 6 sc, 4 inc, 6 sc, 2 inc (28)
- Rnd 3: (1 sc, 1 inc) twice, 6 sc, (1 sc, 1 inc) 4 times, 6 sc, (1 sc, 1 inc) twice (36)
- Rnd 4: (2 sc, 1 inc) twice, 6 sc, (2 sc, 1 inc) 4 times, 6 sc, (2 sc, 1 inc) twice (44)
- Rnd 5: 1 sc, ch 6, skip 6 sts, 9 sc, ch 6, skip 6 sts, 22 sc (44)
- Rnds 6–7: DB 23 sc, B 21 sc each round (44 each)
- Rnd 8: DB 24 sc; B (2 sc, 1 inc, 2 sc) 4 times (48)
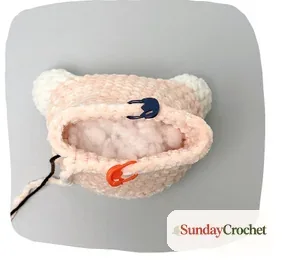
Make the two back paws into the openings from round 5. Join DB to the stitches just before the first chain opening, ch 1, and work 14 sc around that opening for 3 rounds (14 each round). On the next round, work 7 dec (7). Fasten off and close the small opening through the remaining front loops. Repeat for the other opening.
Continue the body after both back paws are complete:
- Rnd 9: DB 1 sc, (1 dec, 2 sc) twice, 7 sc, (1 dec, 2 sc) twice; B 24 sc (44)
- Rnd 10: DB 1 sc, 2 dec, 9 sc, 2 dec, 2 sc; B 24 sc (40)
- Rnd 11: DB 16 sc; B (2 sc, 1 dec, 2 sc) 4 times (36)
- Rnd 12: DB 16 sc, B 20 sc (36)
- Rnd 13: DB 16 sc; B 2 sc, (1 dec, 3 sc) 3 times, 1 dec, 1 sc (32)
- Rnd 14: DB 16 sc, B 16 sc (32)
- Rnd 15: DB 17 sc, B 15 sc (32)
- Rnd 16: DB 18 sc, B 13 sc, DB 1 sc (32)
- Rnd 17: DB 20 sc, B 10 sc, DB 2 sc (32)
- Rnd 18: DB 22 sc, B 7 sc, DB 3 sc (32); cut B
- Rnds 19–22: 32 sc in DB each round (32 each)
Front paws
At round 22, divide the remaining body stitches into two groups of 15, leaving one center stitch between the paws and one at the back. Skip 10 stitches from the start of round 22 and place a marker; skip the next 15 and place the second marker. Each marked group becomes one front paw. Work one paw at a time in DB, using the body stitches in that group.
- Paw Rnds 23–25: 15 sc each round (15 each)
- Paw Rnd 26: (1 sc, 1 dec) 5 times (10)
Fasten off and close through the front loops. Join a new DB strand at the other marker, ch 1, and repeat rounds 23–26 for the second paw. The instructions advise not to overstuff these small paws.
Striped tail
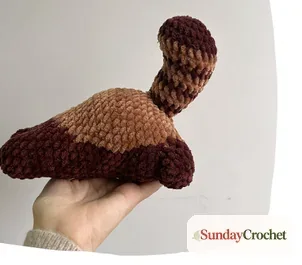
Begin in DB. Change between DB and B as indicated, completing the last stitch of each color section with the next shade. Stuff the tail firmly before its final decreases, then leave a long tail for sewing.
- Rnd 1: 6 sc in MR (6)
- Rnd 2: 6 inc (12)
- Rnd 3: (1 sc, 1 inc) 6 times (18)
- Rnd 4: (2 sc, 1 inc) 6 times (24)
- Rnd 5: 24 sc (24)
- Rnd 6: B 24 sc (24)
- Rnd 7: B 4 dec, 16 sc (20)
- Rnd 8: DB 2 dec, 16 sc (18)
- Rnds 9–10: B 18 sc each round (18 each)
- Rnd 11: DB 8 sc, 1 dec, 2 sc, 1 dec, 4 sc (16)
- Rnd 12: B 16 sc (16)
- Rnd 13: B 8 sc, 2 dec, 4 sc (14)
- Rnd 14: DB 14 sc (14). Stuff firmly.
- Rnd 15: B (5 sc, 1 dec) twice (12). Fasten off, leaving a long sewing tail.
Assembly and finishing
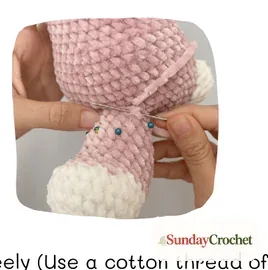
First sew the head to the body. Pin the pieces together and check the angle from the front and side before stitching. The pattern leaves the exact posture to your preference, so use the pins to find a stable alignment, then sew around the neck with the head’s remaining tail or a matching yarn length. Hide the knot and weave the end inside.
Sew the ears to the top of the head between rounds 10 and 12, with about seven stitches between them. Attach the tail to the back of the body around rounds 3–5. Adjust its curve as you pin it so the stripes remain visible from the front or side.
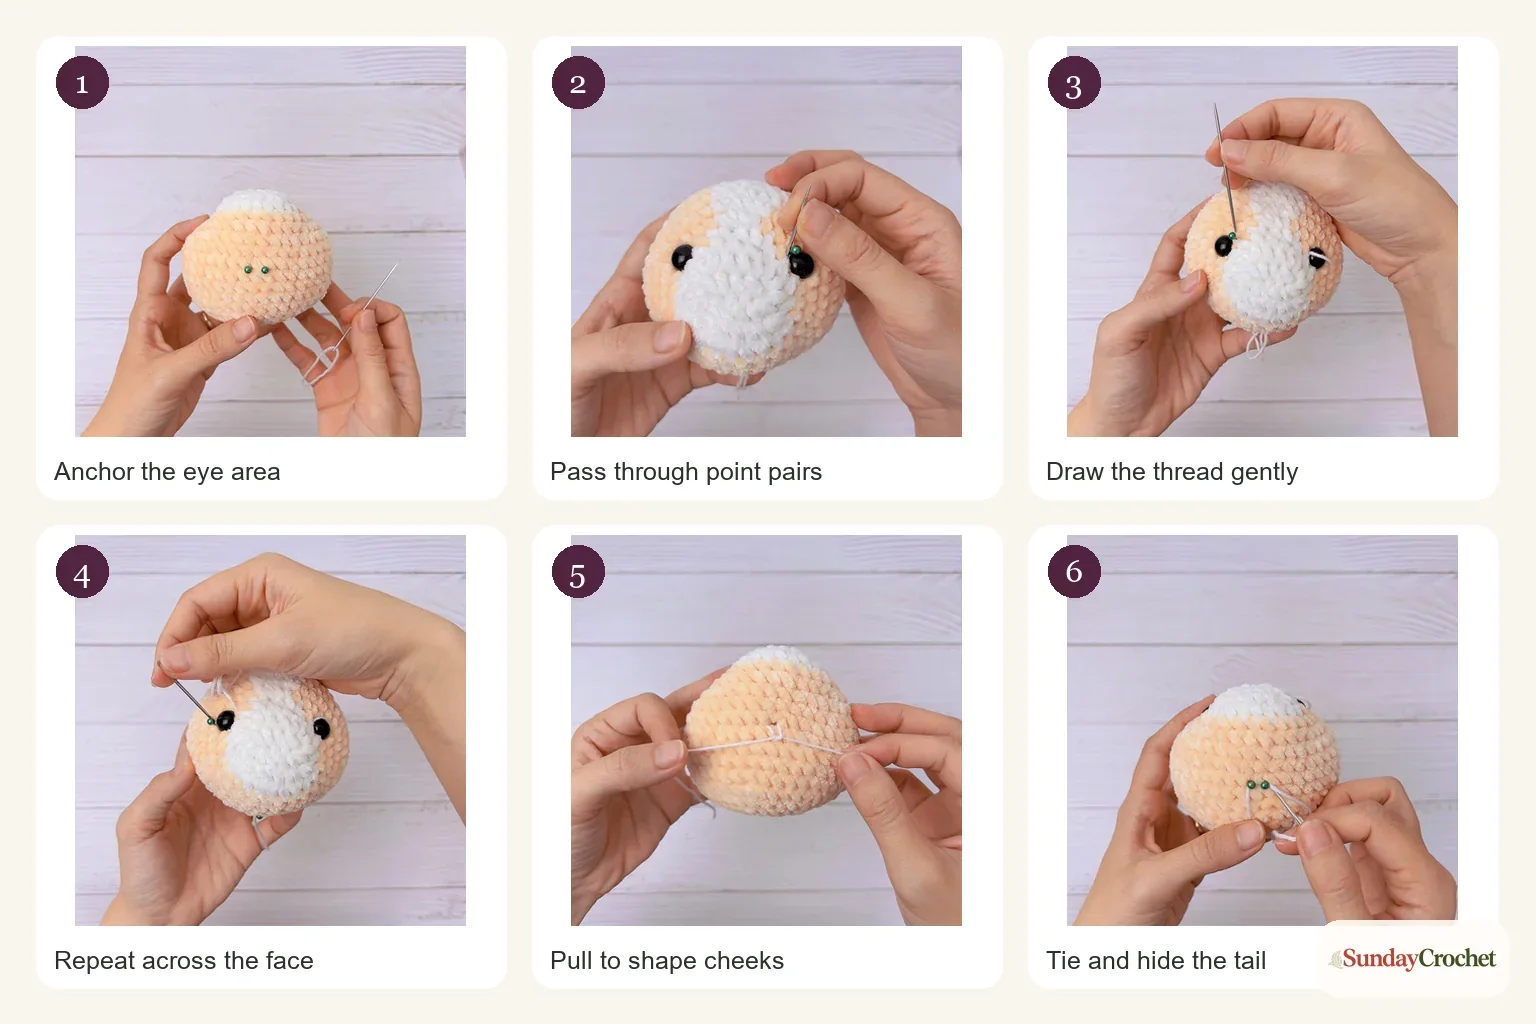
Embroider a small nose with dark-brown cotton or semicotton yarn over rounds 1–2 of the head, about two stitches wide. To shape the face, pass the yarn needle through points 1–2, then 3–4, and bring it through points 1–5 and 6–4 as shown in the image sequence. Pull the thread gently until the cheeks and muzzle take shape, tie a secure knot, and hide the yarn inside the head. Avoid pulling so tightly that the safety eyes disappear into the fabric.
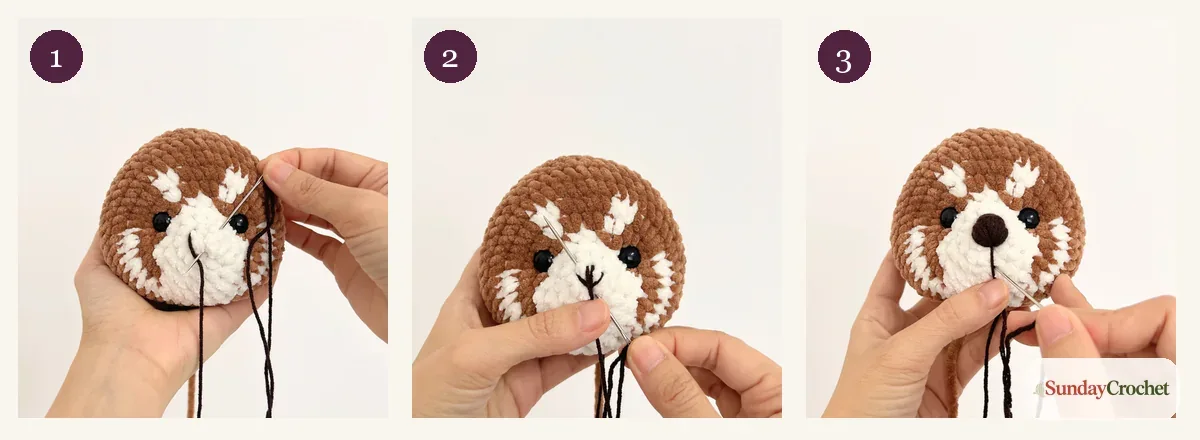
Before weaving in the last ends, feel around the head and body for soft spots and add stuffing where needed. The fabric should feel evenly filled while the stitches remain closed. Close any remaining small opening by passing the yarn tail through the front loops of the final round and drawing them together. Weave each end through the inside of the plush, then trim the excess.


